Backyard Decor Solution

Spring Cleaning can be both cathartic and frustrating. As you spend these next few weekends planning for your outdoor life, don’t get worked up about how you’re going to make your backyard look just right.  If you’ve considered refreshing your exterior decor, you’ve likely realized you’ll spend well into the thousands to do so. But don’t panic, I’ve got a solution for you. In an effort to find the right pieces for my own patio, I have searched high and low to find the right products for reasonable prices. Here’s my selection of eclectic & bohemian, yet classic backyard decor. Clickable links to each product below. Happy Spring!

Meredith McBride Kipp Backyard Decor Savvy Selects

1. Scalamandre Melamine Salad Plates
Set of four $24.50, FRONTGATE

2. Pagoda Umbrella in Maui
$199.95, Pier 1 imports

3. citronella grey candle
$19.95, CB2

4. Capella Island Deluxe Armchair
$379.95, Pier 1 imports

5. OUTDOOR IDRISS PRINT LUMBAR PILLOW
$59.50, Pottery Barn

6. chunky white block planter
$39.95, CB2

7. Classic Beach Fold Chair
$229.00, Navy/Sand, Ballard Designs

8. OUTDOOR LARACHE PRINT PILLOW
$49.50, Pottery Barn

9. Ceylon Whitewash Chaise
$549, Ballard Designs

10. Quinn Garden Stool
$119.95, Pier 1 imports

11. Farmhouse Hammock Cushion
$399, Canopy Stripe Taupe/Sand Sunbrella, Ballard Designs

12. dockside II dining table
$449.00, CB2

Paddling Out to Rockaway

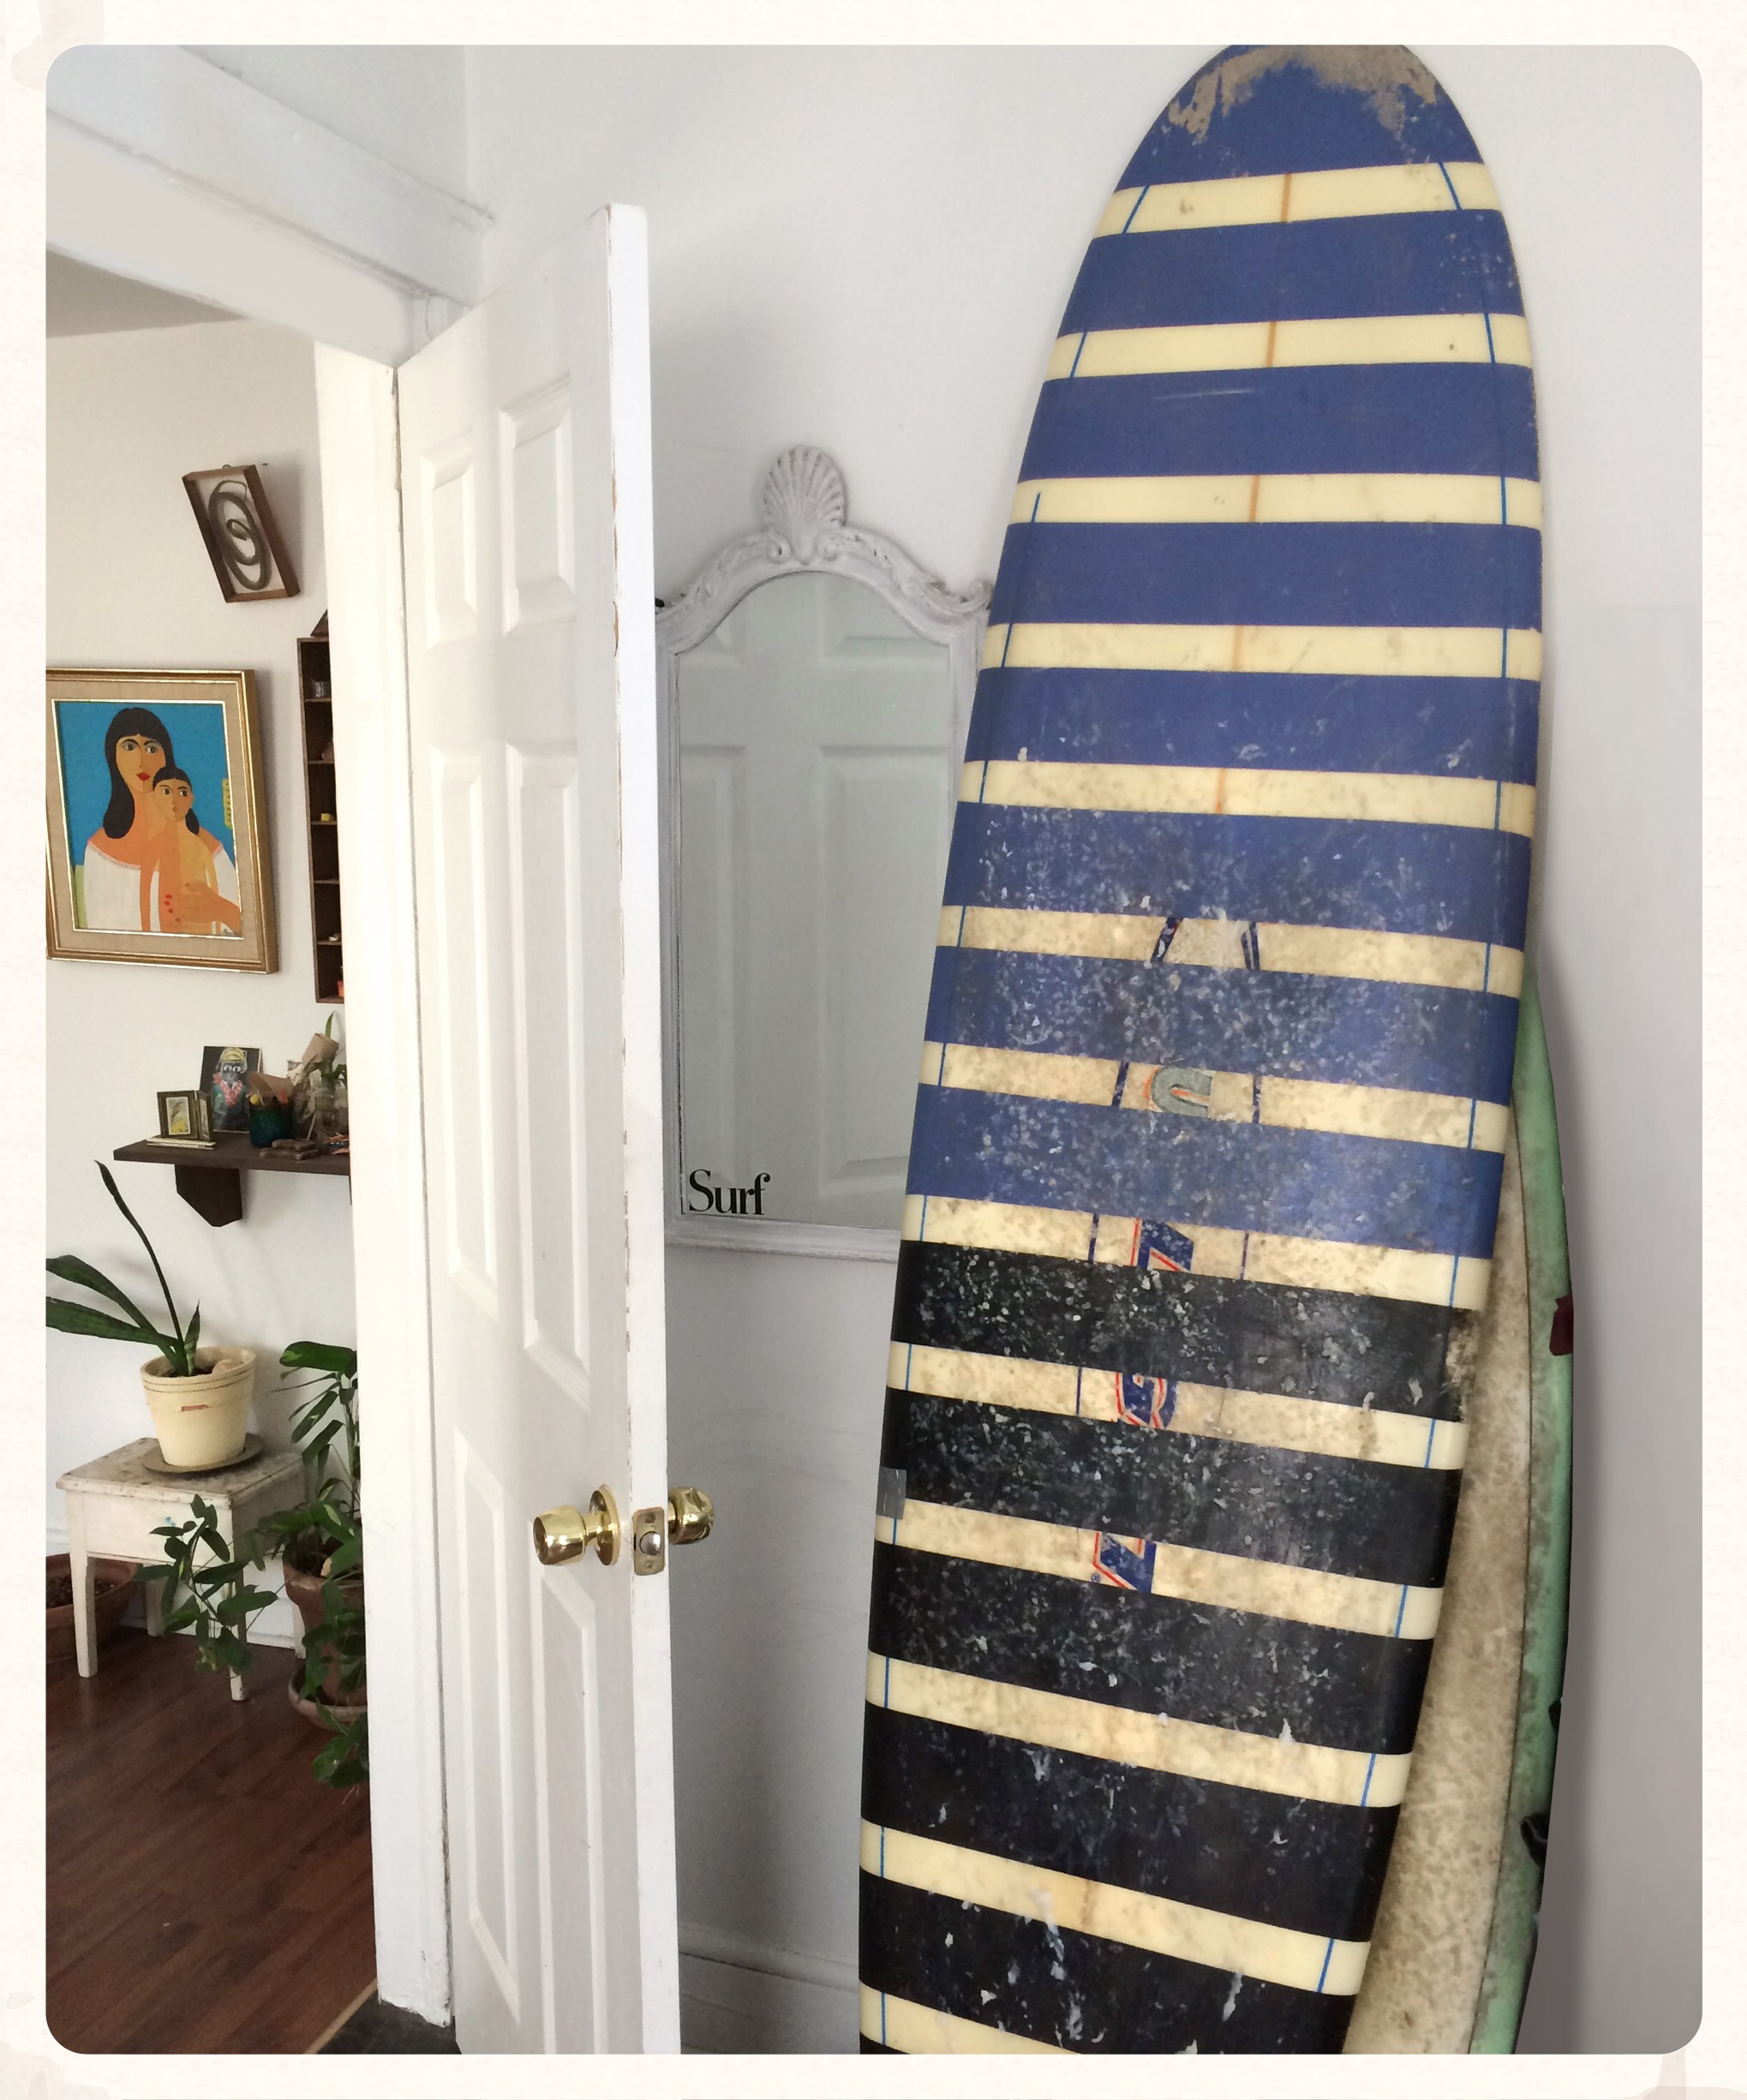
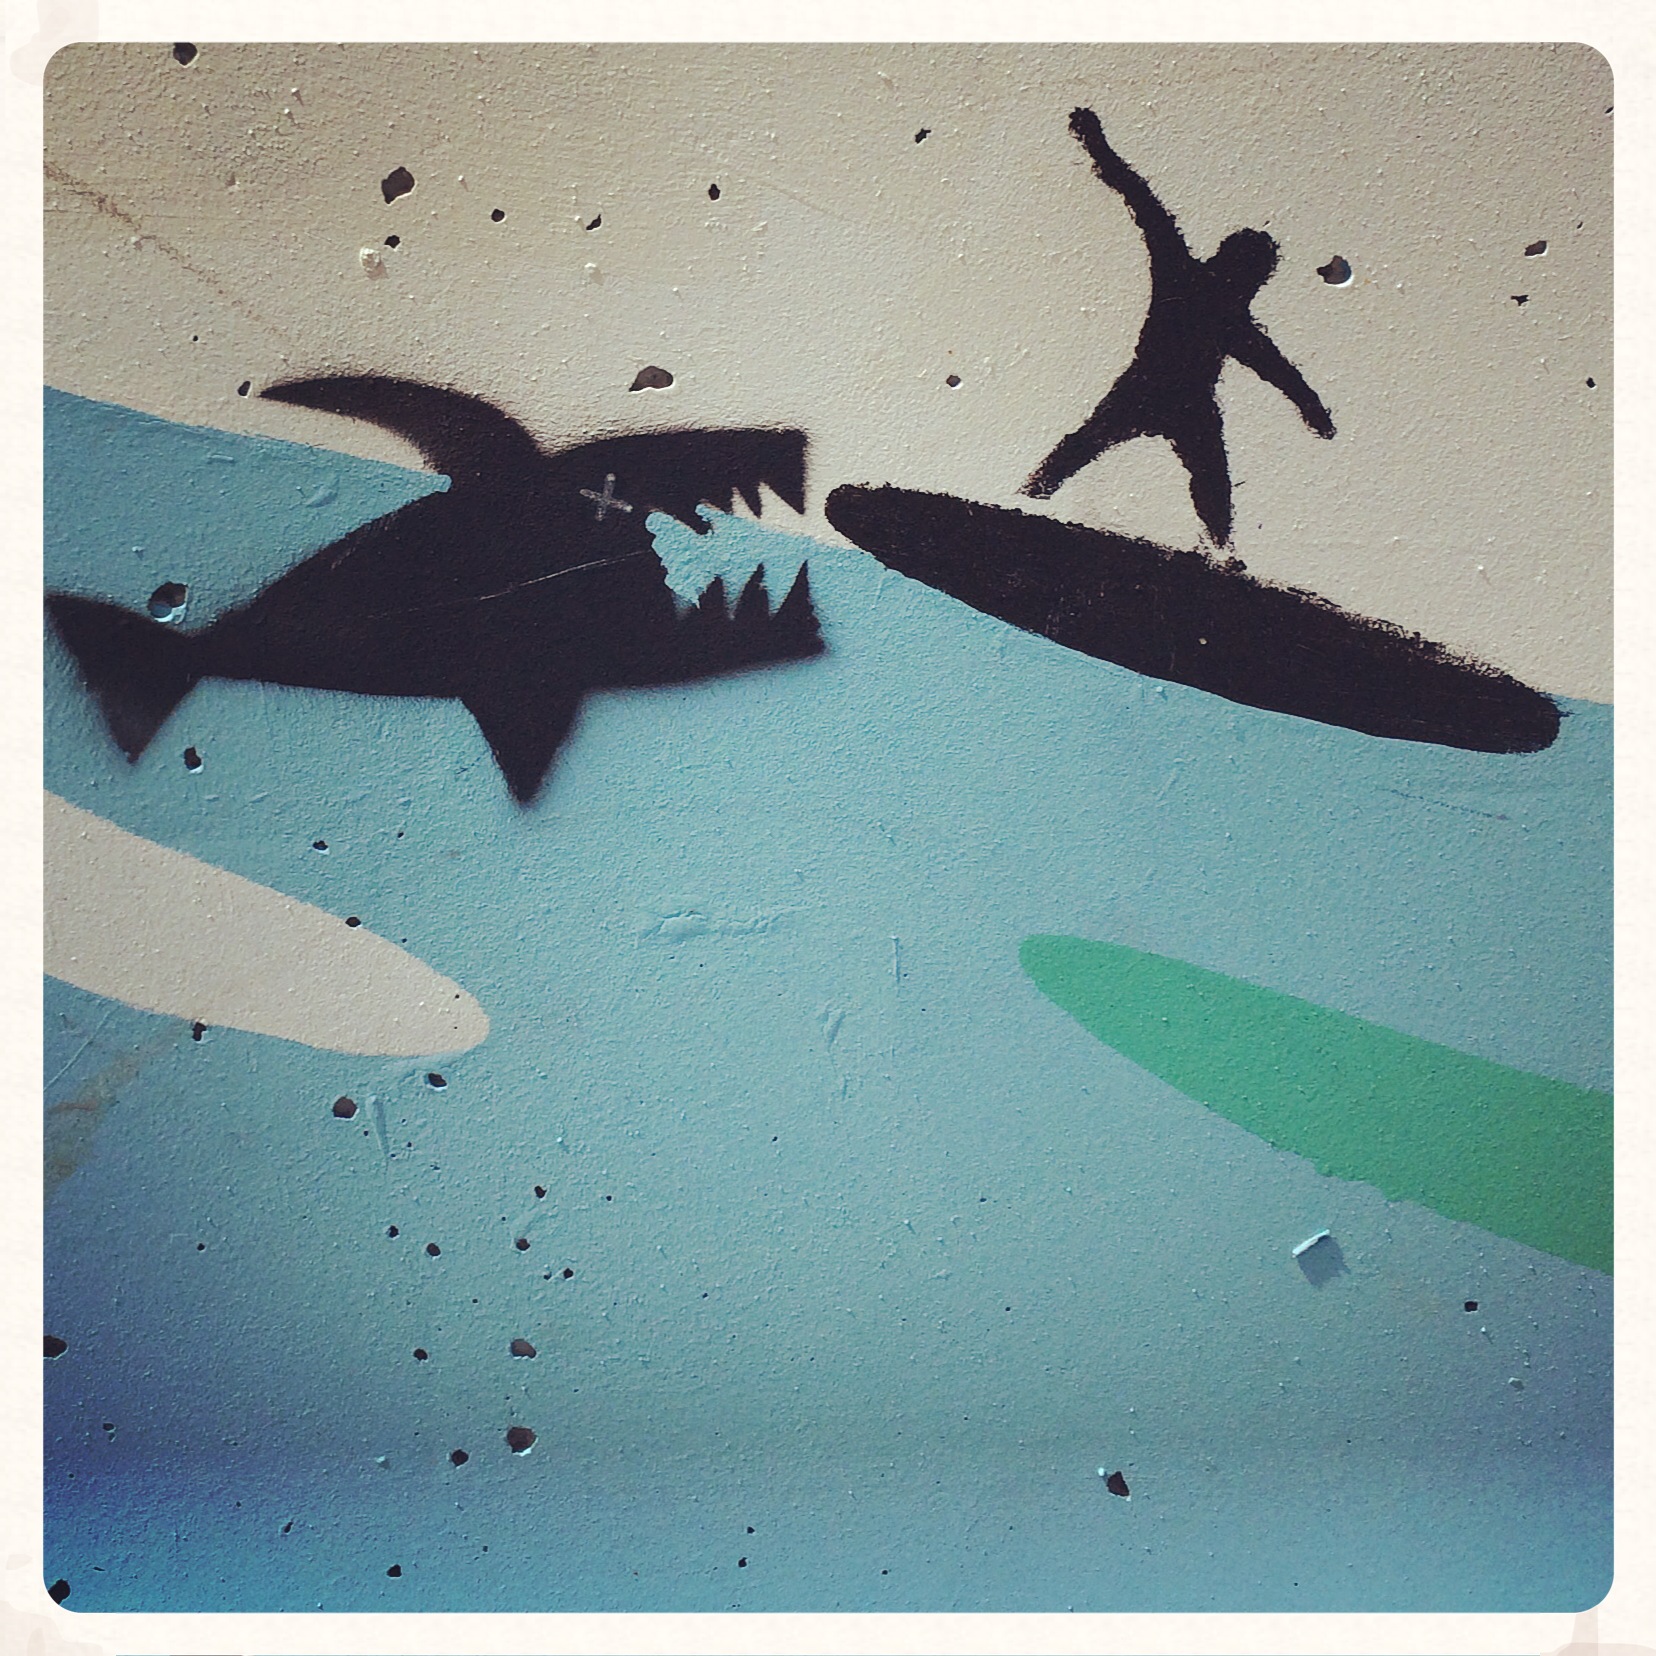
I went out to Rockaway Beach last weekend—an area that was devastated by hurricane Sandy of 2012—to hang with surf blogger (NYCurchin.com), sustainable fashion marketer (at Rogan and Loomstate), philanthropist, and sister, Annie McBride.

Annie has been surfing for several years and was accustomed to taking mass transit—surfboard in tow—to the Queens coastline from Williamsburg when Sandy hit town. Due to her appreciation for the beaches and her general philanthropic nature, Annie spent months helping with the recovery effort in Rockaway and quickly fell in love with the culture there. Now a Rockaway resident, this NYC Urchin is in her element.

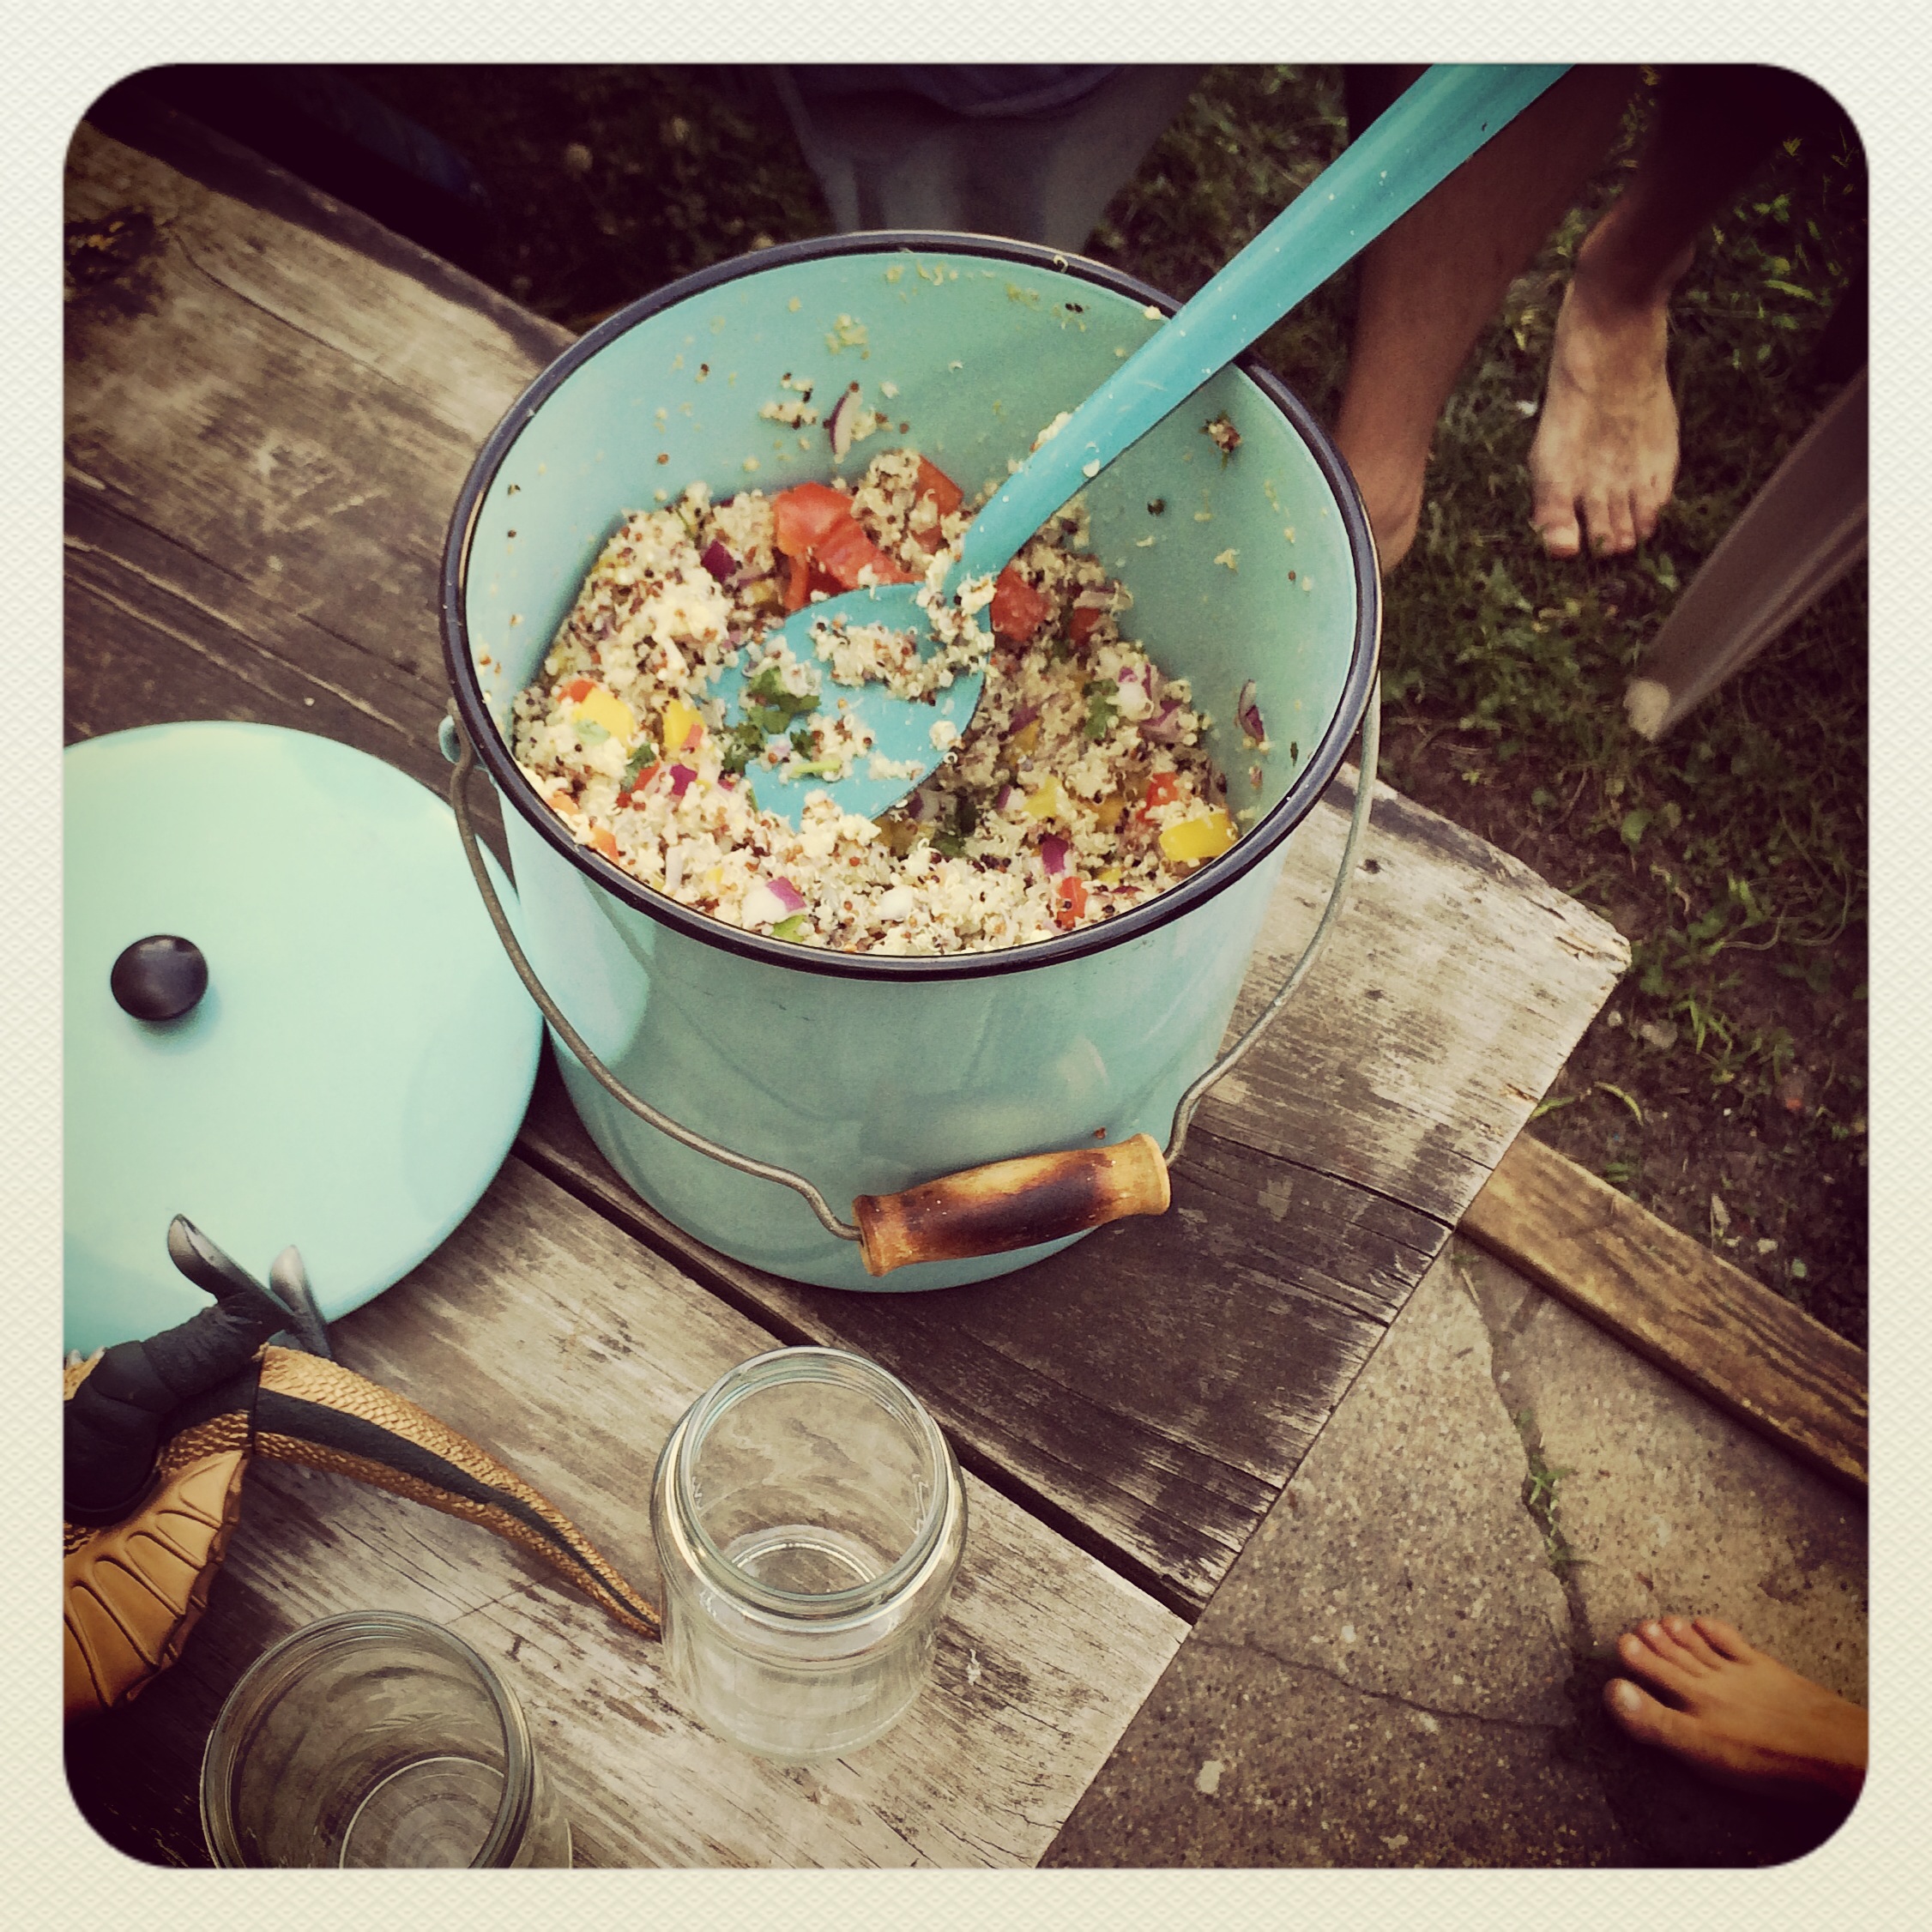
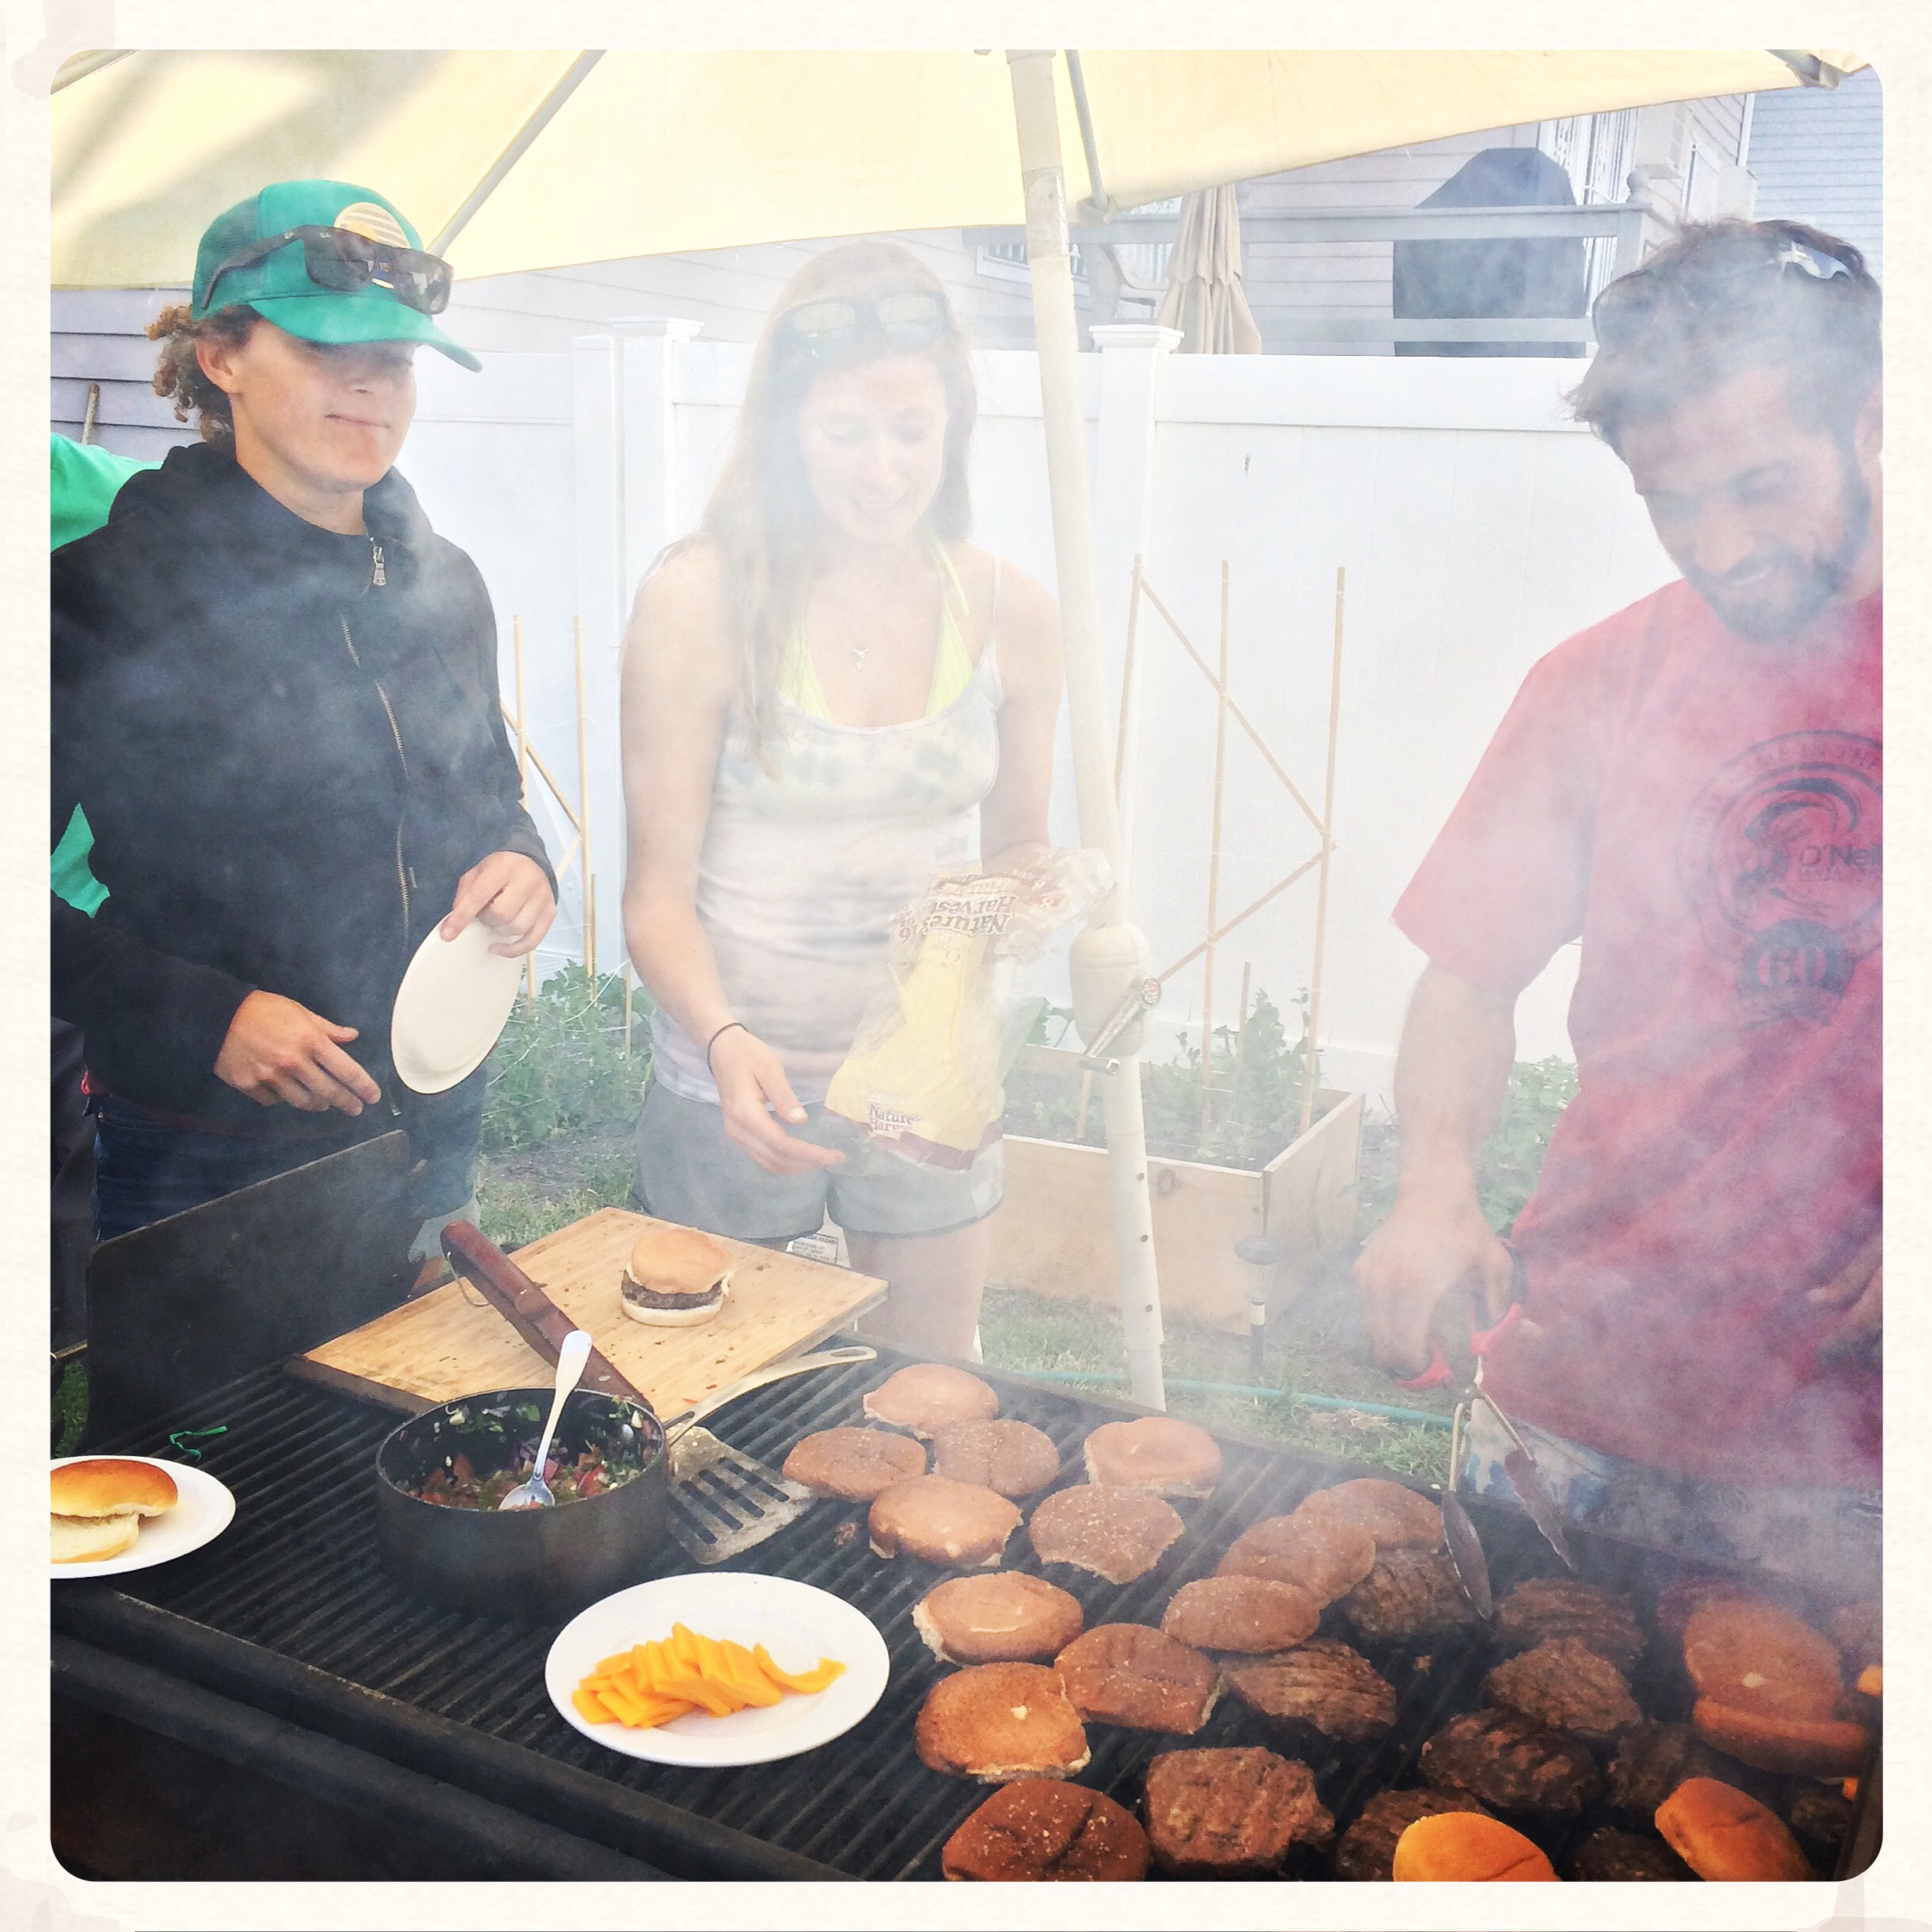
After a morning of surf and sun, Annie hosted an intimate barbecue with friends and neighbors. I was not nearly bohemian enough for the crowd, but anyone can connect over good summer food. Below are the recipes she embellished for the best Veggie Burgers I have ever had (I am a proud carnivore) and a totally delicious Quinoa Salad.

Pass the poi, mahalo!

Quinoa Summer Salad
(modified from allrecipes.com)

Ingredients
4 cups water
1 cup white quinoa
1 cup red quinoa
1 1/2 large red onions, chopped
1 red bell pepper, chopped
1 yellow bell pepper, chopped
1 teaspoon sea salt
12 grinds black pepper from a grinder
1/4 cup olive oil
2 limes, juiced
2 tablespoons chopped fresh cilantro

Directions
Bring water to a boil in a pot; add white quinoa and red quinoa. Reduce heat, cover, and simmer until water is absorbed, 15 minutes. Set quinoa aside to cool while you complete the remaining steps.
Combine red onions, red bell pepper, yellow bell pepper, sea salt, and black pepper together in a bowl. Stir in white and red quinoa.
Whisk olive oil and lime juice together in a separate bowl; pour over quinoa mixture. Stir to coat. Add cilantro and stir to incorporate. Cover salad and refrigerate for flavors to blend, at least 4 hours.


Lentil Quinoa Burgers
(modified from Women’s Health Magazine)

Ingredients

1/2 cup quinoa
1 can (19 oz) lentils, rinsed
1/2 cup plain bread crumbs
1 egg, lightly beaten
2 gloves garlic, chopped
2 tsp cumin powder
1/3 cup cilantro
Juice of half a lemon
1/2 cup walnut pieces
2 tsp vegetable oil
6 buns

Directions

In a saucepan, combine quinoa and 1 cup water. Bring to a boil and simmer about 10 minutes. Let quinoa cool.
In a bowl, combine half the lentils, bread crumbs, egg, garlic, cumin, cilantro, lemon juice, cooked quinoa, and salt and pepper to taste. Place in a food processor or blender; process until well combined. Add remaining lentils and walnuts; pulse until they’re incorporated. Form into 6 patties.
Preheat grill to medium. Brush burgers with oil and cook for 4 minutes per side. Toast buns for 2 minutes.


SHOULD YOU VENTURE TO ROCKAWAY THIS SUMMER,
HERE ARE A FEW PLACES NOT TO MISS:

Transportation: The NYC Beach Bus provides beer and a ride to Rockaway

Breakwater Surf Co: for board rentals

Rockaway Taco: a classic neighborhood spot for—you guessed it—tacos. Place is popular morning, noon and night.

Whit’s End: for the best pizza you’ll ever have

Playland: Super bohemian-chic motel with bar and outdoor games

Caracas: beach bar with arepas and drinks (arepas are south american corn pancakes)

Veggie Island (may have new name now): for your morning coffee and fresh pressed juices

THIS WEEKEND there is s surf, skate and music festival: Rock Stock and Barrels

And don’t forget to check out the new Moma PS1 Rockaway! show featuring solo projects by Patti Smith, Adrián Villar Rojas, and Janet Cardiff. IT OPENS TODAY, June 29- Sept 1, 2014.

Rhinestone Retro Rehab

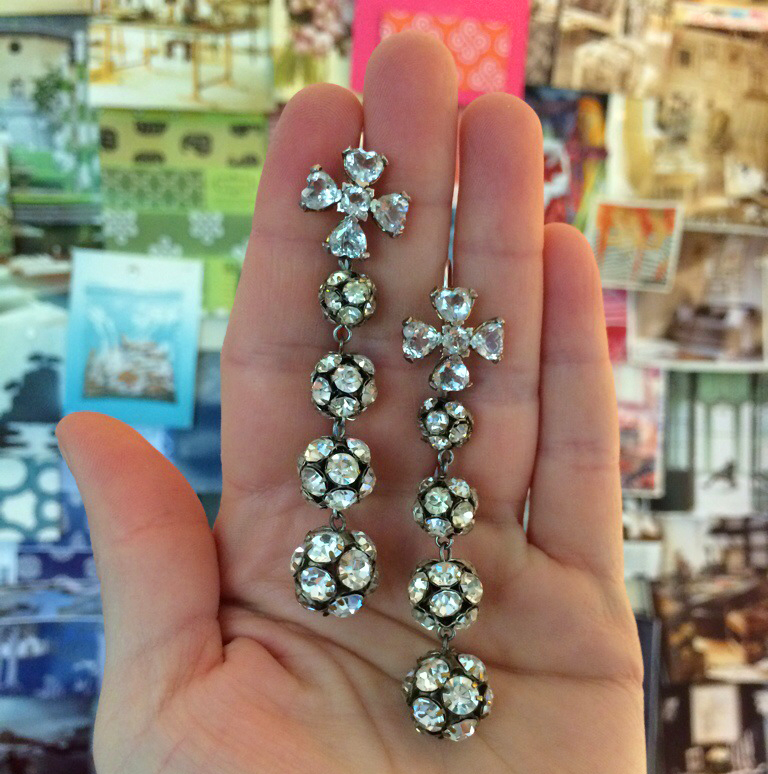
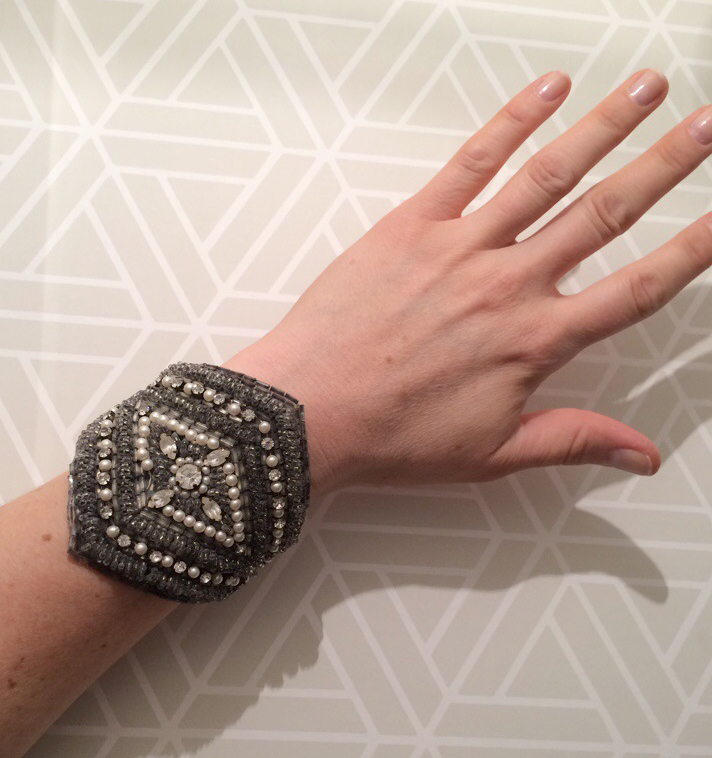
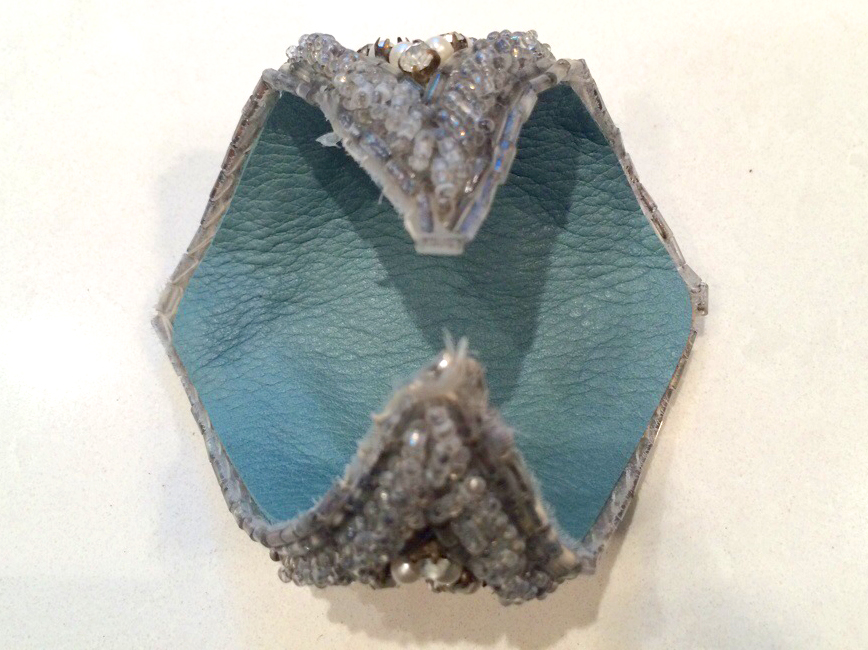
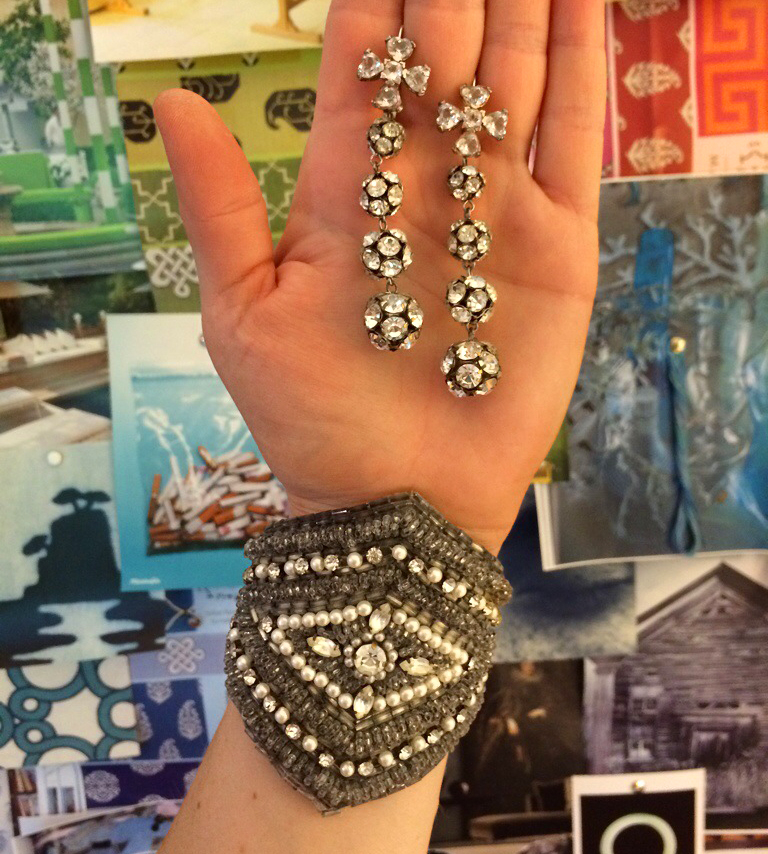
I rehabbed a few pairs of damaged vintage deco earrings today and made a cuff bracelet to match with a salvaged beaded appliqué from a beat-up vintage dress from Salvation Army.

Earrings: I removed both the clip-on backs and post backs from the 2 pairs of earrings, to start. With fine, but heavy weight fiber wire I strung the earrings together and fastened them to new, stainless steel (hypo-allergenic) earring hooks. Side story, my grandmother wore the long rhinestone-cluster ones—that look like lincoln center’s huge exterior chandeliers—to Nixon’s inaugural ball in the late 60’s. They are my absolute favorite but were both missing a bead at the top… and were clip-on.


Here’s what I did to make the bracelet:

 1. Using crazy glue I secured the beads around the edges and trimmed excess fabric and thread.
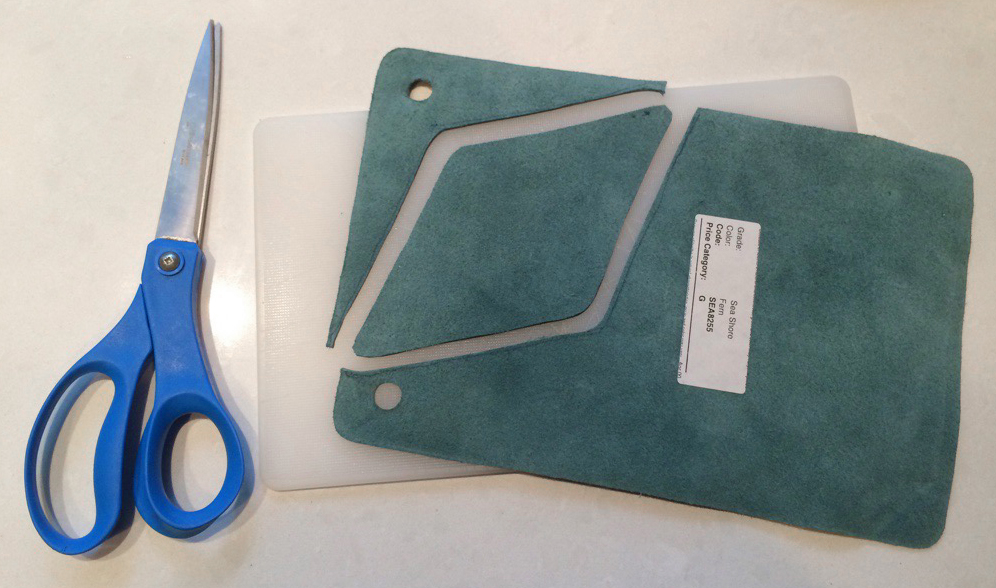
2. I traced the appliqué onto the back of a leather sample (I used turquoise for a pop of color) and cut the leather smaller by an eighth of an inch all the way around so that it would not show from the other side once bent into shape.
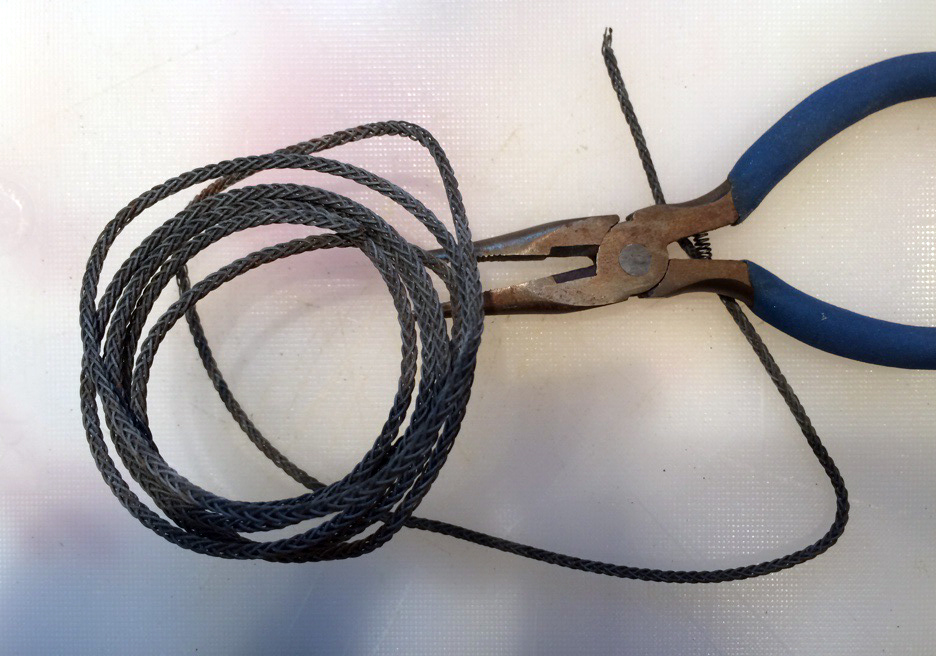
3. Using thick, heavy-duty woven art-hanging wire and a pair of wire cutters, I ran a spiral around the leather piece—with about a half-inch setback from the edges—and secured it in place with hot glue. (sorry, forgot to shoot his part!)
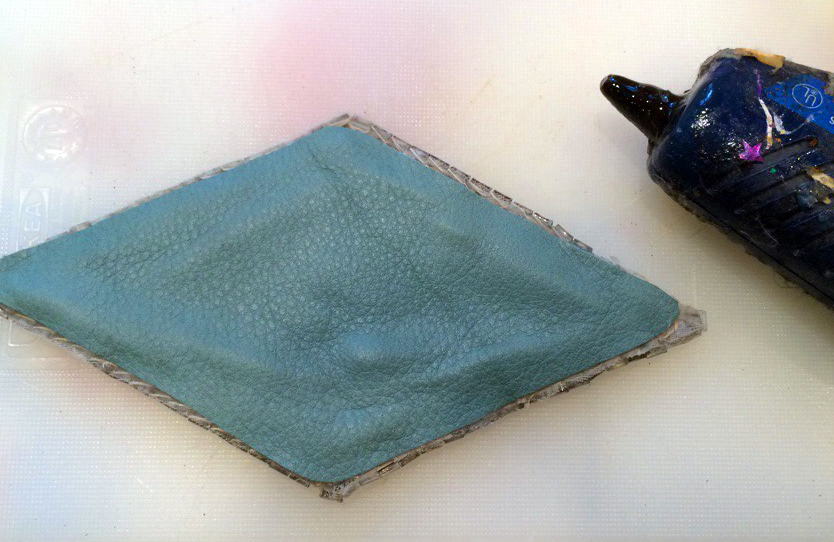
4. Once the wire was set in place on the leather, I ran a bead of hot glue around the outside edge of leather piece and several more lines along the center and then adhered it to the back of my beaded appliqué. I pressed firmly on both sides to secure them together.
5. Once glue had cooled and set completely, I bent the piece to form a cuff and fit it around my wrist an adjusted as necessary.

Swiss Miss

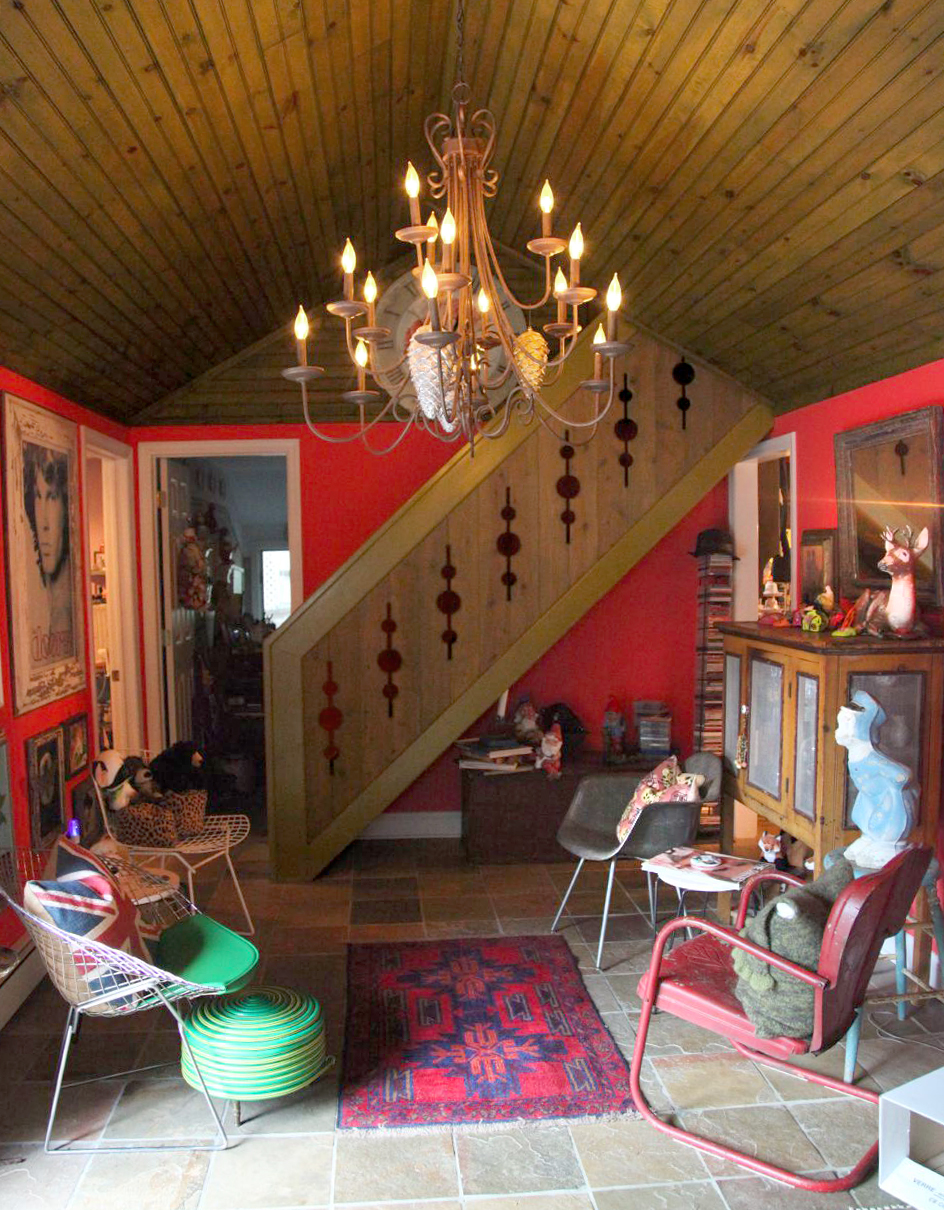
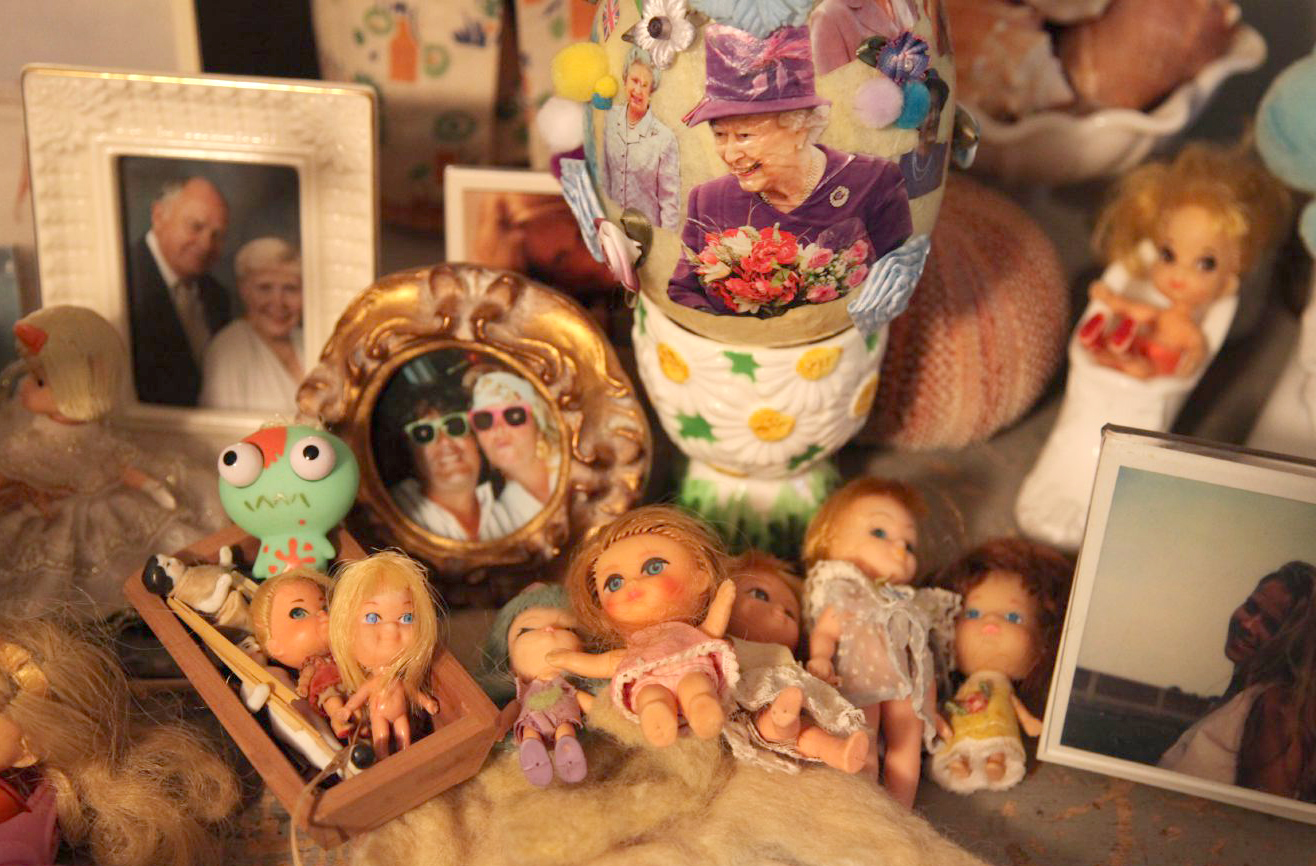
The living room with a narrow stairwell up to a small studio and DOLL ROOM!

Welcome to the home of Jorge & Katie Lengyel. You met them last Fall in my post about DIY Hypertufa Potting Containers (which would be a great project to do this weekend for your new plantings.) Jorge is an Argentinean gentleman and artist, Katie is Dutch with a passion for crafting, collecting, and anything Anglophile. Together they have built a petit chalet that is multi-cultural, very-colorful and eccentric beyond belief.

The home is situated on a shaded property that slopes towards sparkling Lake Mohawk in the beautiful and über-Swiss village of Sparta, NJ. Between Katie’s collections, Jorge’s ingenuity, and both of their vivid imaginations, they’ve built themselves a really unique and fantastical abode worthy only of fairytales and fables. I think you’ll agree that this feast for the eyes is like nothing you’ve ever seen in real life!

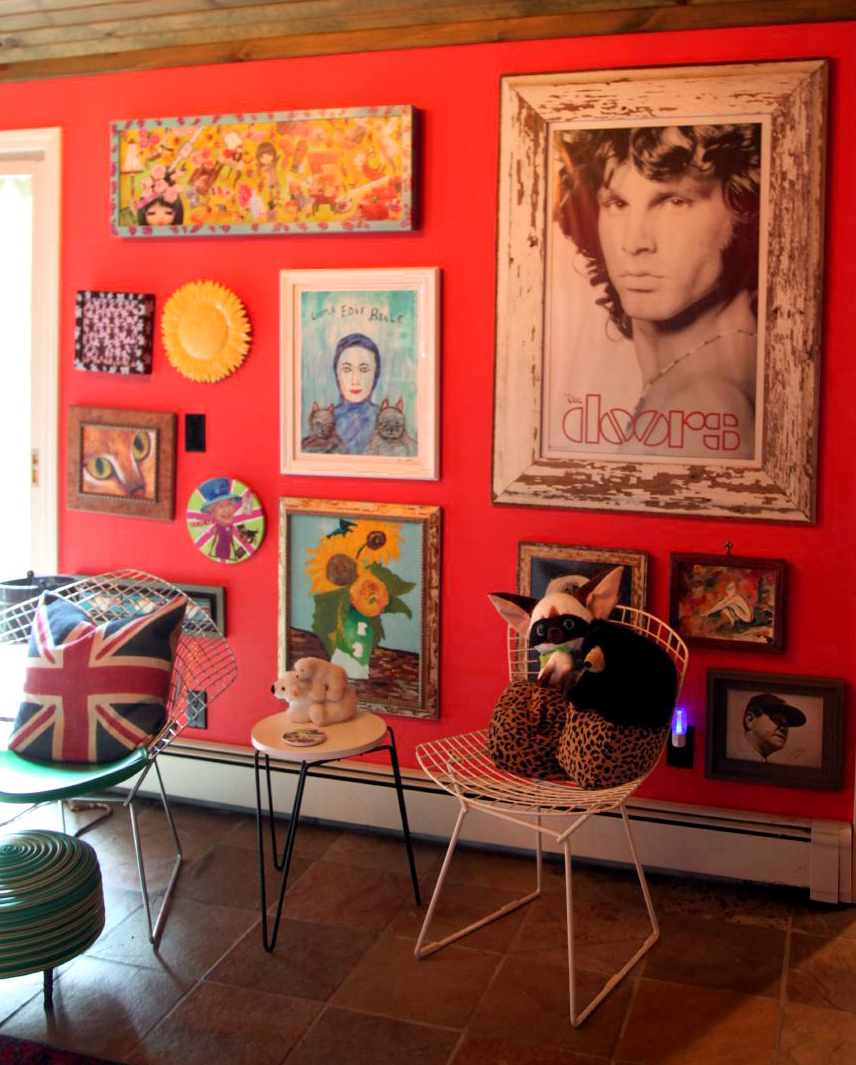
Wall of eclectic finds and projects including poster of Katie’s coveted Jim Morrison

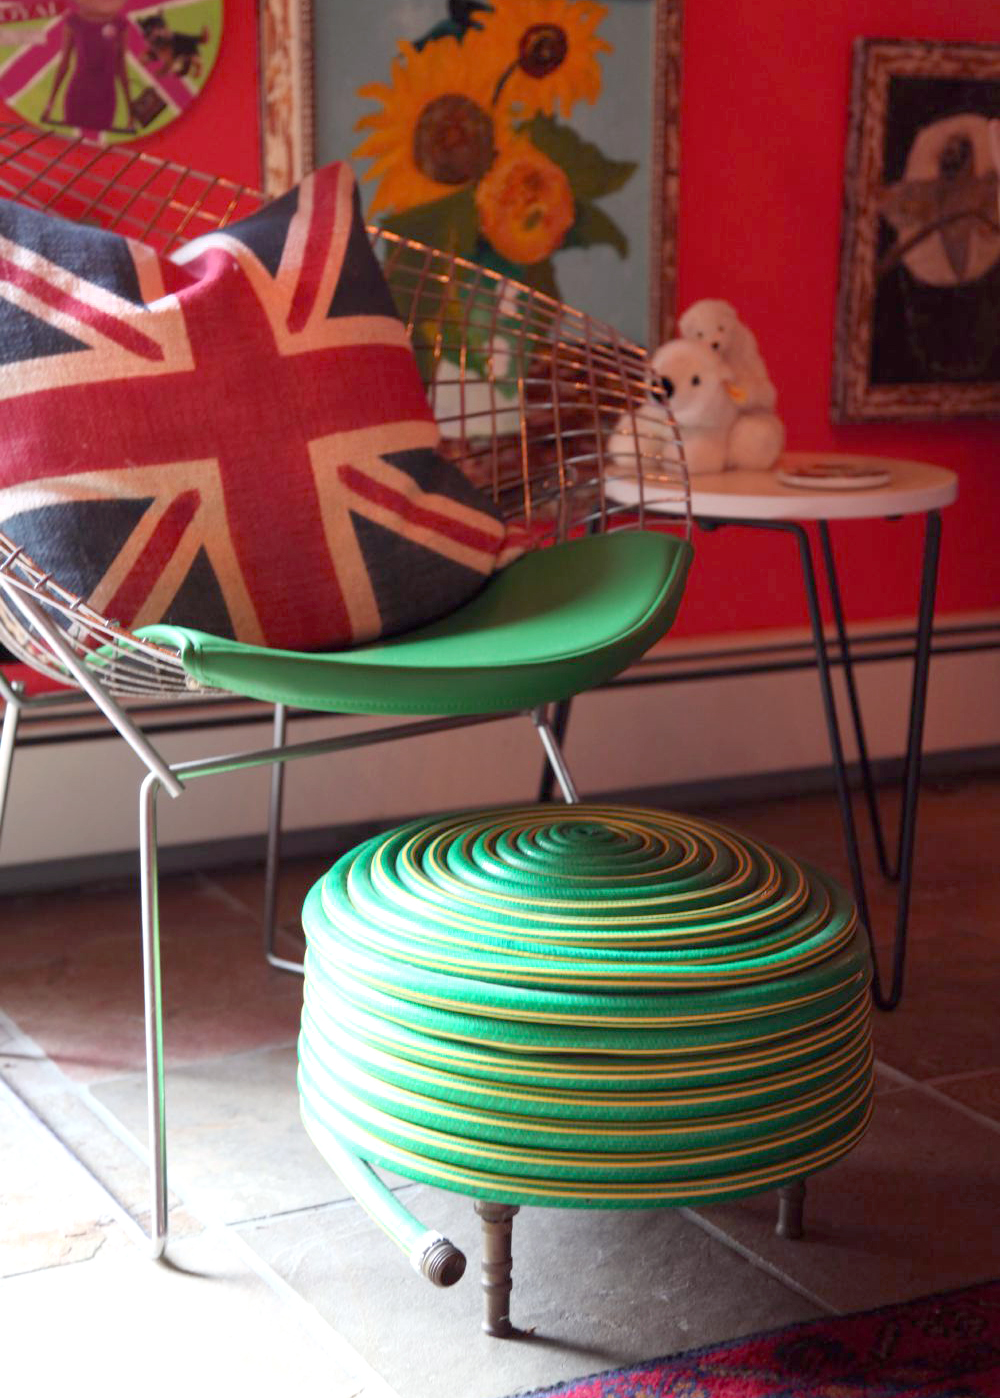
Katie made this fabulous little ottoman. She used nozzles for legs as well. Such a fun piece.

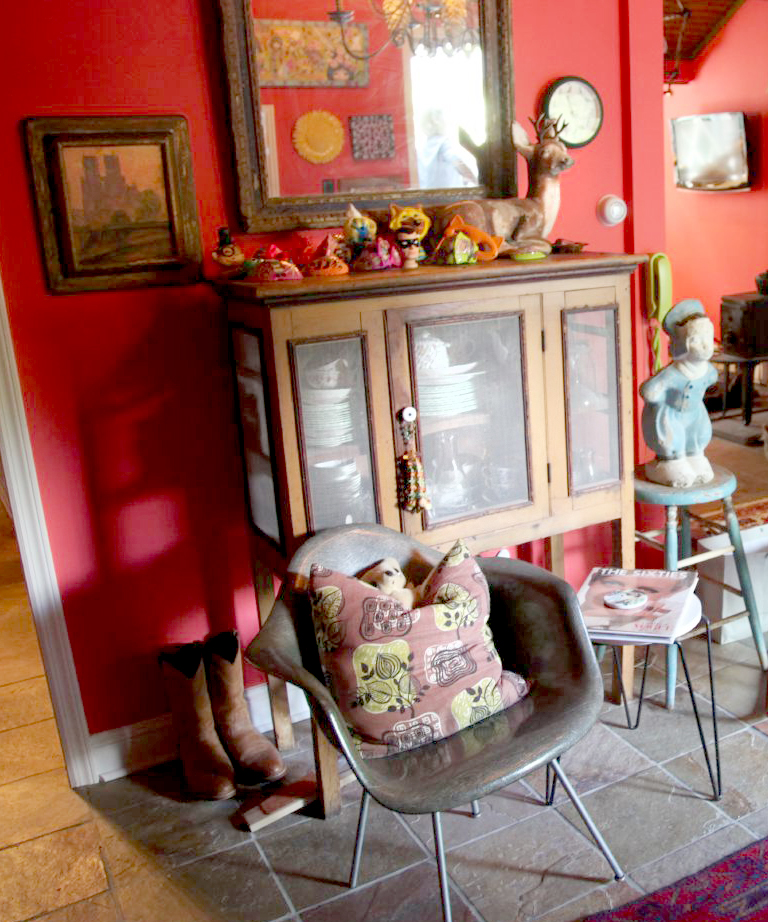
Pie chest filled with china and adorned with kitsch galore

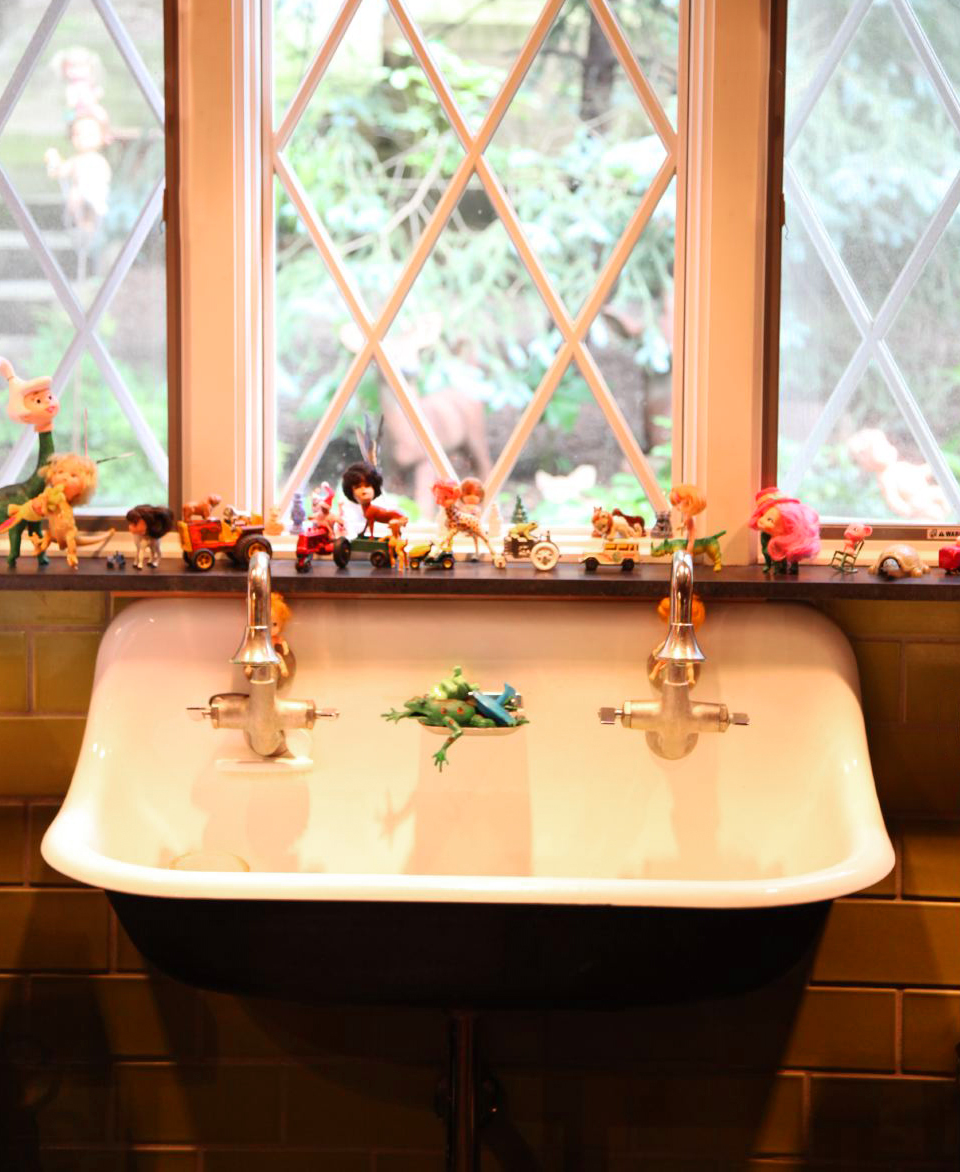
This is my favorite vignette in the house. Big porcelain basin in the kitchen with 2 faucets looks out onto their front porch and natural landscaping. The sill is covered in colorful toys, some as-is, some Katie’s hybrid sculptures.


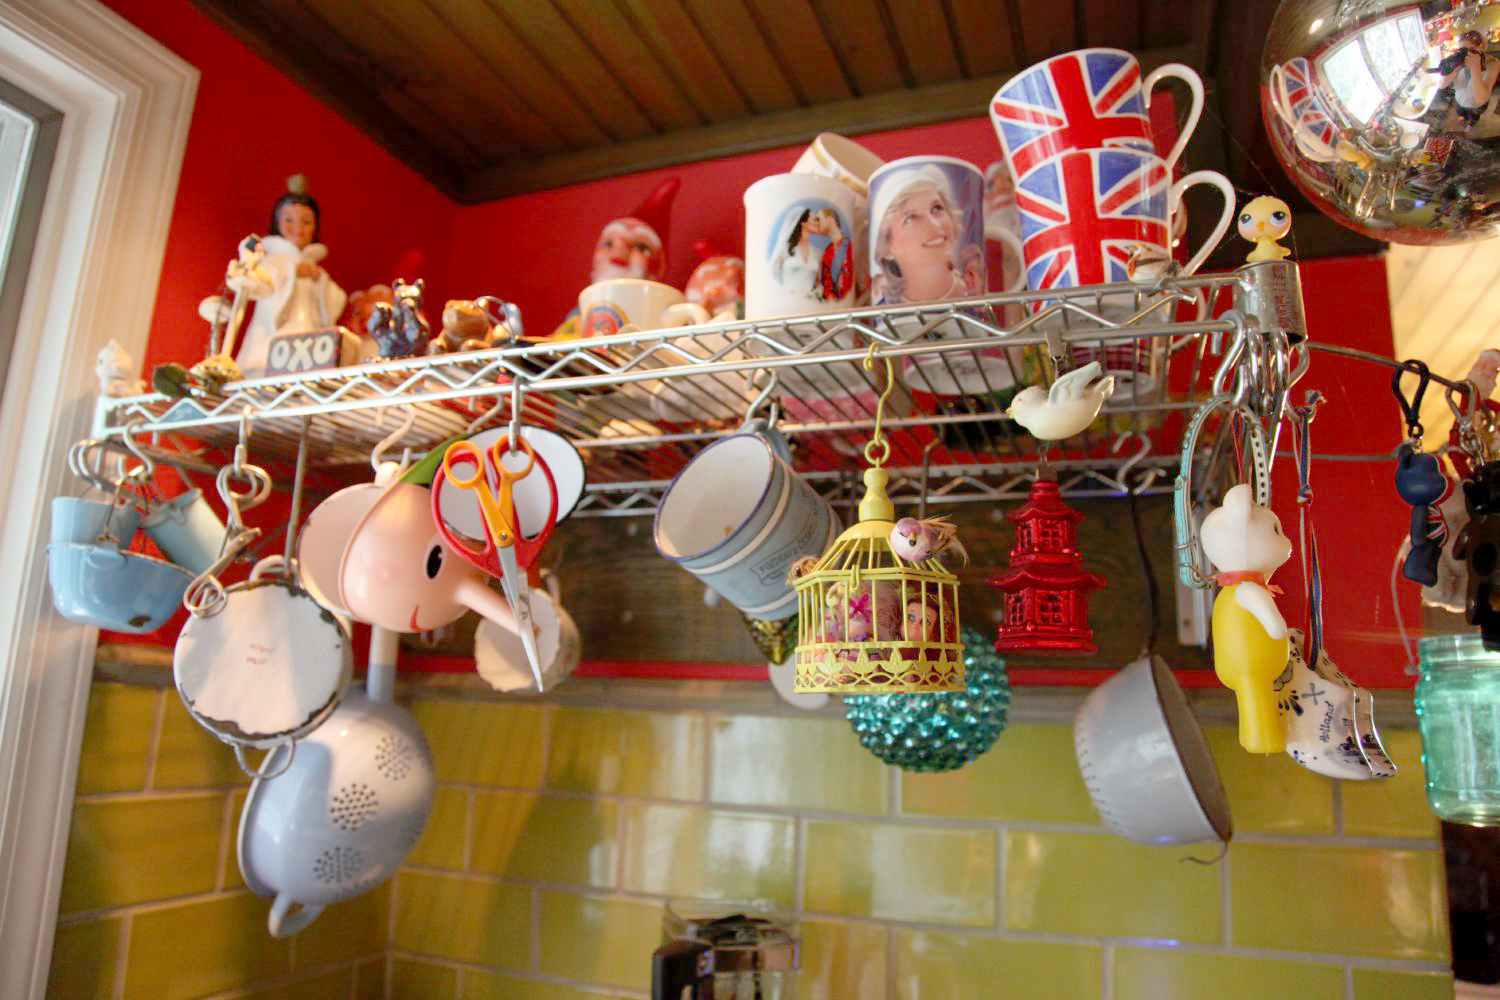
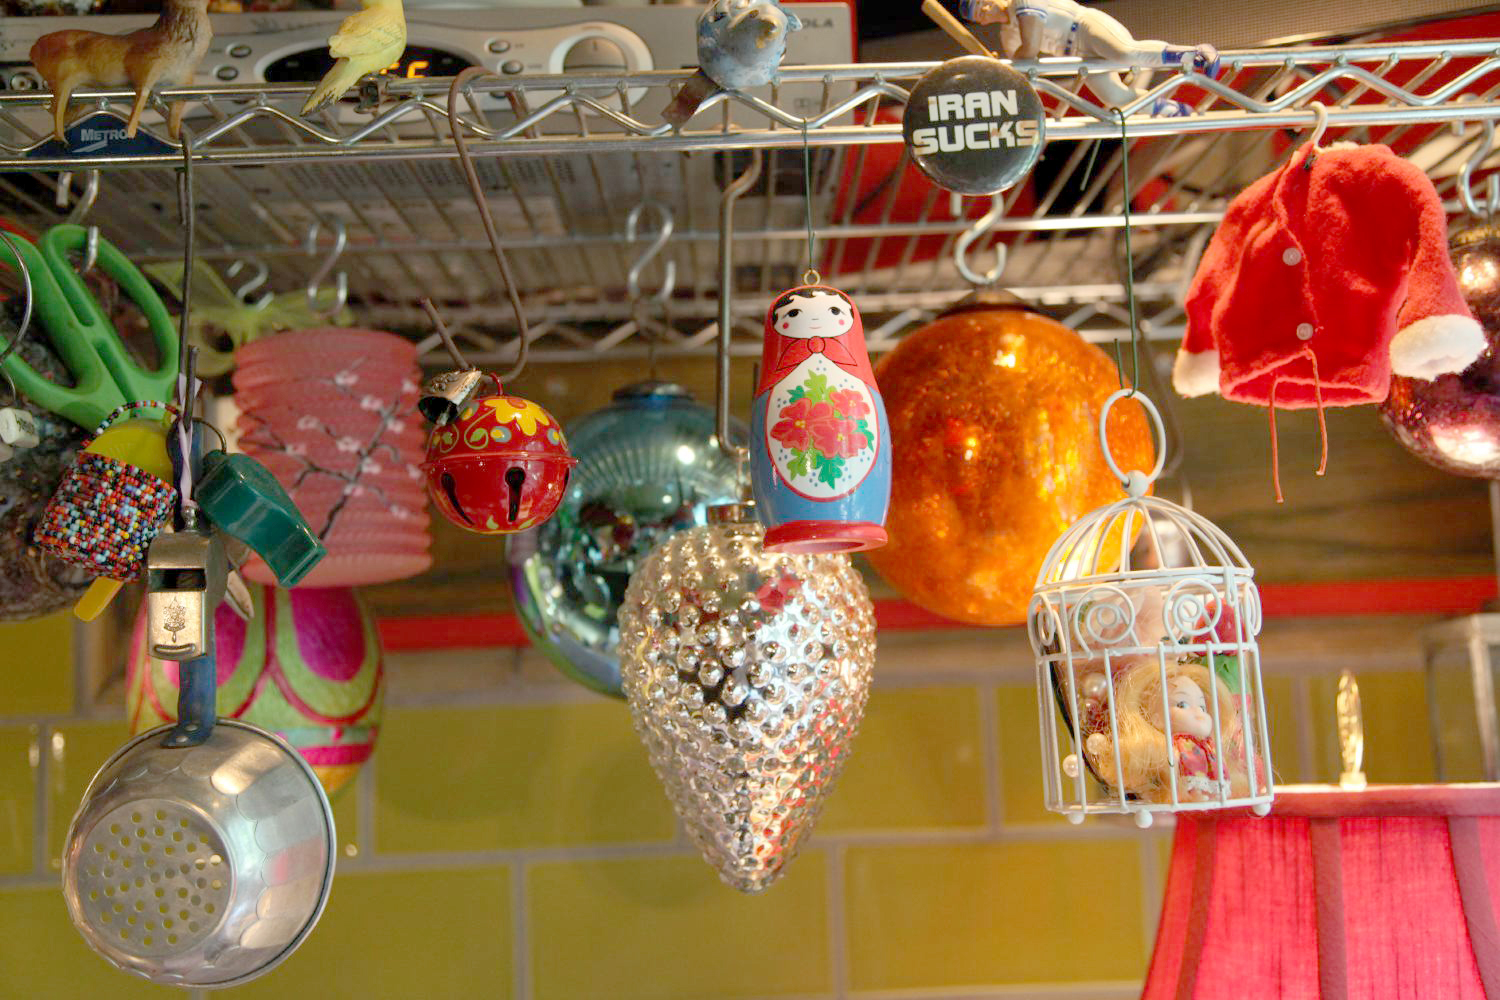
To the left and right of the sink are these great and simple industrial racks that hold their drying dishes and everyday needs… and some kitsch of course

To the left and right of the sink are these great and simple industrial racks that hold their drying dishes and everyday needs… and some kitsch of course.

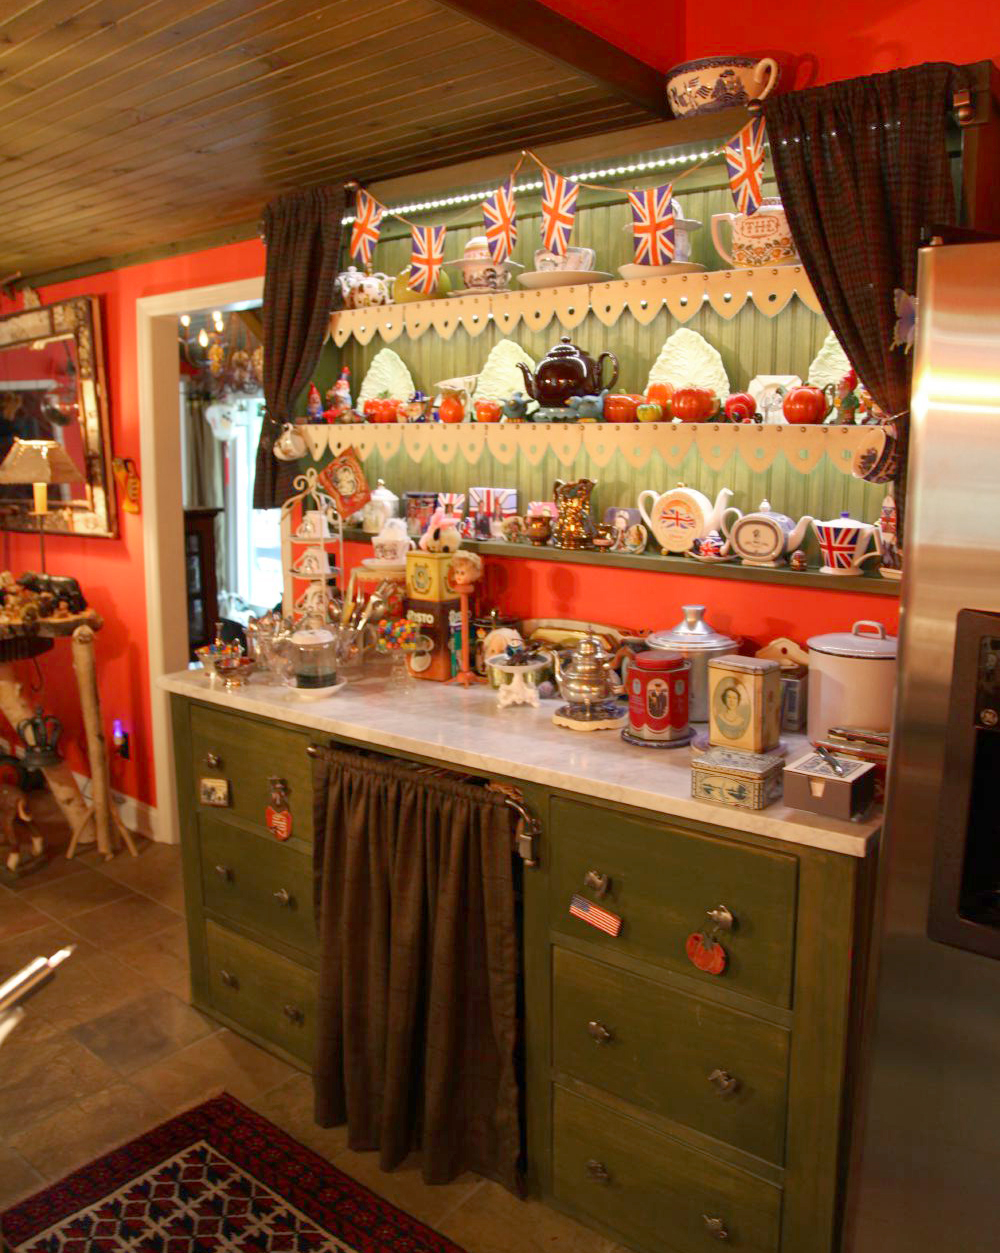
This kitchen cabinetry serves as both storage and a buffet for the dining room. Katie and Jorge cut thick felt trim for each shelf and attached it with decorative nail heads. This is one of the spots Katie displays her British wares

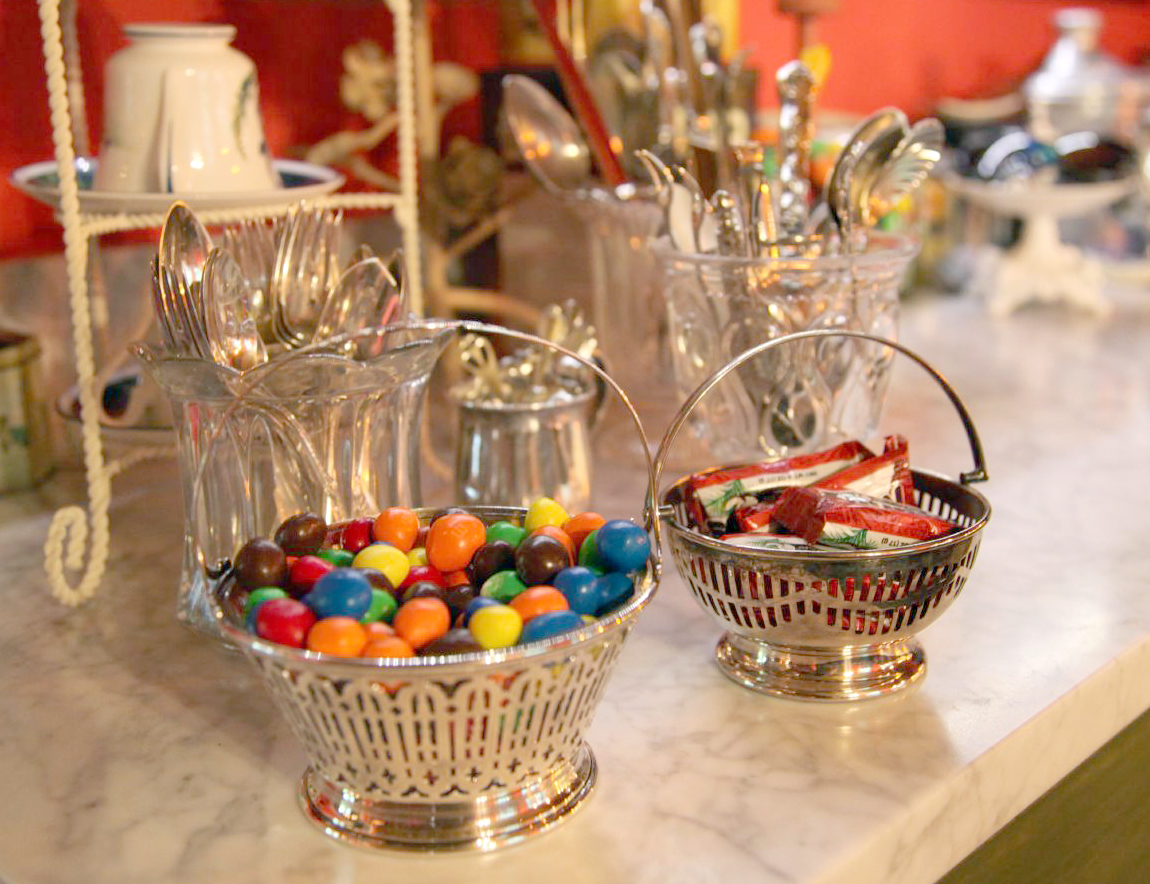
The silver is always polished and in use on the Anglo’d-out buffet in the dining room

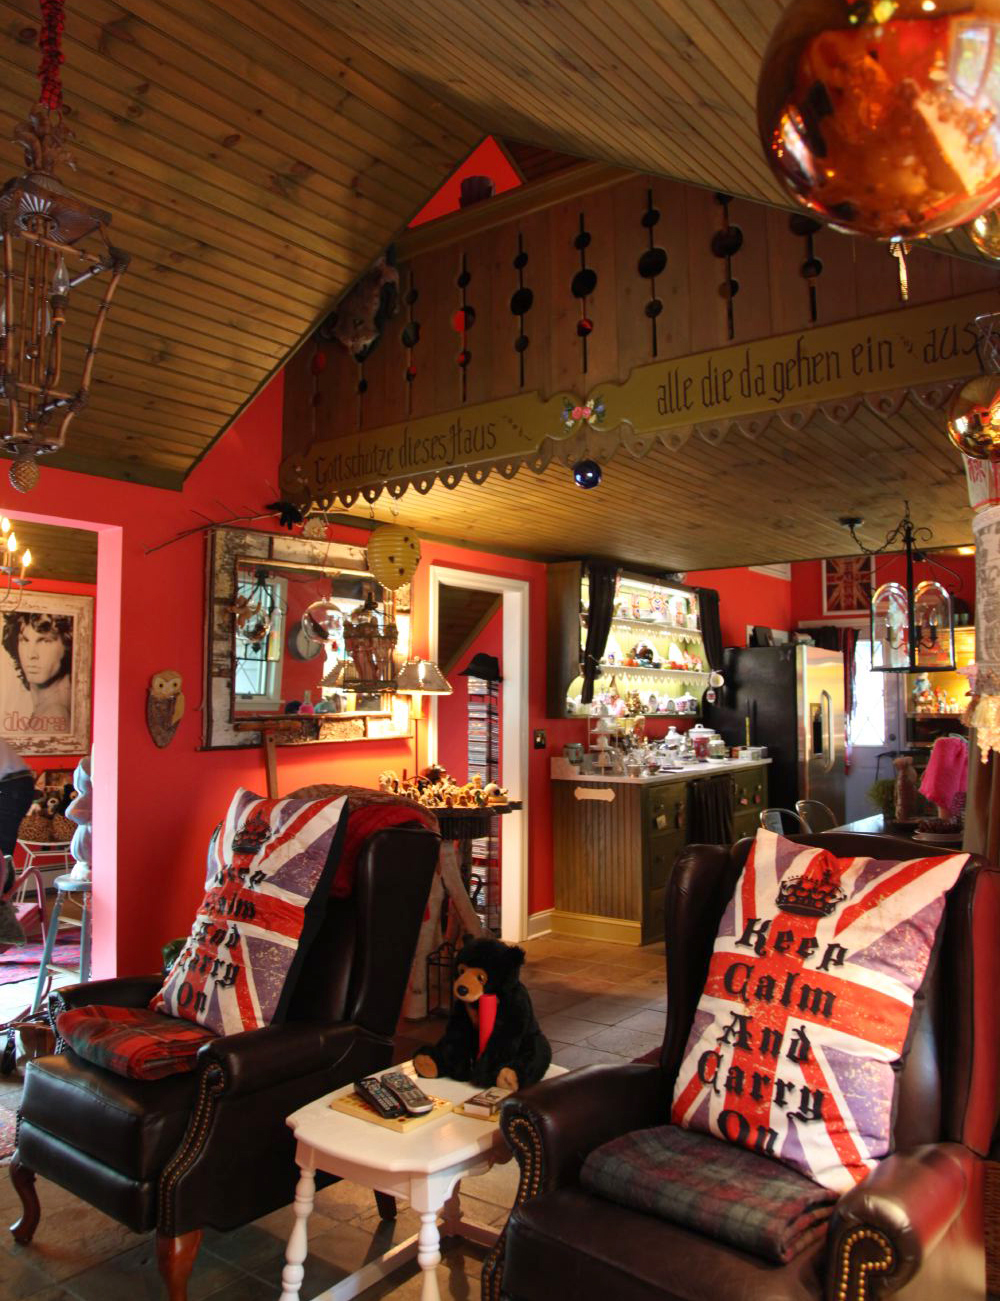
A view from the den into the dining room and kitchen beyond. Two leather chairs in foreground face a cast iron potbelly stove and a TV. Very cozy spot on a cool night.

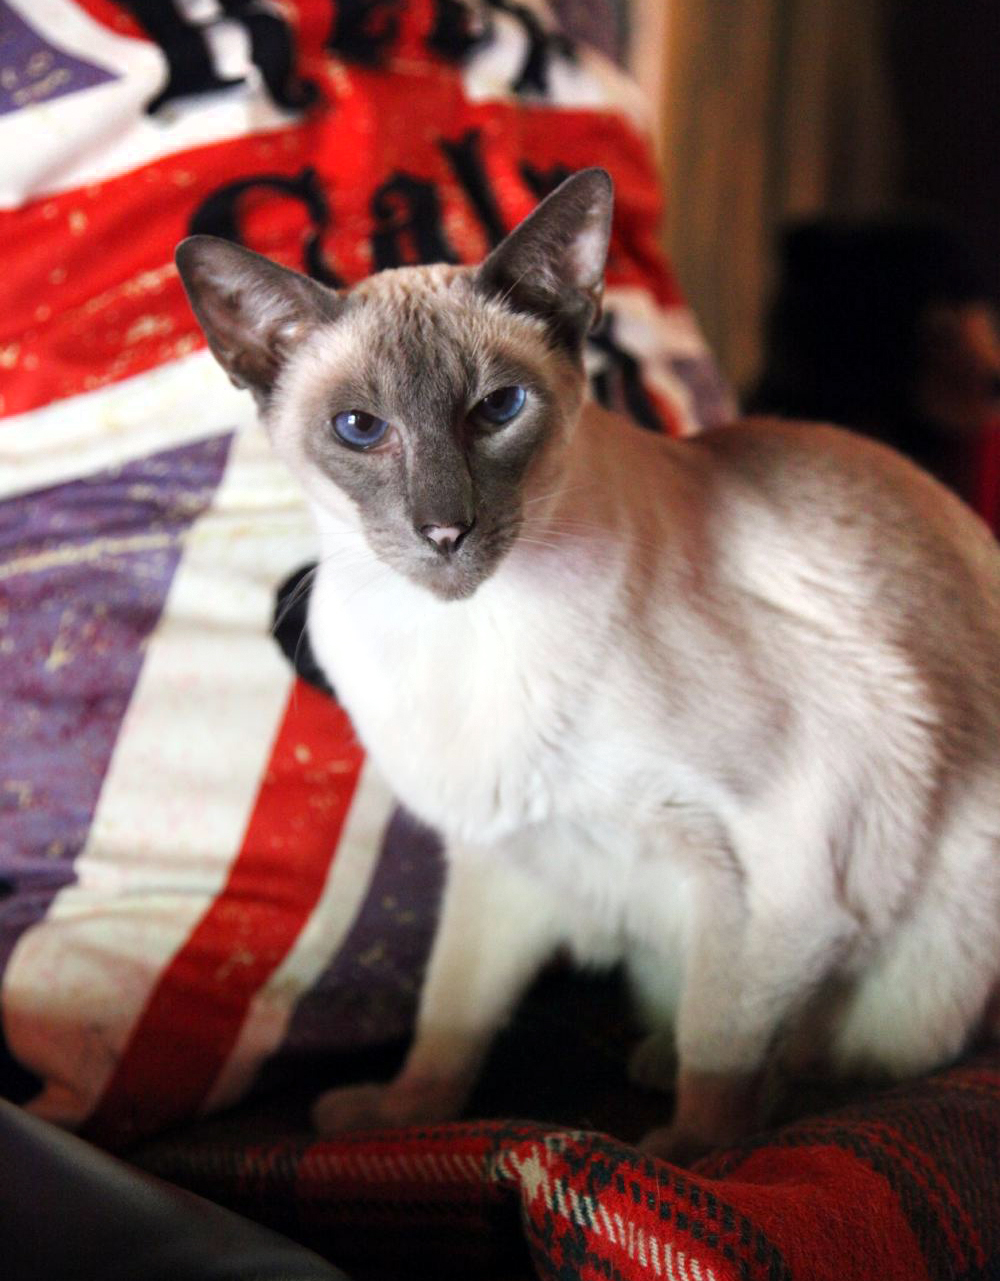
One of Katie & Jorge’s siamese cats, Hunter

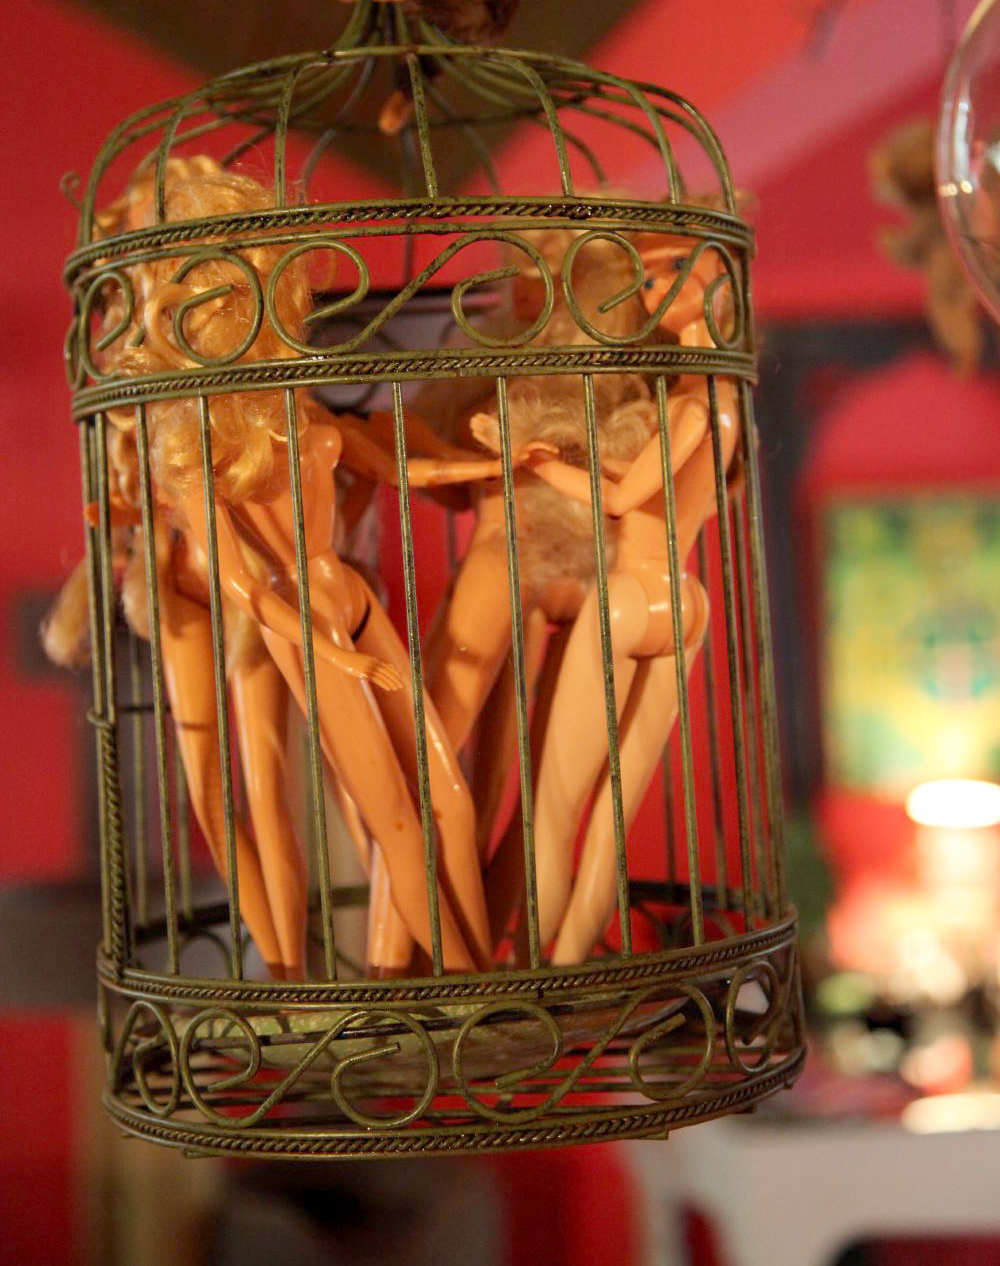
Love this cage aux folles. Not something you see every day.


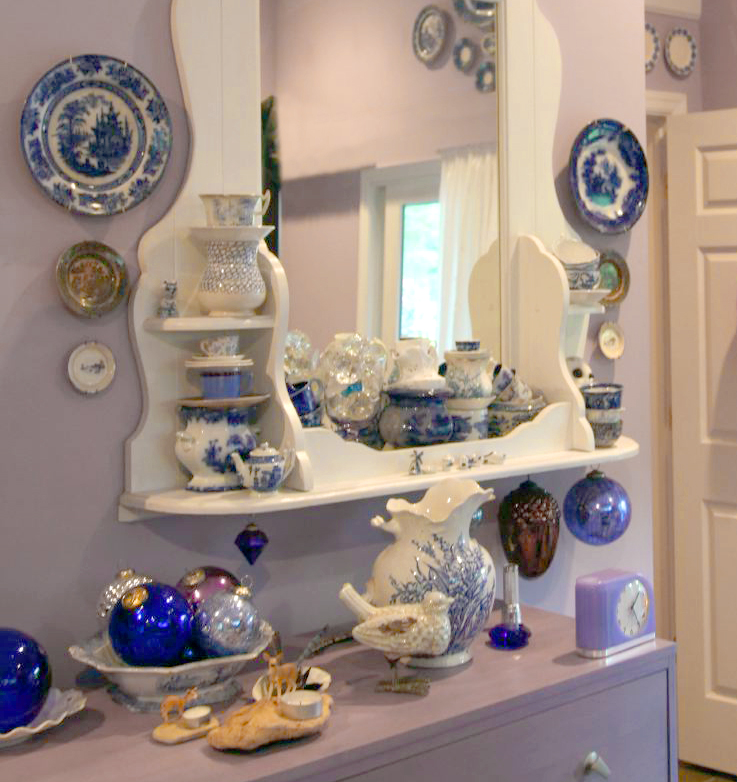
A quick peak into the bedroom. As you can see, this is where the blue & white china lives.

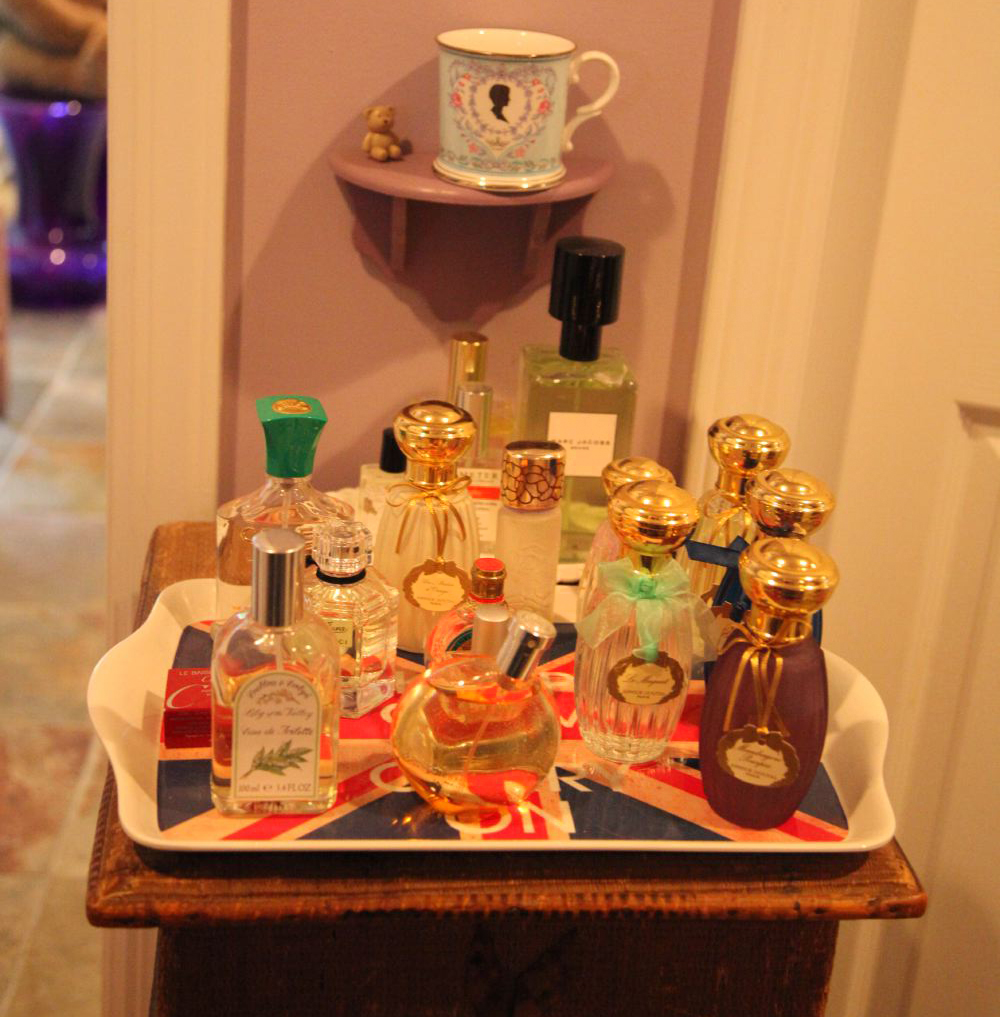
I even love her abundant perfume station (I too am a huge user of French perfumer Annick Goutal)… with a few nods to the motherland of course.

There is too much going on in Katie’s office (behind the living room stairs) to really show you in one photo, but here’s a little detail of the mix of things either waiting to be worked into one of her sculptures or just hanging around to keep her company while she works.

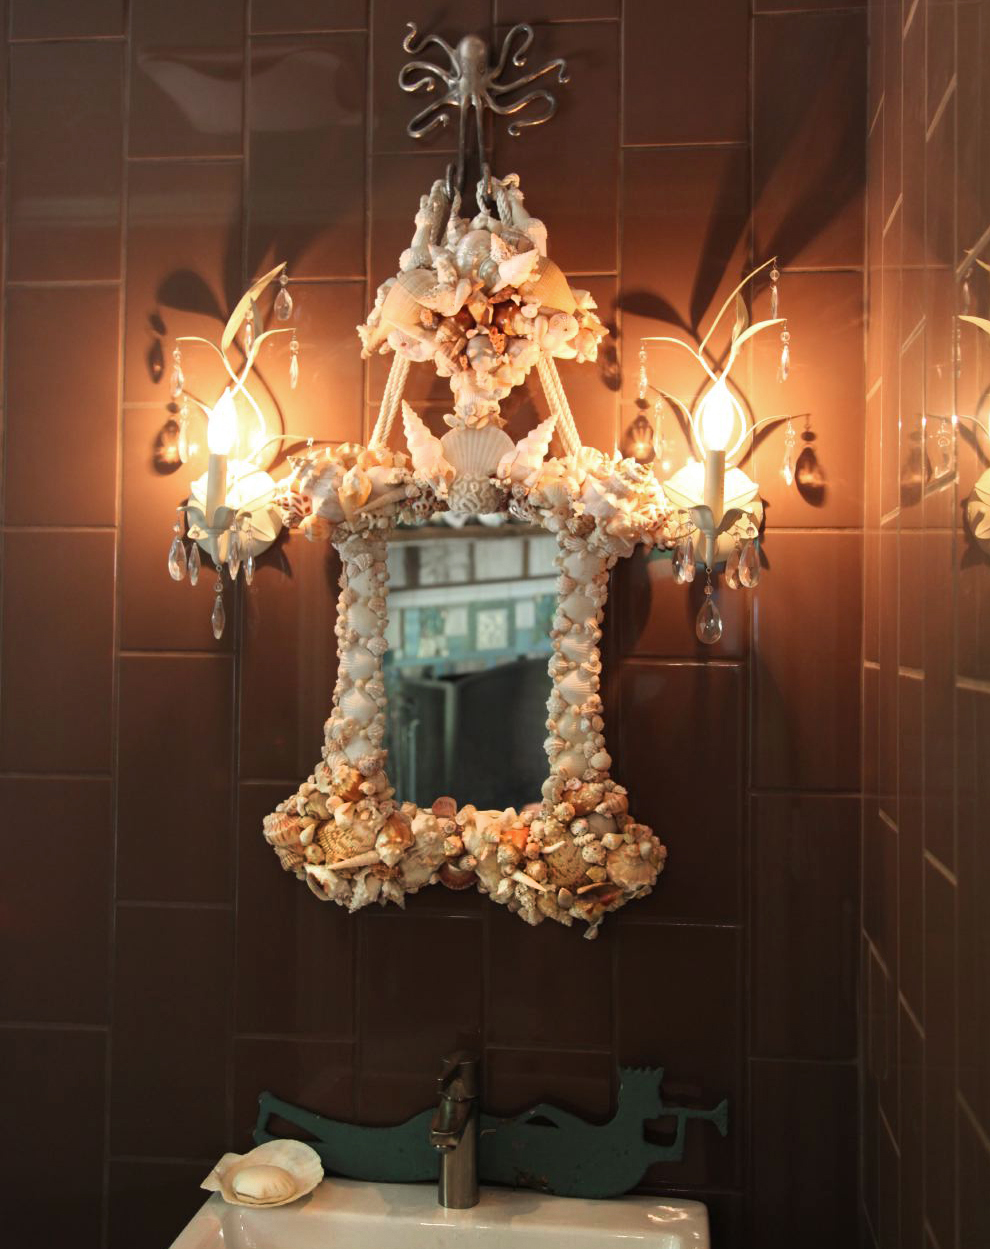
The powder room is incredible! The glossy, rich brown tiled walls reflect the gentle light that comes off the shell piece—that the couple made—for a really dramatic look.

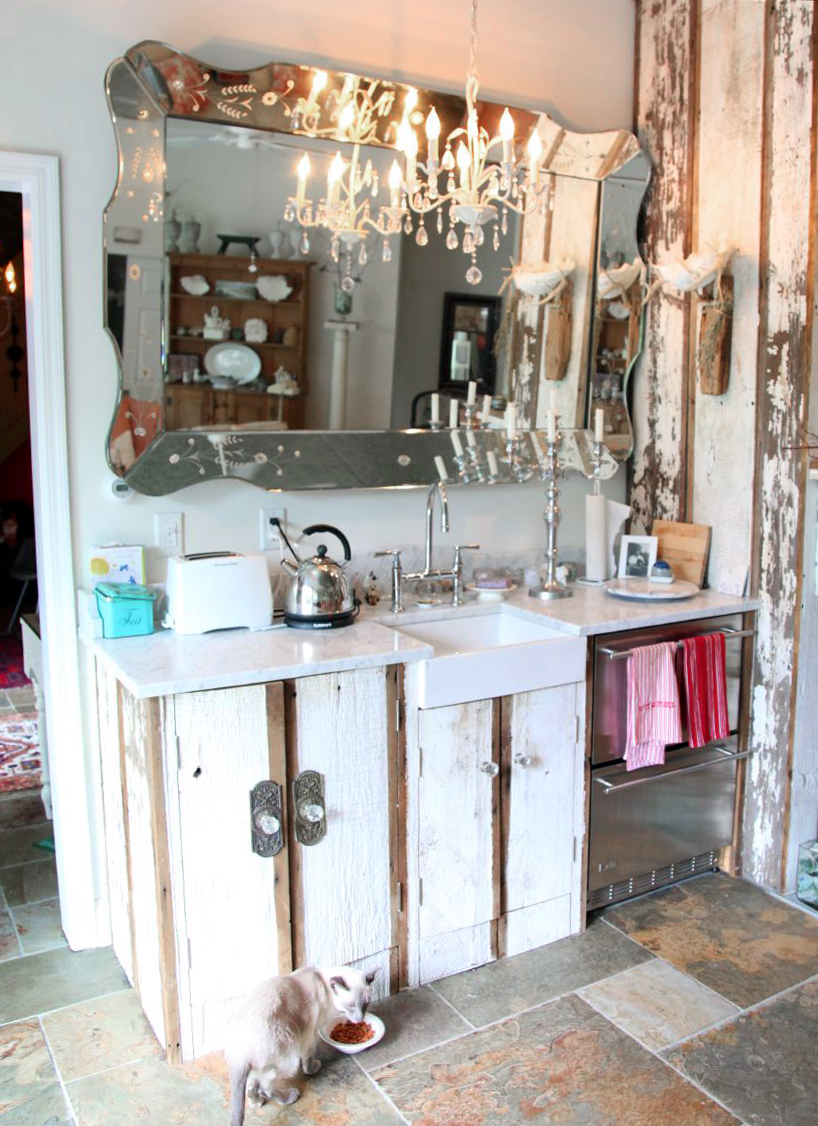
The deluxe wet bar in their family room. Loads of lights spills in from the wall of doors that exit to the back porch.

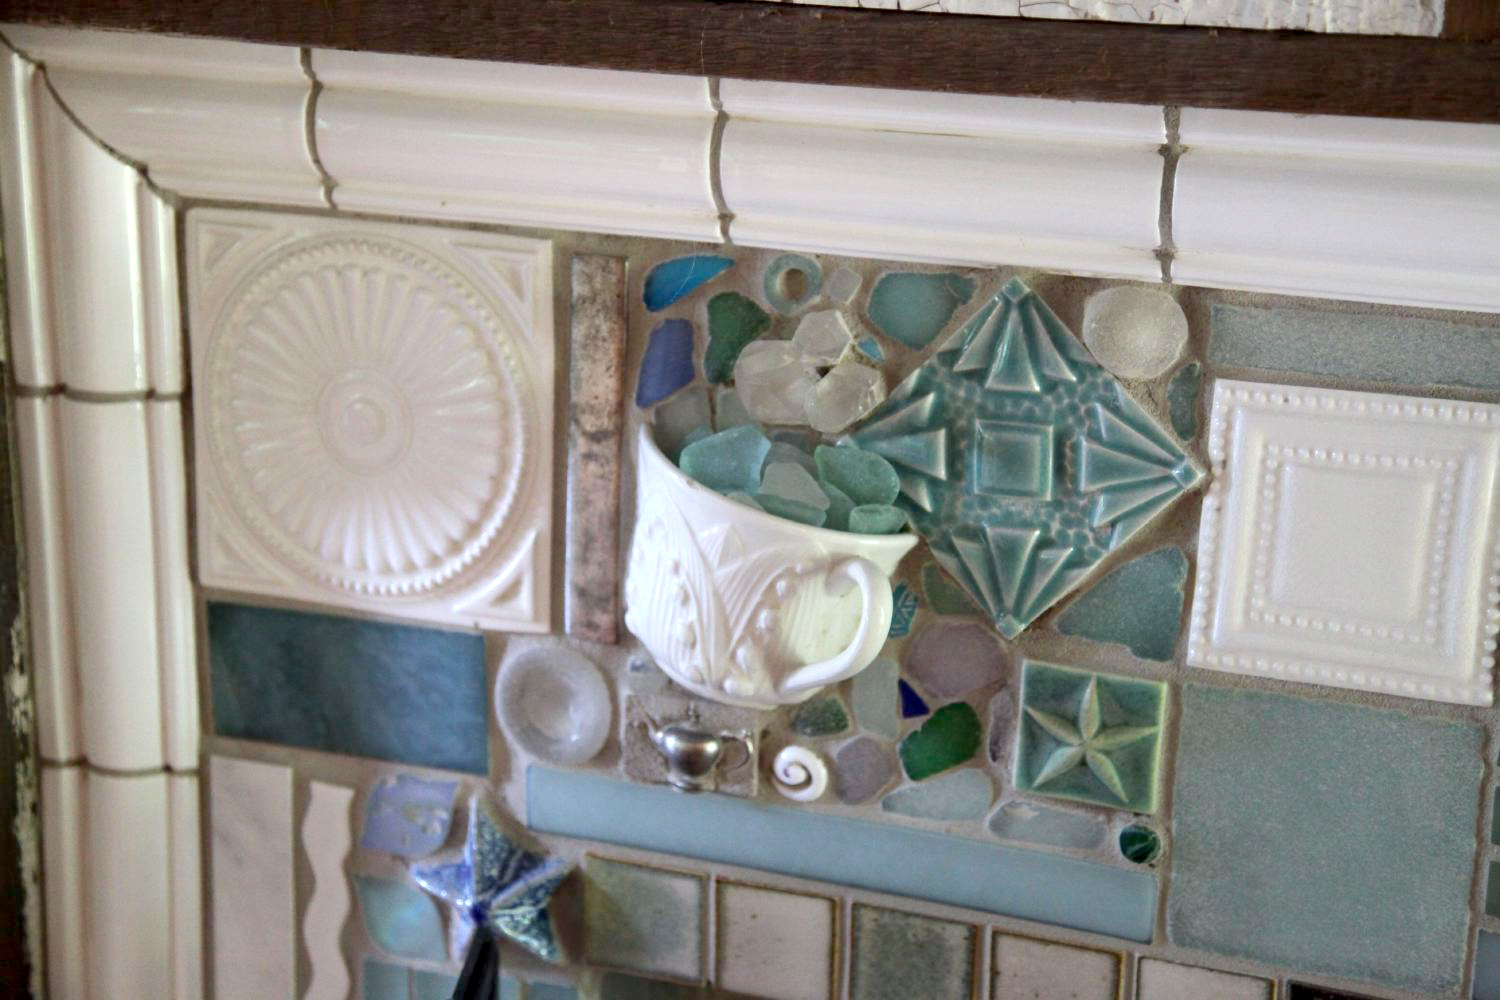
A delicious little detail from above the wet bar

A detail of the ornately mosaic’d fireplace that Jorge made for Katie in their family room.

The breakfast table in their family room. As you can see, this room is all about the white and light collections

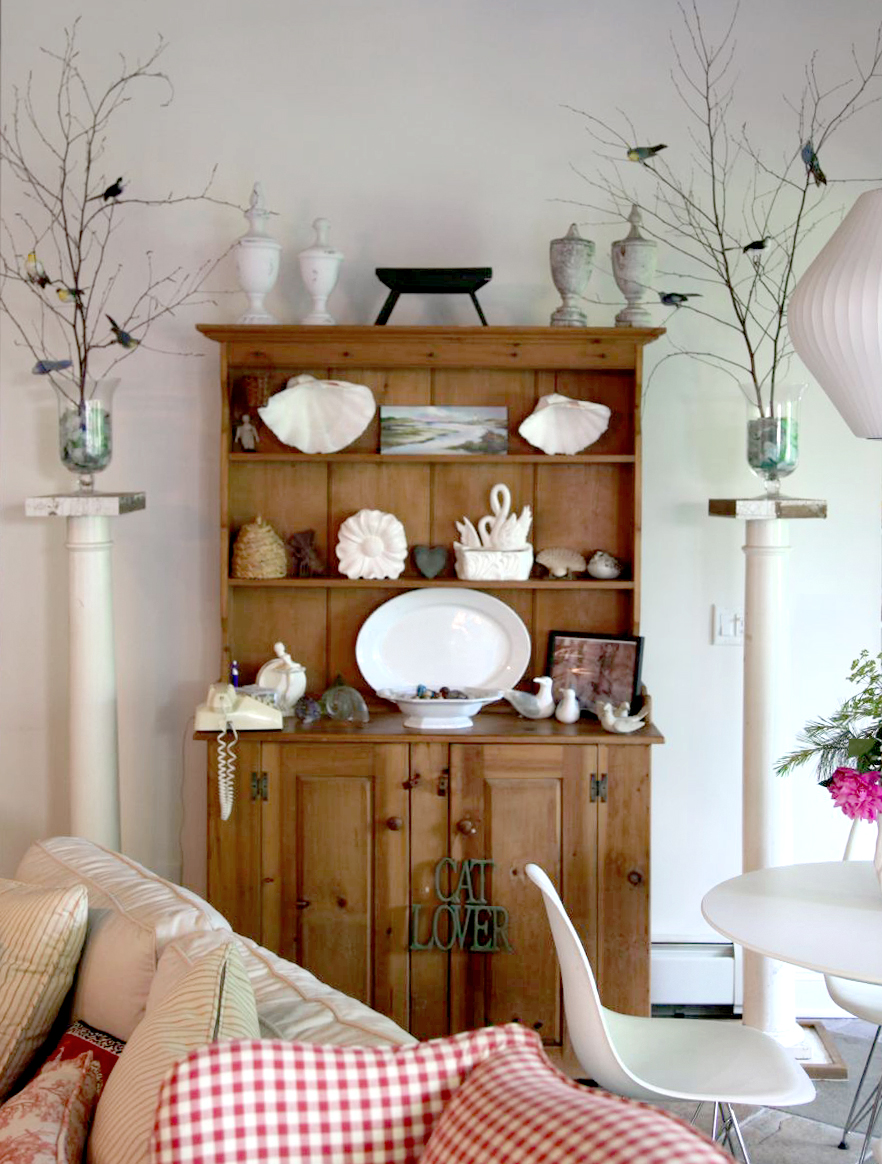
And antique china cupboard is flanked by two fabulous peeling columns.

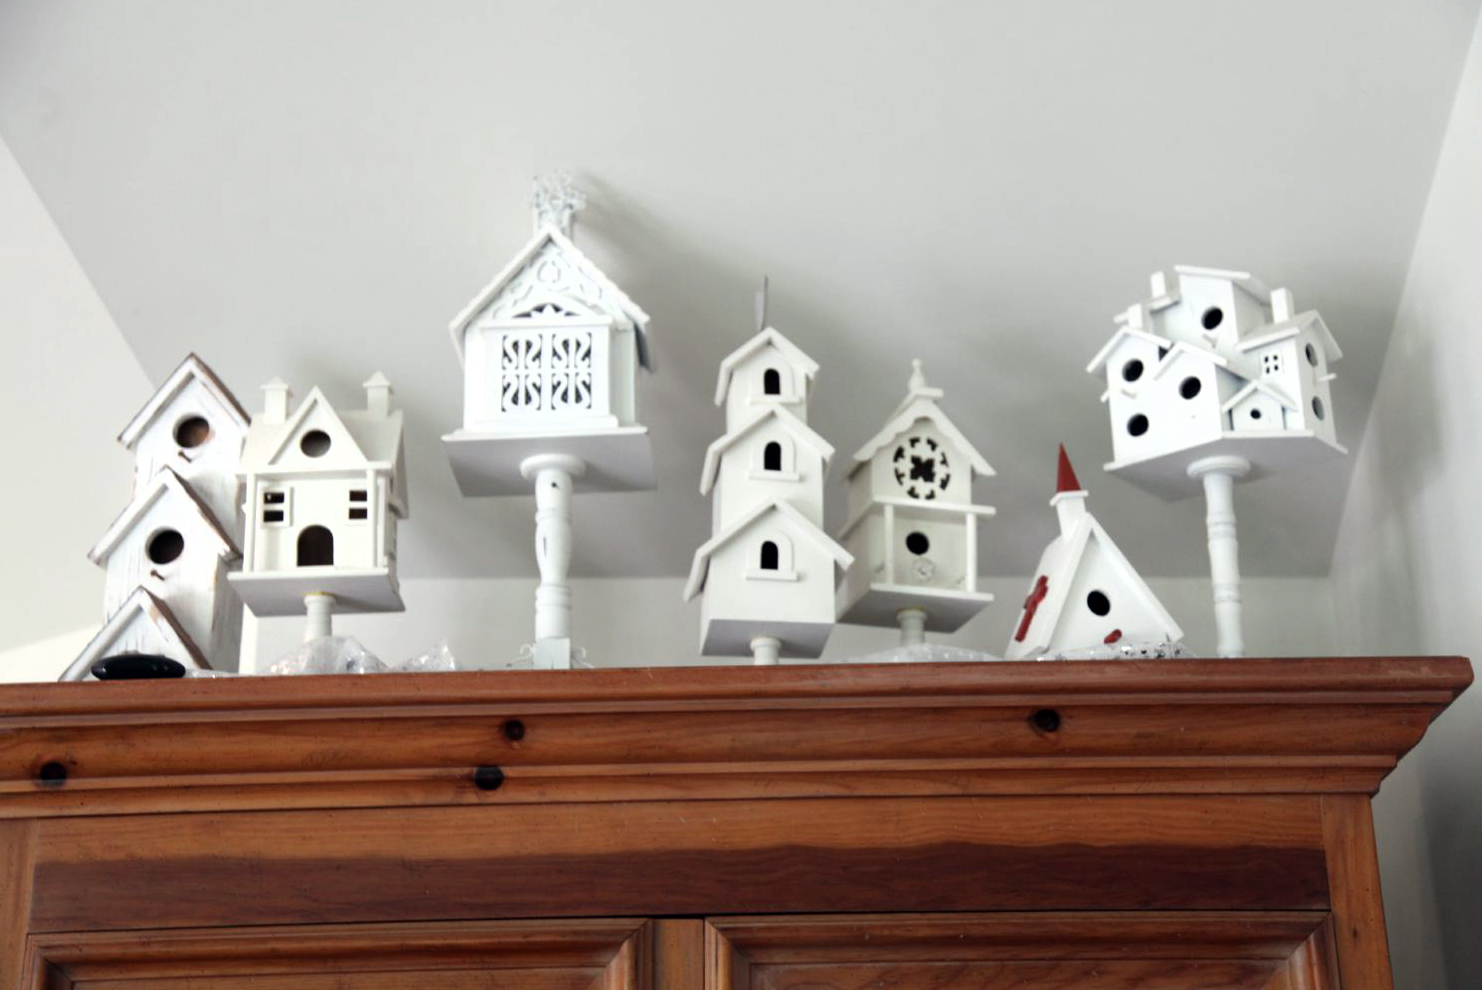
A birdhouse collection hovers above the entertainment cupboard in the family room.

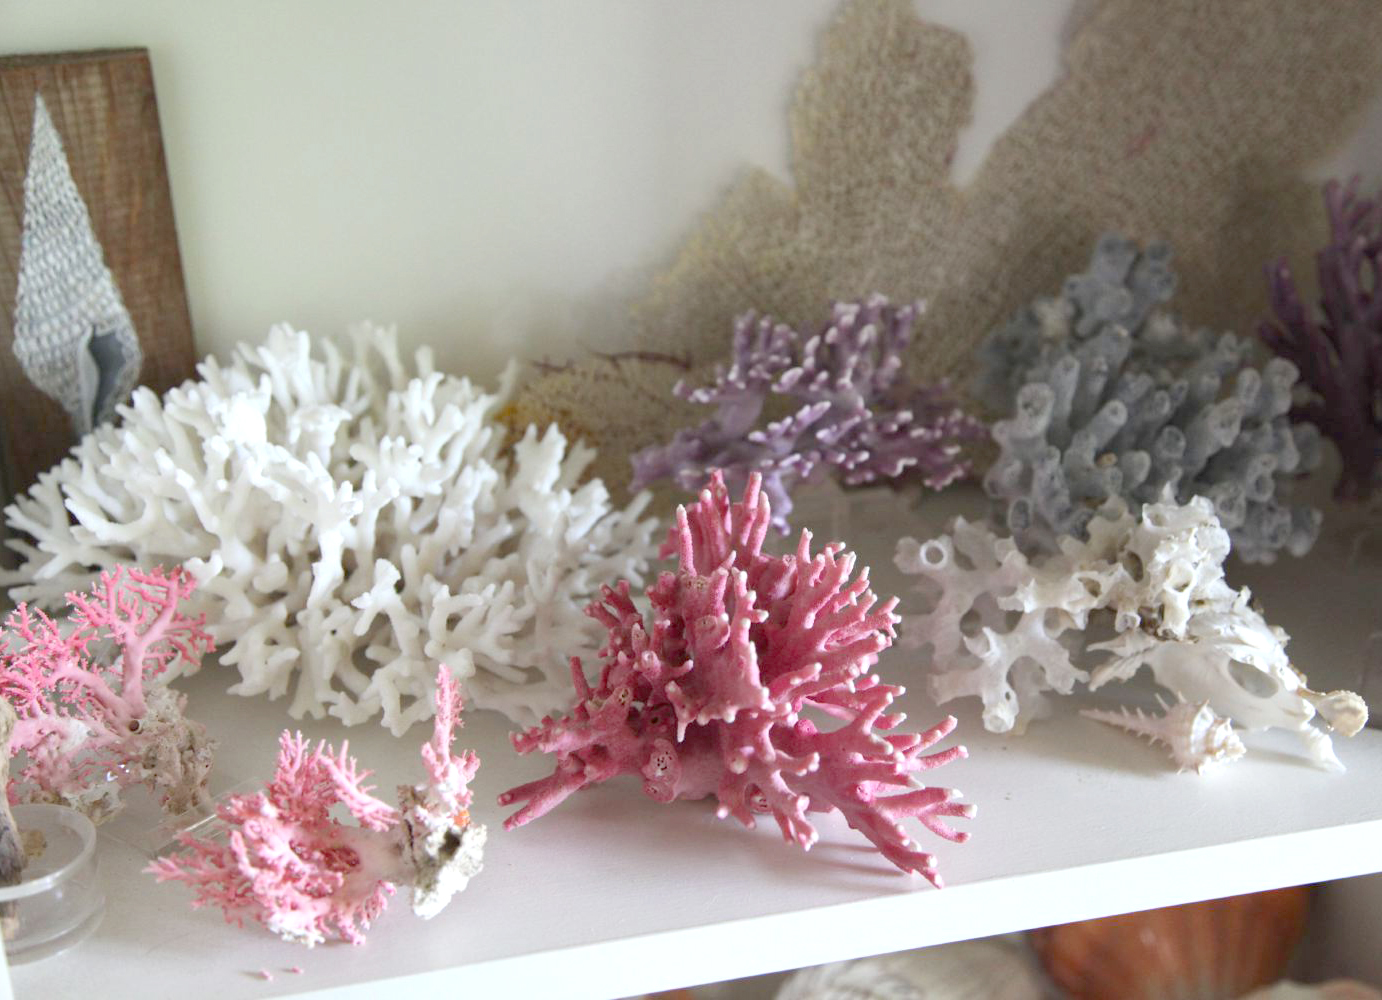
A detail of another collection in their almost-all-white family room.


This is Jorge about to do some gardening in the back yard. He built the home they live in. Detail of back porch in the background.

What I don’t even get to show you is the full master suite (i just give you a few details) with walk-in closet, 4-poster bead and steam shower; Jorge’s office upstairs; the creepy and magical doll room Katie has for her doll collection (too narrow to shoot); the full guest suite downstairs; the ornate herb storage wall-unit they have built leading to the basement off the kitchen; and the magnificent wrap-around back porch with abundant vintage planters (perhaps photographer friend Laura Moss will provide exterior for an upcoming post: she focused on the exterior of the home while I drooled over the interior.)

Re-soul a Slipper

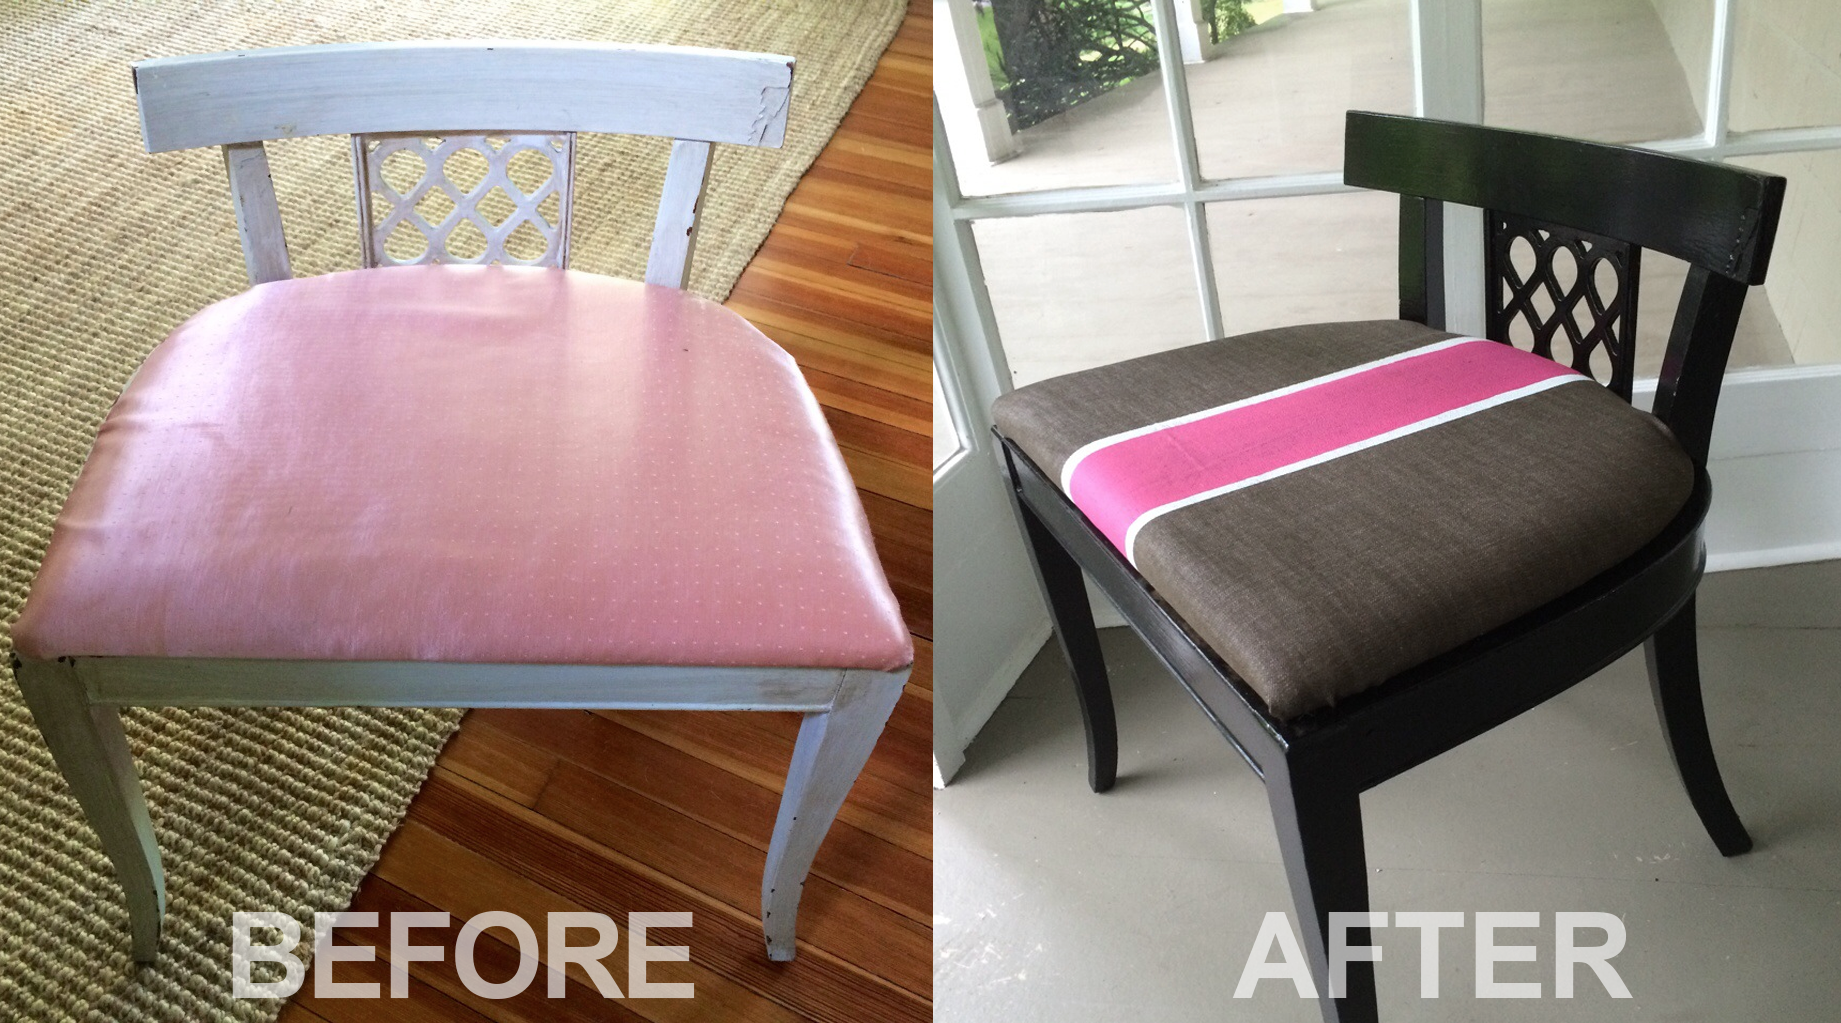
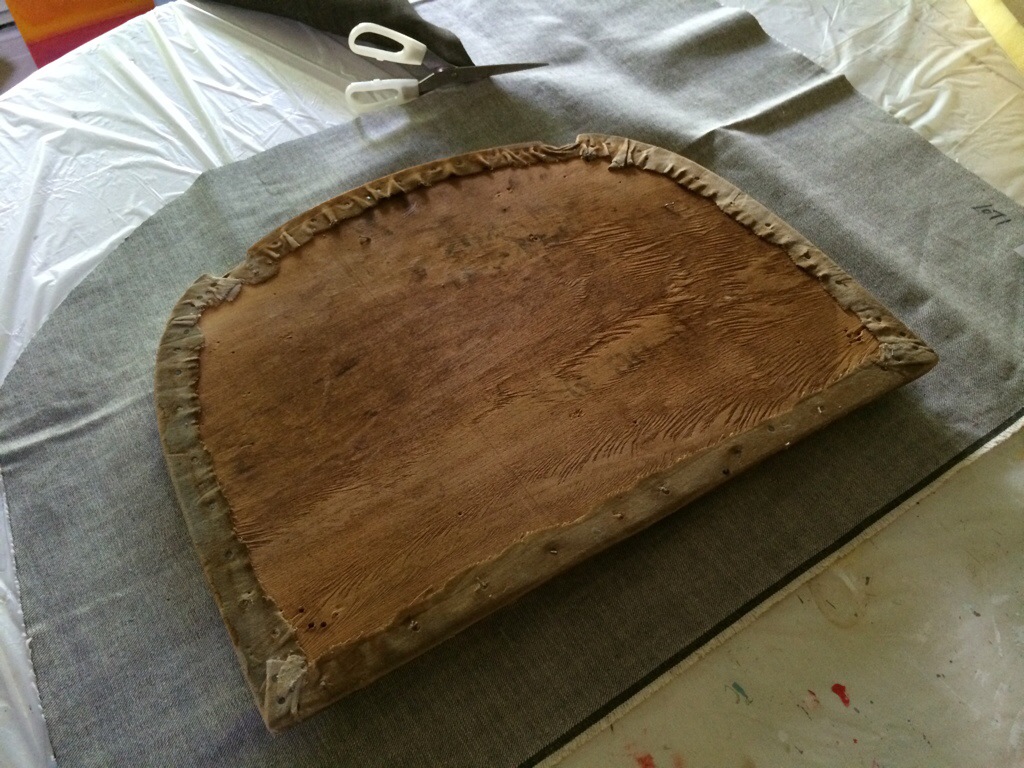
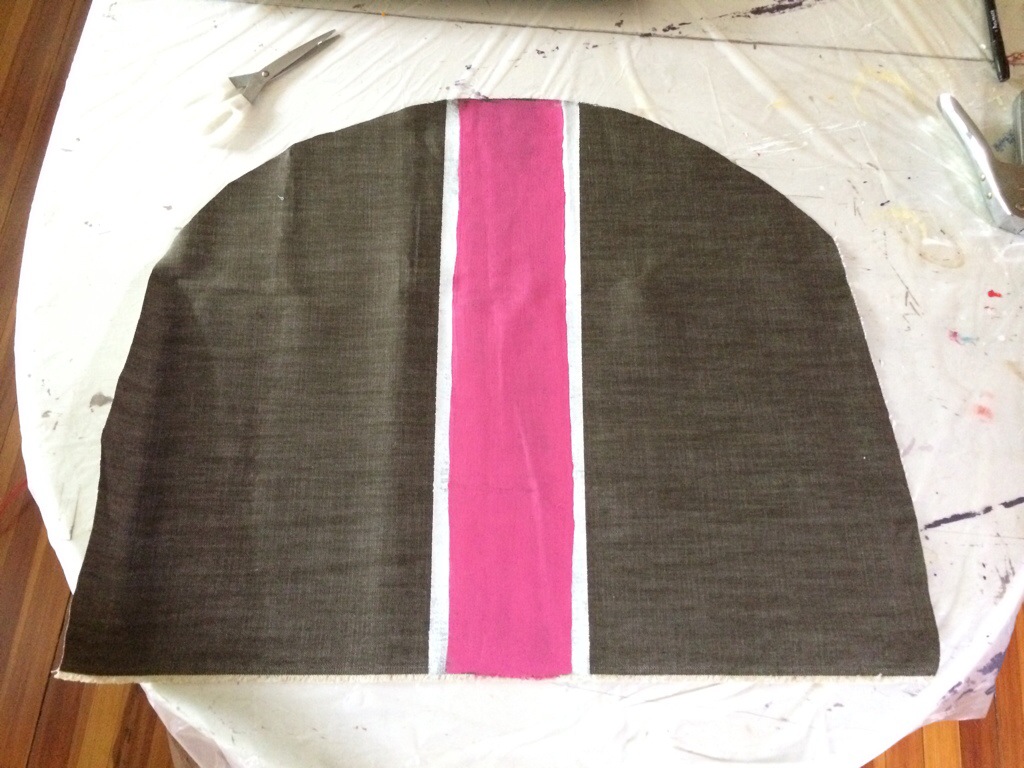
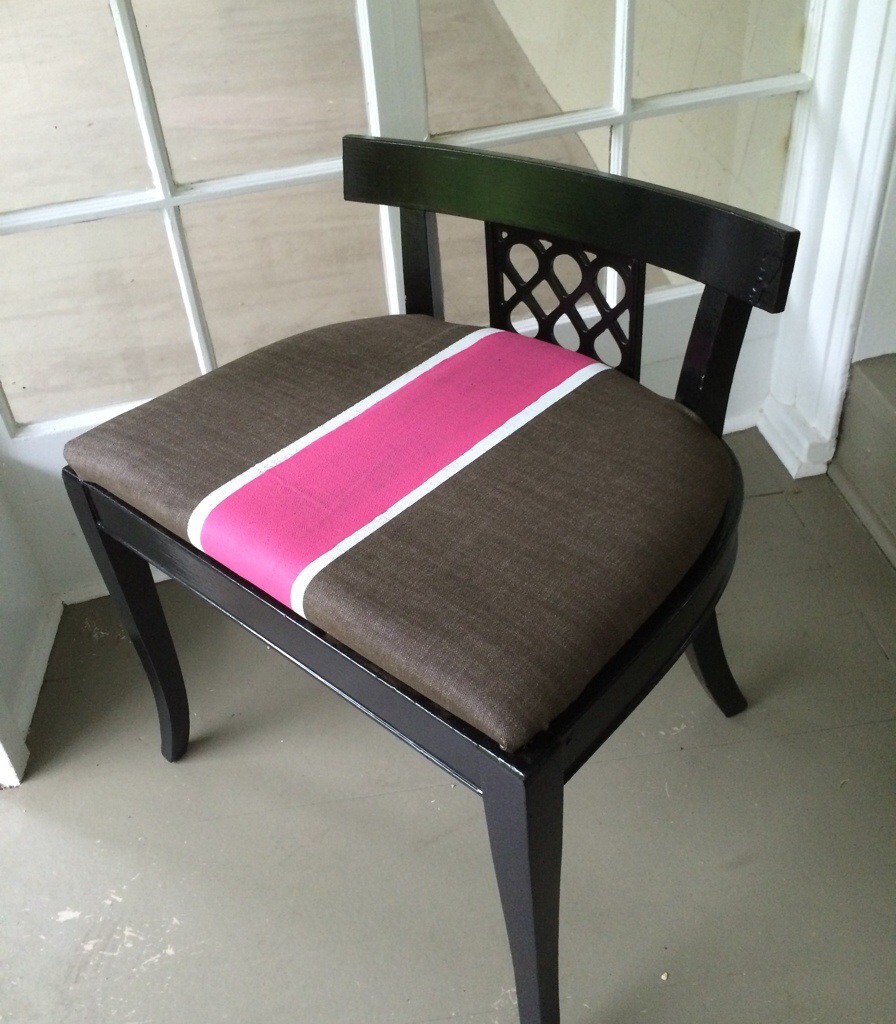
Give new life to  garage sale find this weekend. Whether it be a new purchase from your Memorial Day weekend hunting or one of the pieces you’ve been hanging onto, just rip the bandaid off and do it. Here’s a quick slipper chair remodel I did in a few hours yesterday. All it entailed was a fresh coat of glossy spray paint, a piece of fabric and 2 samples of latex wall paint from my local hardware store. Directions below. Good luck and happy hunting this weekend!

Cut a piece of fabric large enough to wrap around and be stapled. Always give yourself a little extra.

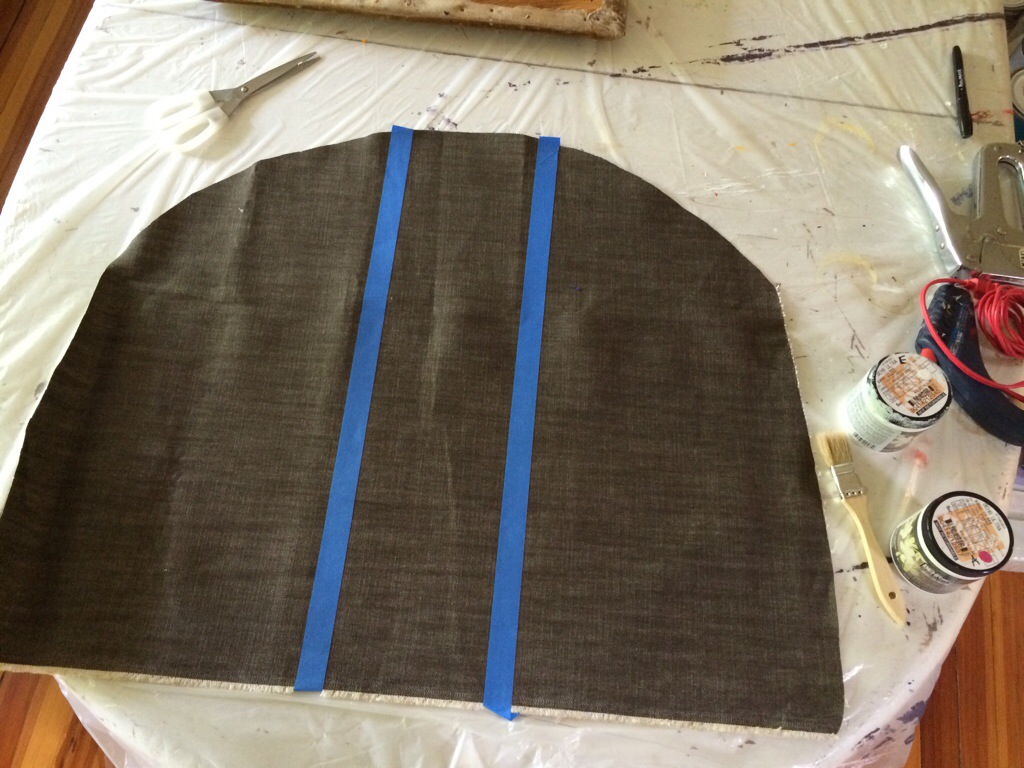
I taped off o wide stripe down the center of the fabric. Measure from each side to make sure your pretty centered.

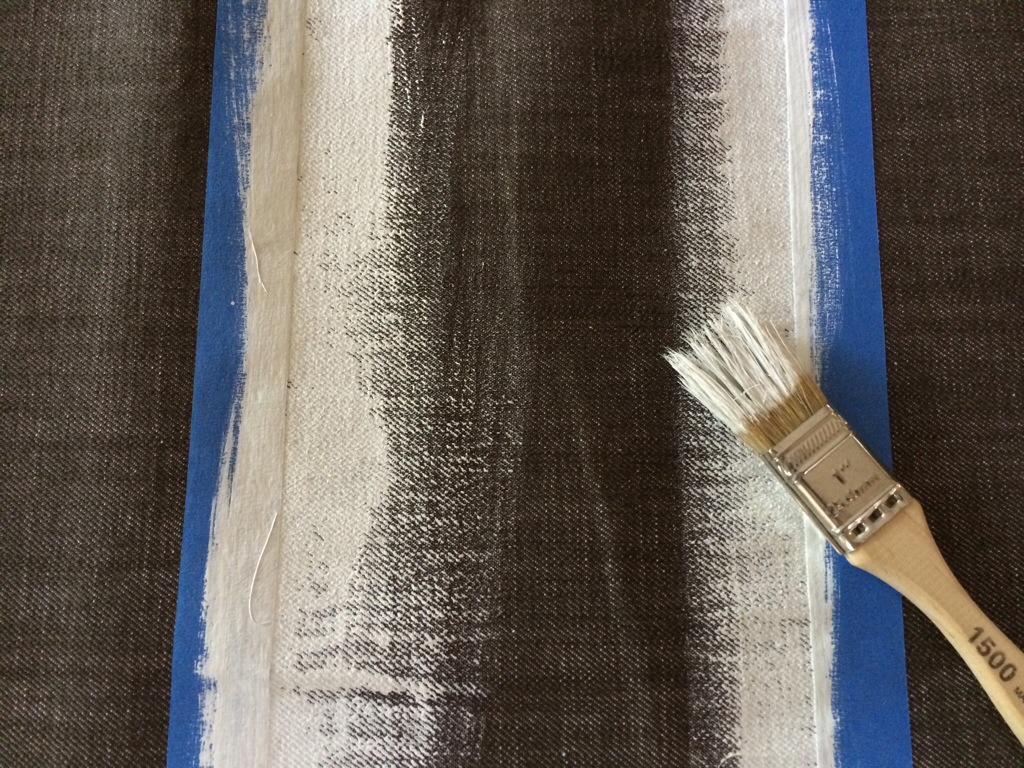
I brushed on white latex paint for a white edge

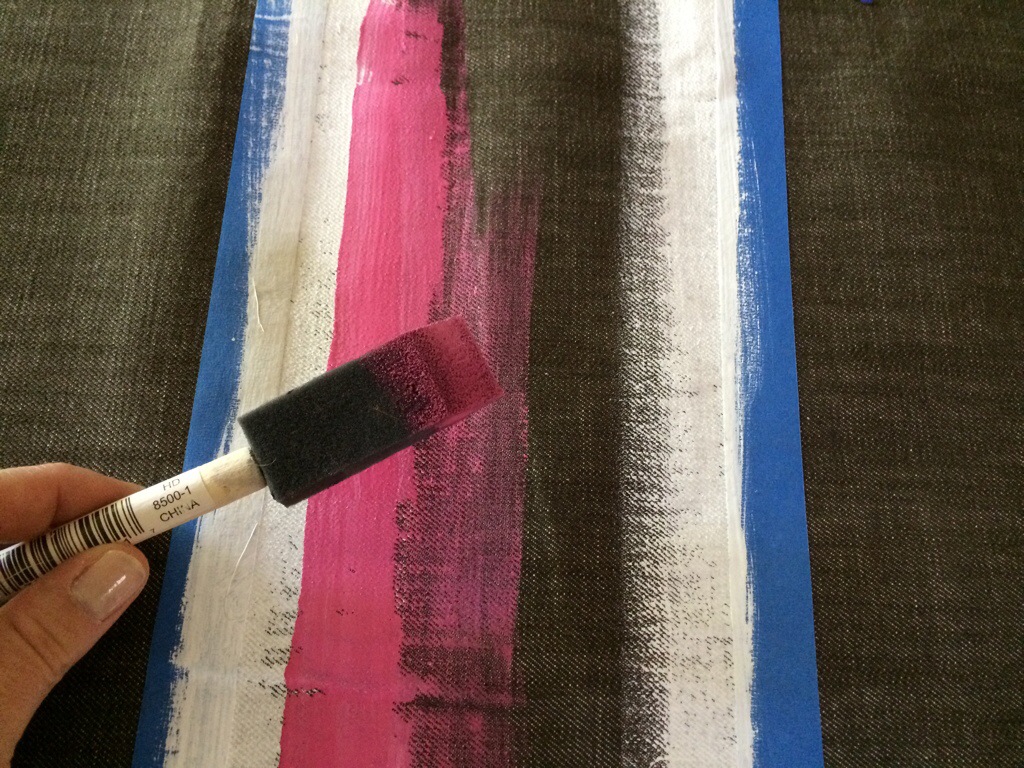
Then pink. If you want the lines to be perfect, let the white dry, then tape a new line for the pink. I wanted mine to be a little organic so i freehanded it

remove the tape and let it dry thoroughly

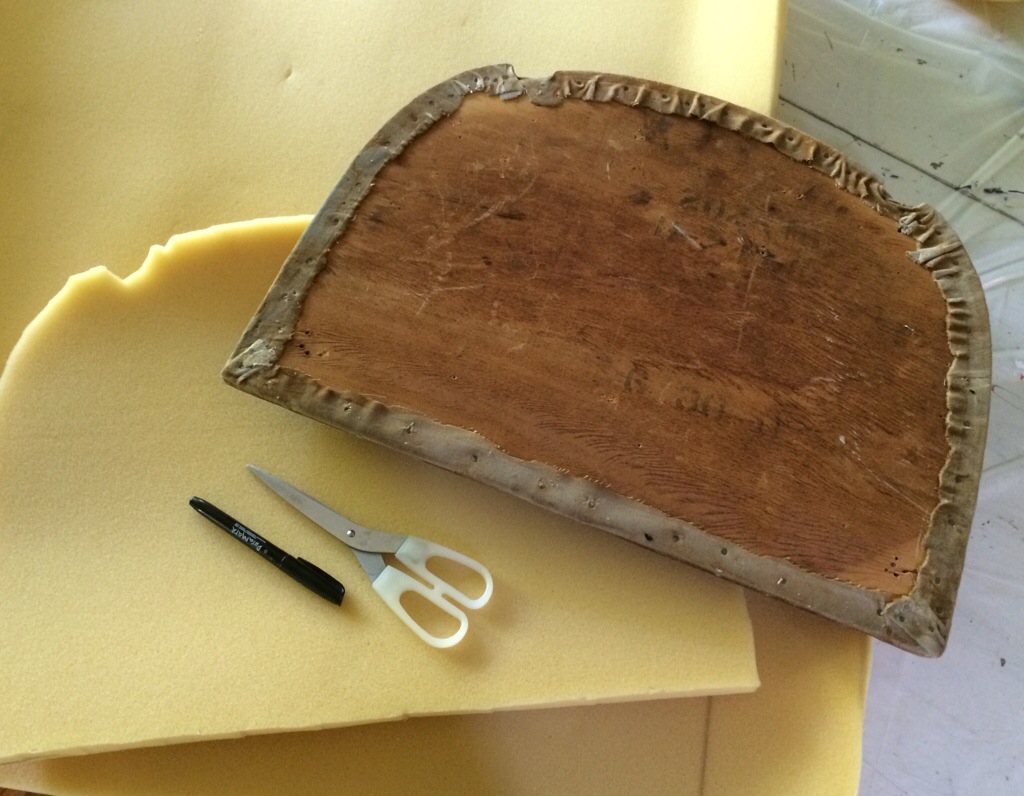
if you need to replace the foam, do so by tracing the seat onto the foam and then cut it out with scissors.

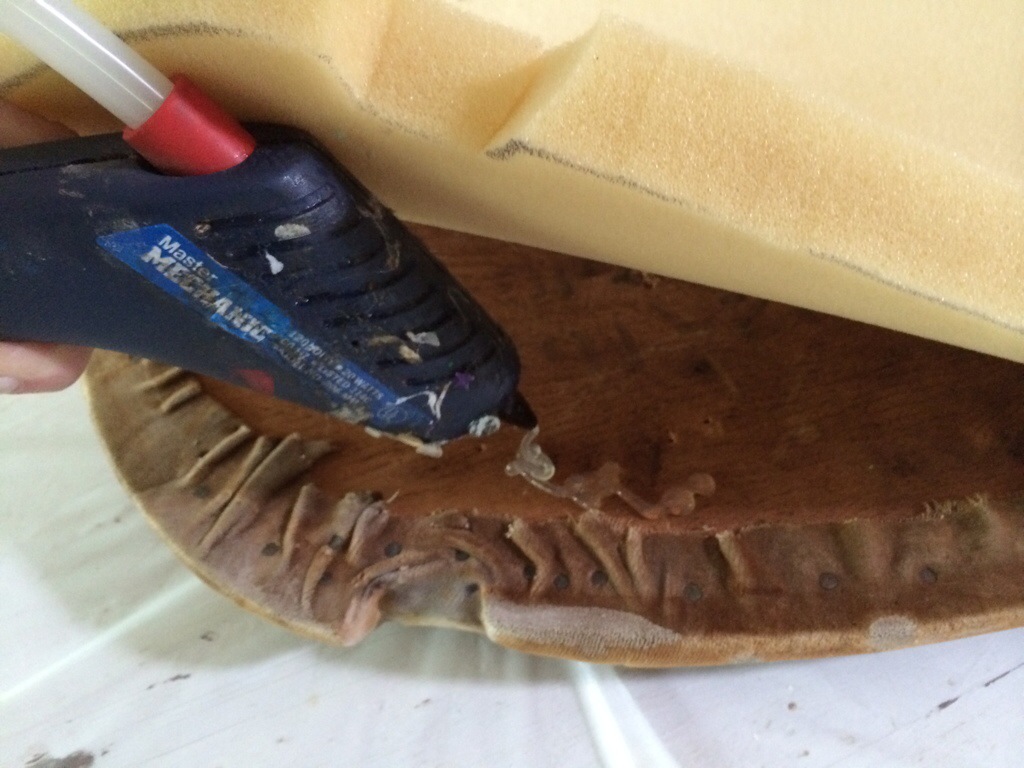
Once lined up precisely, glue your foam in place so that it doesn’t shift while you’re upholstering or in the future

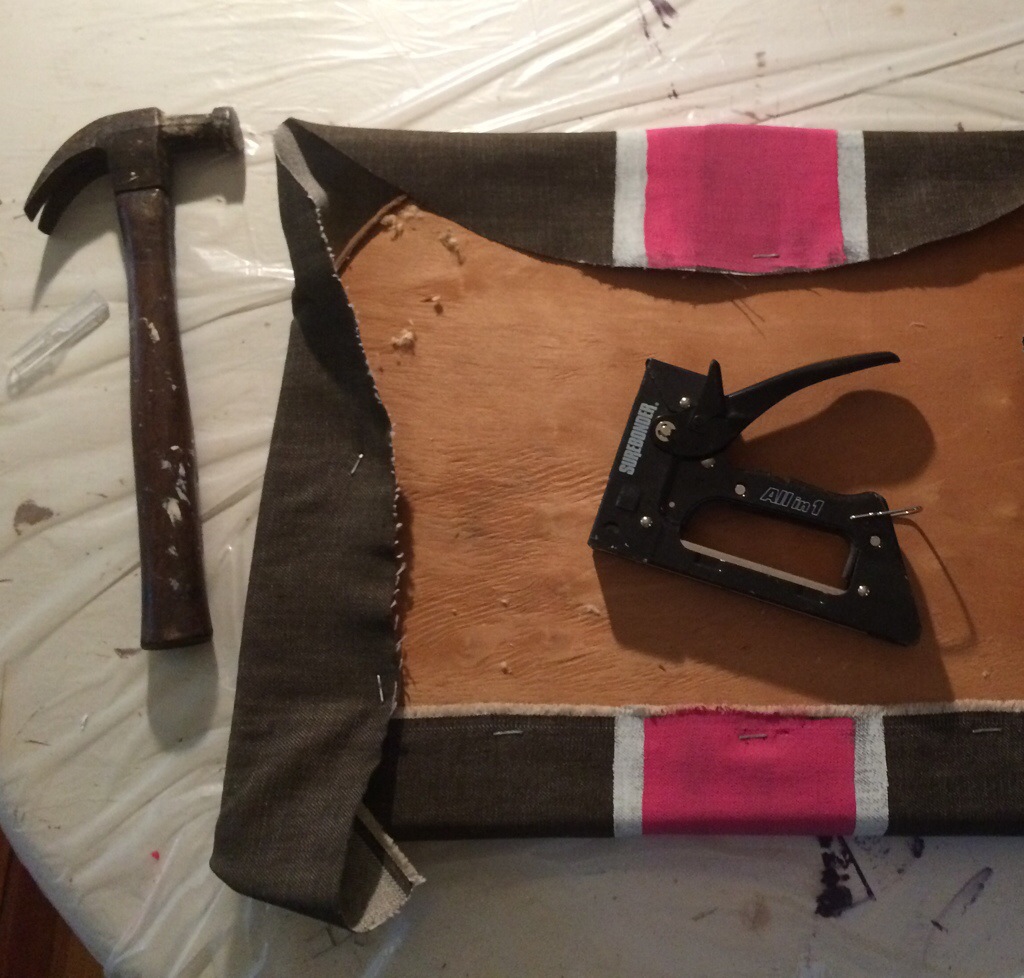
I staple-gunned the fabric taught to the wooden seat, pulling the foam to a rounded edge along the sides of the cushion. Again, measure to make sure your stripe is centered and straight before you staple.

Et Voila! A new soul for your Slipper chair!


Hampton Designer Showhouse


Mark your calendars decor deal-finders and haute-hunters! Only one more week to go until Traditional Home’s annual Hampton Designer Showhouse has their online auction! A handful of special items from each designer will be auctioned off… and (a portion of) the proceeds will benefit Southampton Hospital.

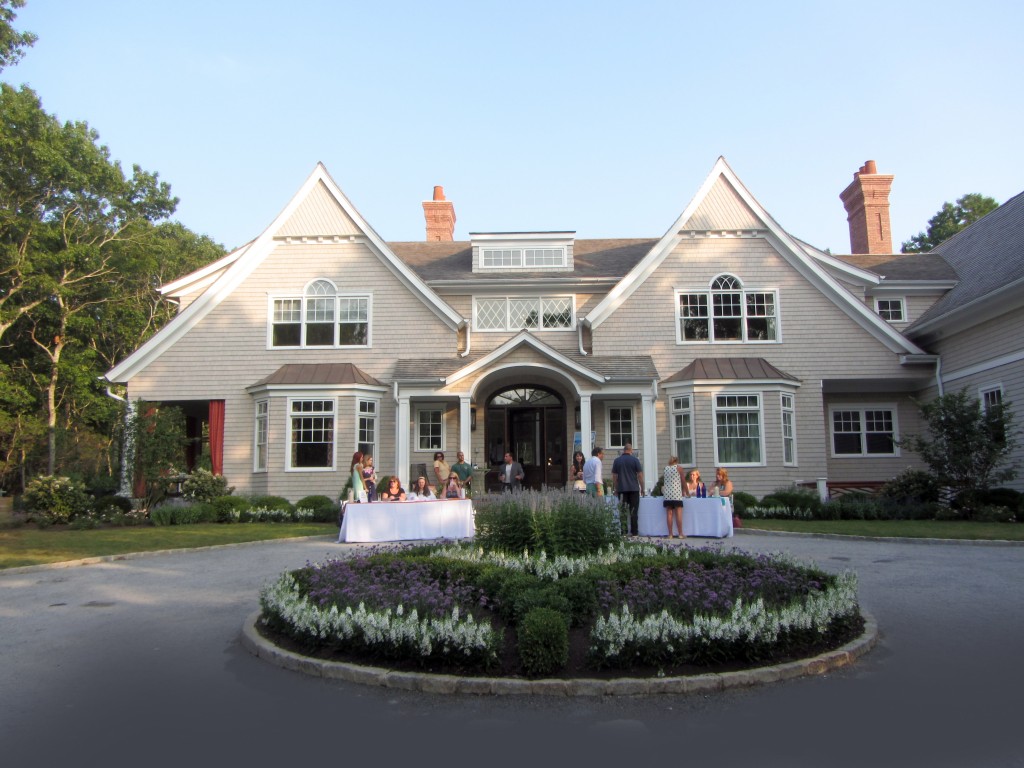
A few weekends ago, my husband Ryerson and I attended the Gala Preview Party for the debut of the 2013 Hampton Designer Showhouse. The party was lively, the cocktails were flowing, the crowd was very glamorous and the interior design was exceptional.

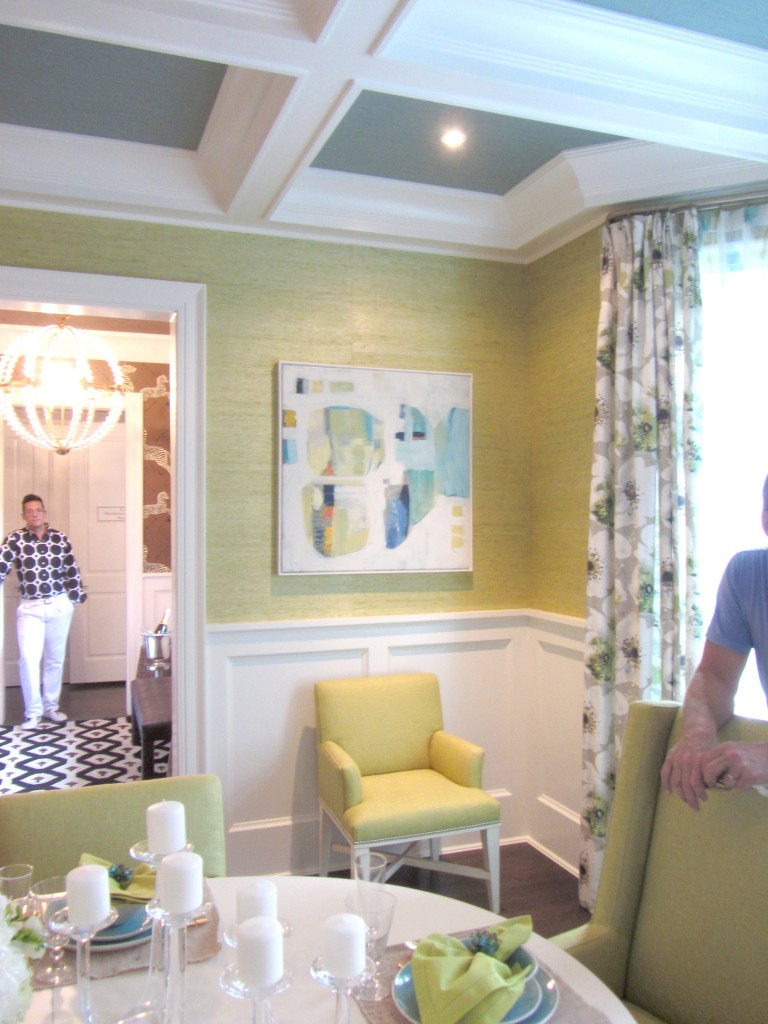
Though we did not get to meet him, we saw Thom Felicia (if you look closely at the picture above, you’ll see him checking in). Upon arrival, we decided to see the house before checking out the outdoor party—which turned out to be a good game plan—and we moved through each room and meet all the designers with ease and sans traffic.

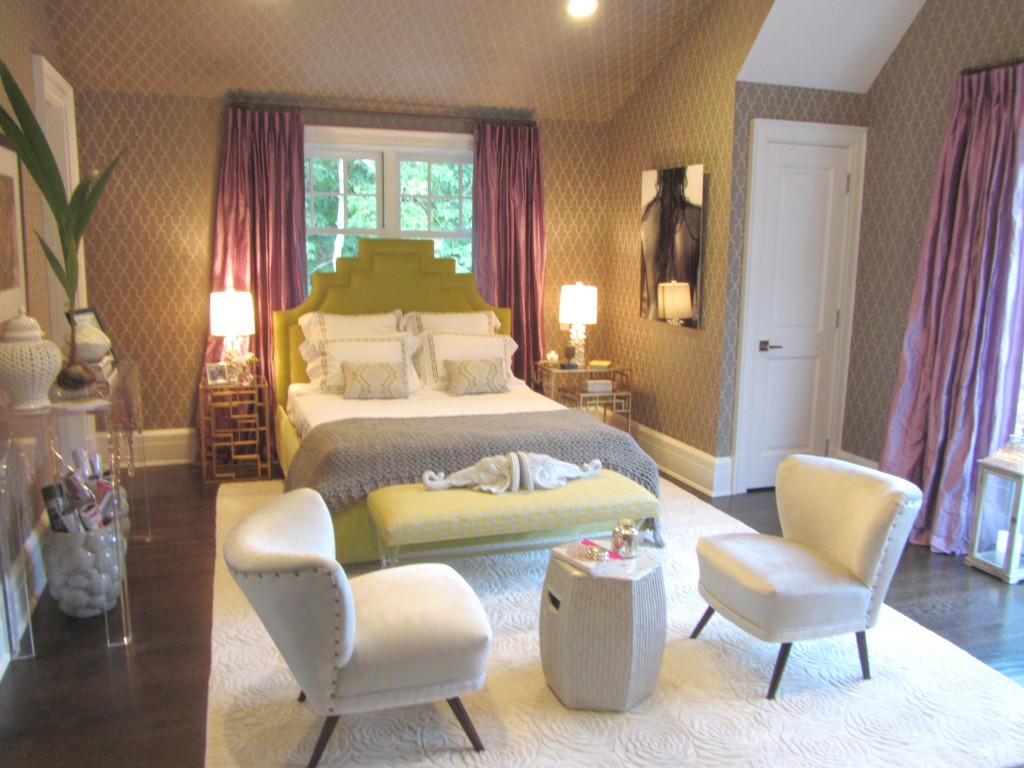
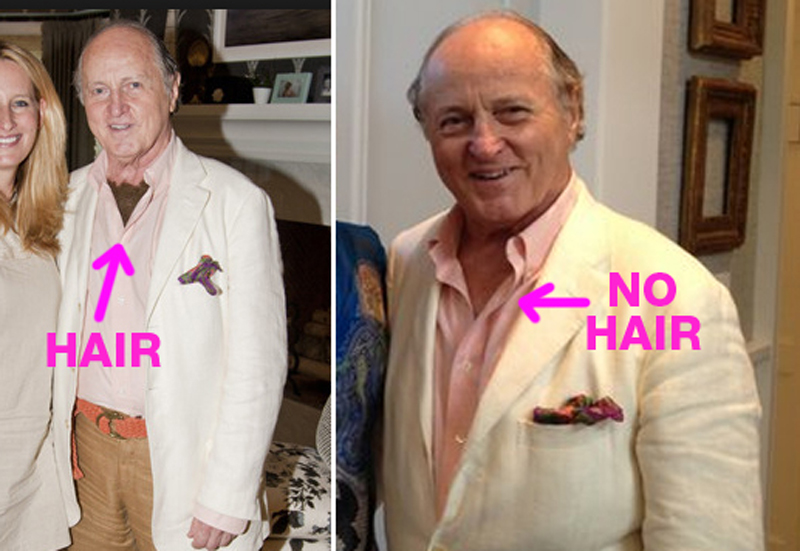
After passing through Celerie Kemble‘s grand but restful master bedroom, I spotted idol and decor celeb (and Honorary Showhouse Chairman), Mario Buatta. I immediately turned red and noted the lack of AC in the house. I’ve met Mr. Buatta probably 3 or 4 times now, but have never managed to have a satisfying conversation over the sound of my chattering teeth. This time was no better… He had an absurdly robust plume of chest hair protruding from the top of his neckline—normally buttoned and bow-tied—that I fought hard not to make eye-contact with while I reintroduced myself. I explained that I had just written a magazine column on him and his new retrospective (Mario Buatta: Fifty Years of American Interior Decoration, published by Rizzoli) that is about to come out. He seemed amused watching as I struggled with his practical joke (see photos below, it was indeed faux chest hair that came out later in the party). We parted ways—me reeling from missed opportunities of composure and humor—and bee-lined it for the bar.

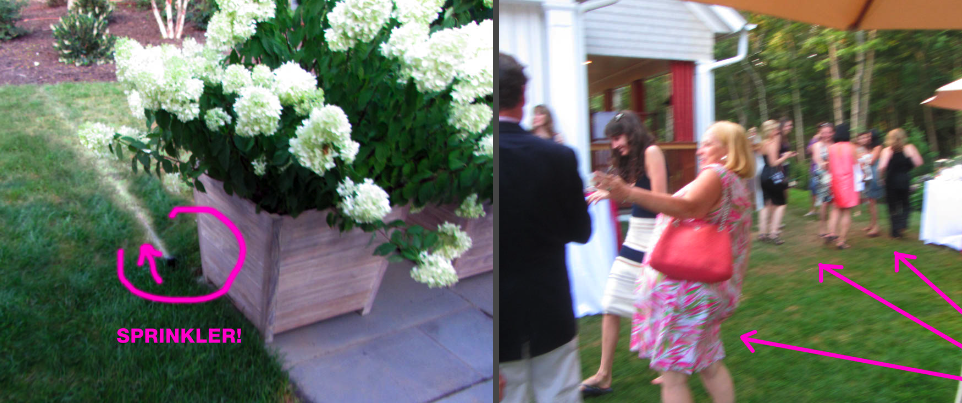
The back yard was abustle with a lively, quintessential Hamptons summer party crowd. After procuring a cocktail, we had the pleasure of bumping into another of my interior design idols, Vicente Wolf, and his friend (also a well-known interior designer) Matthew Yee. We were engaging in a nice little chat (everything my Buatta conversation was not) until—out of nowhere—Vicente & Matthew sprang away! Before I could worry about what I’d said, the lawn sprinkler soaked my lower half, and I too leapt backwards (before it got my white silk shirt) and watched in shock as women (and men) screamed and ran. Gowns got soaked, seersucker wilted, and white linen pants became see-through. It was hilarious. And a blessing in disguise? I think so: it was over 100°F and wildly humid out.

After that, it was time to go. Plenty of excitement for one decor party night.


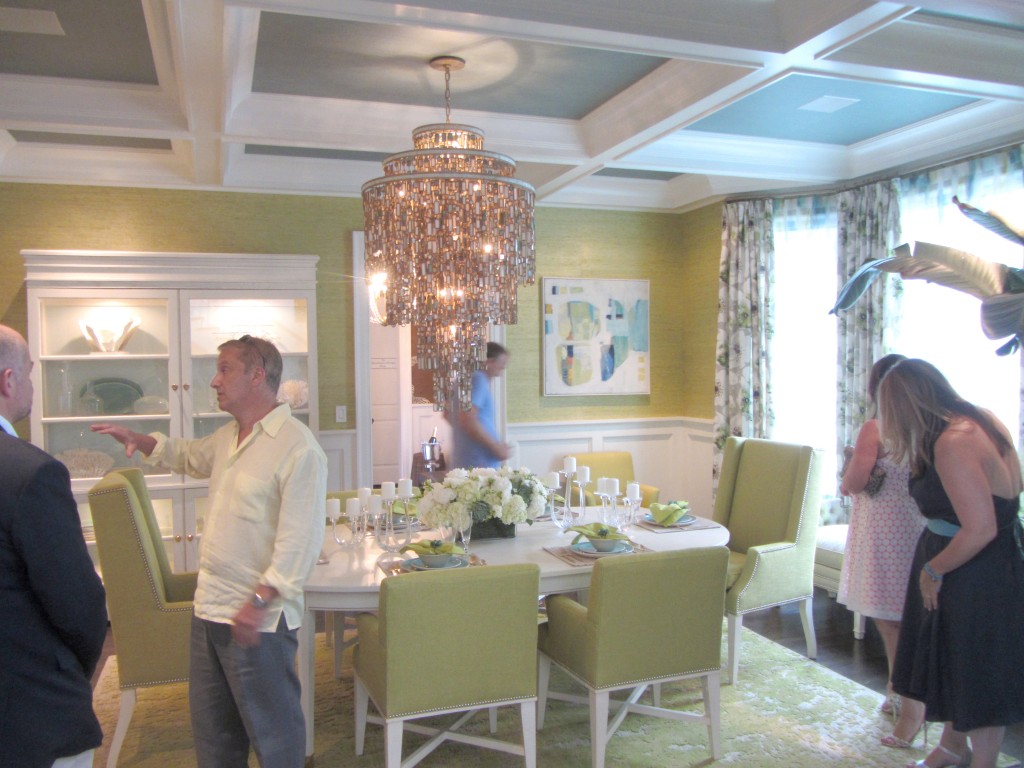
ABOVE: Lillian August‘s cheerful and punchy dining room. I love the painting on the back wall by Julie Headland.
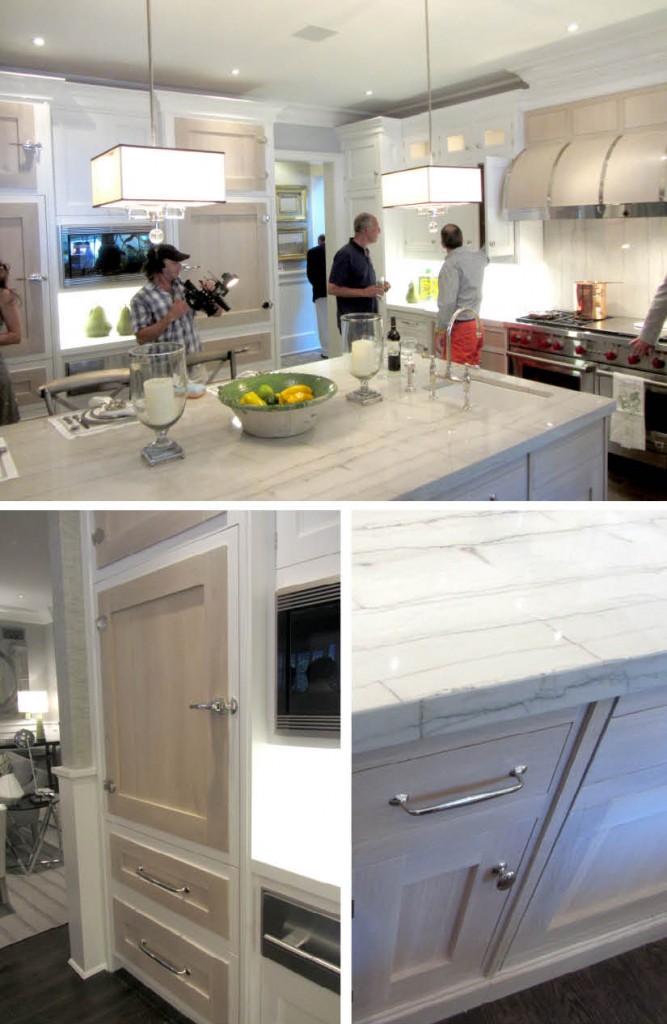
BELOW: Bakes and Company‘s kitchen with outrageous countertops and custom refrigerators and freezer drawers (shown bottom left). Hot!

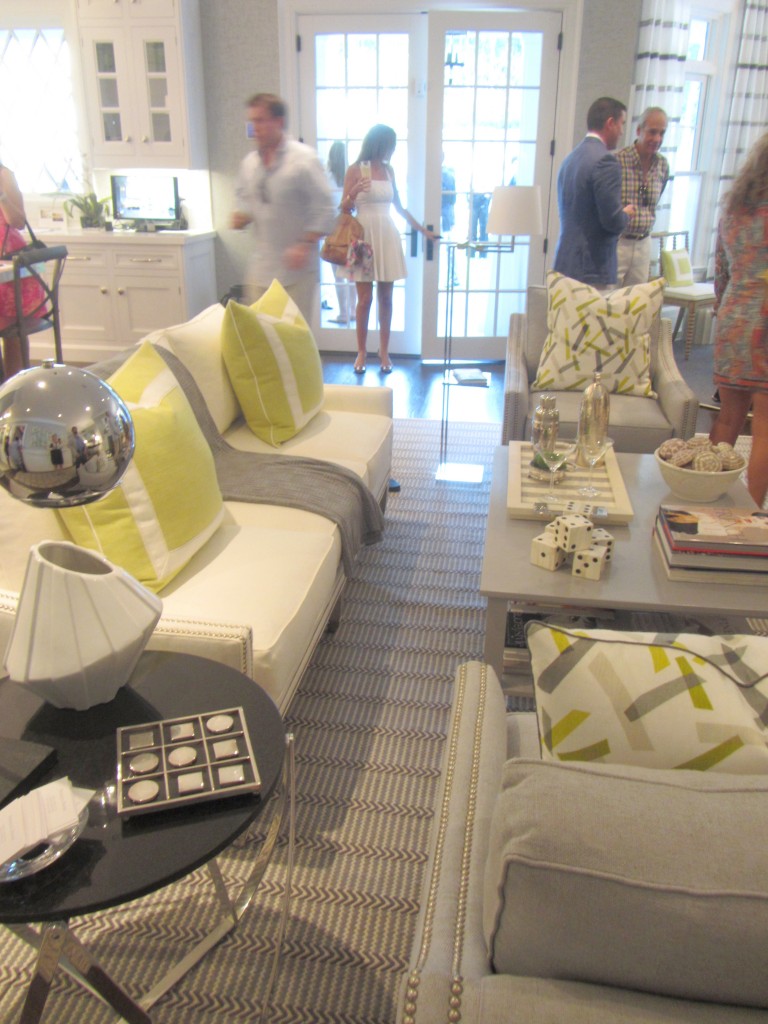
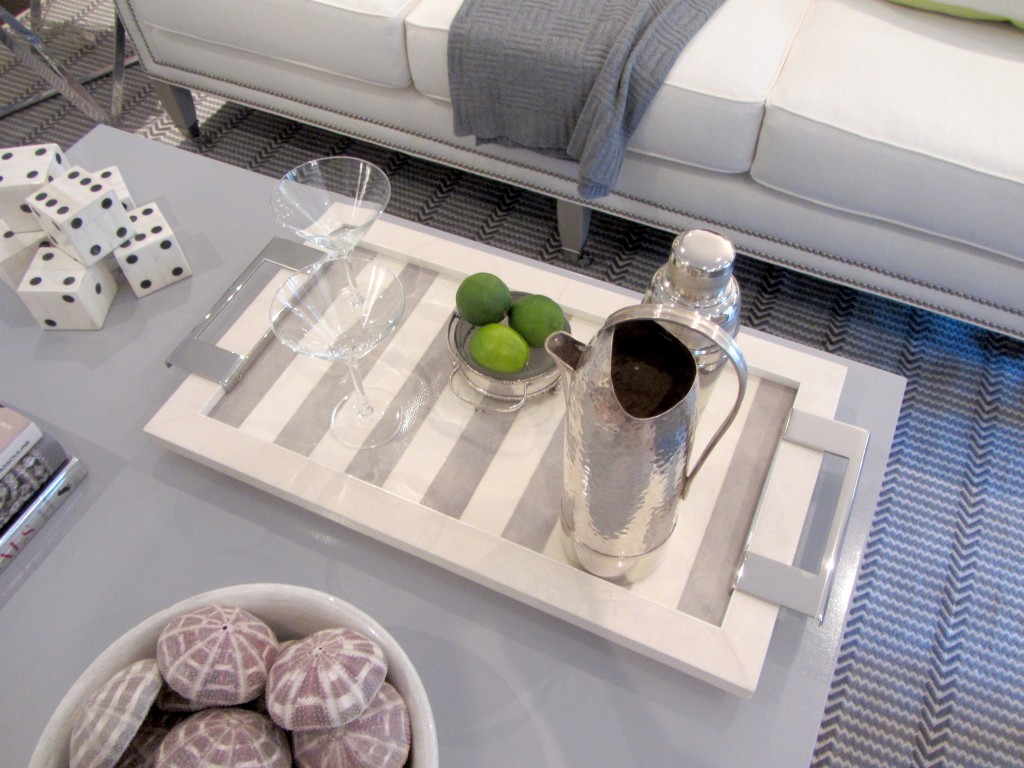
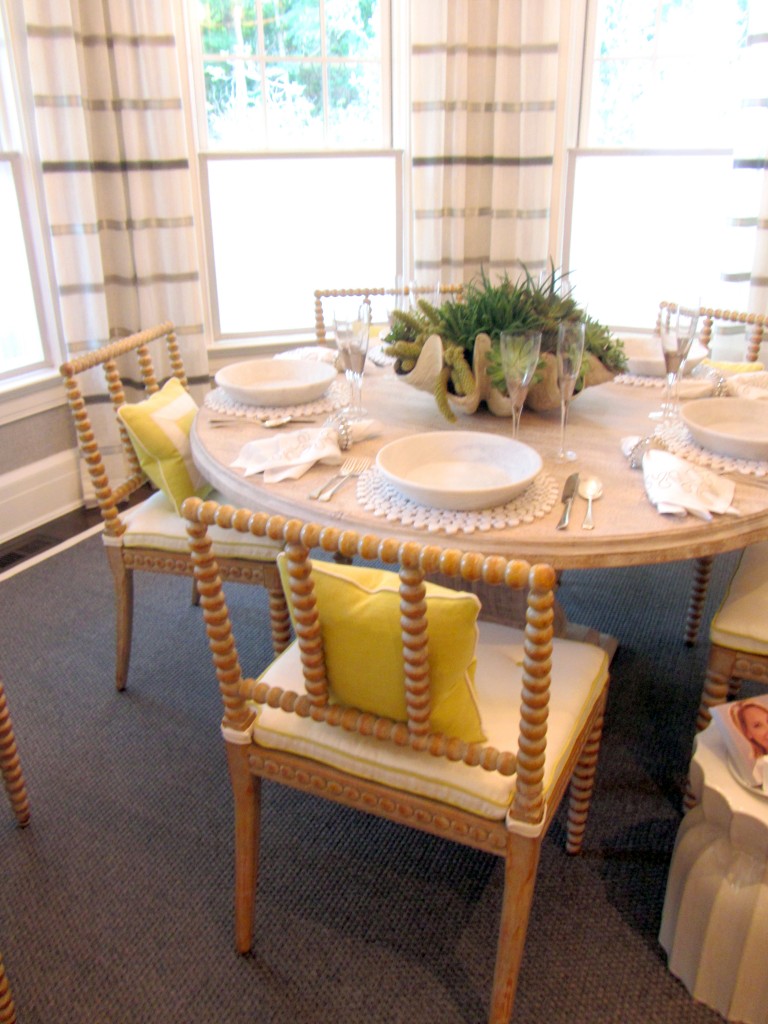
Below (3 photos) of Patricia Fisher Design‘s sitting area and breakfast nook. The saffron and light grey with pops of bright green were a refreshing and inviting combo.


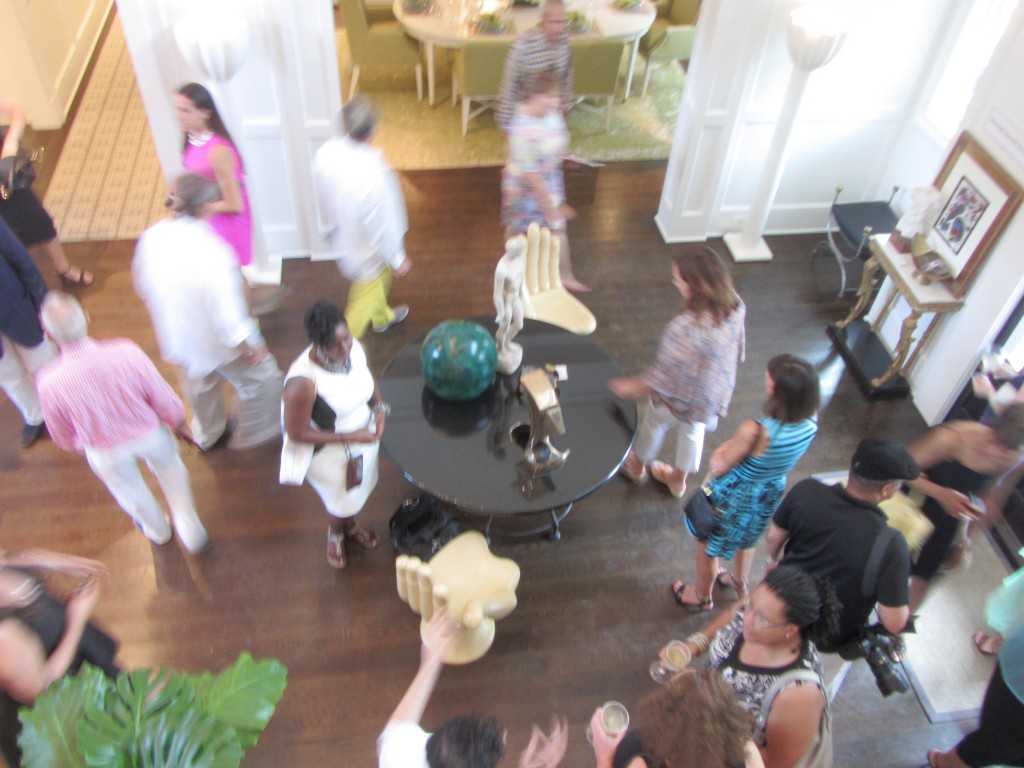
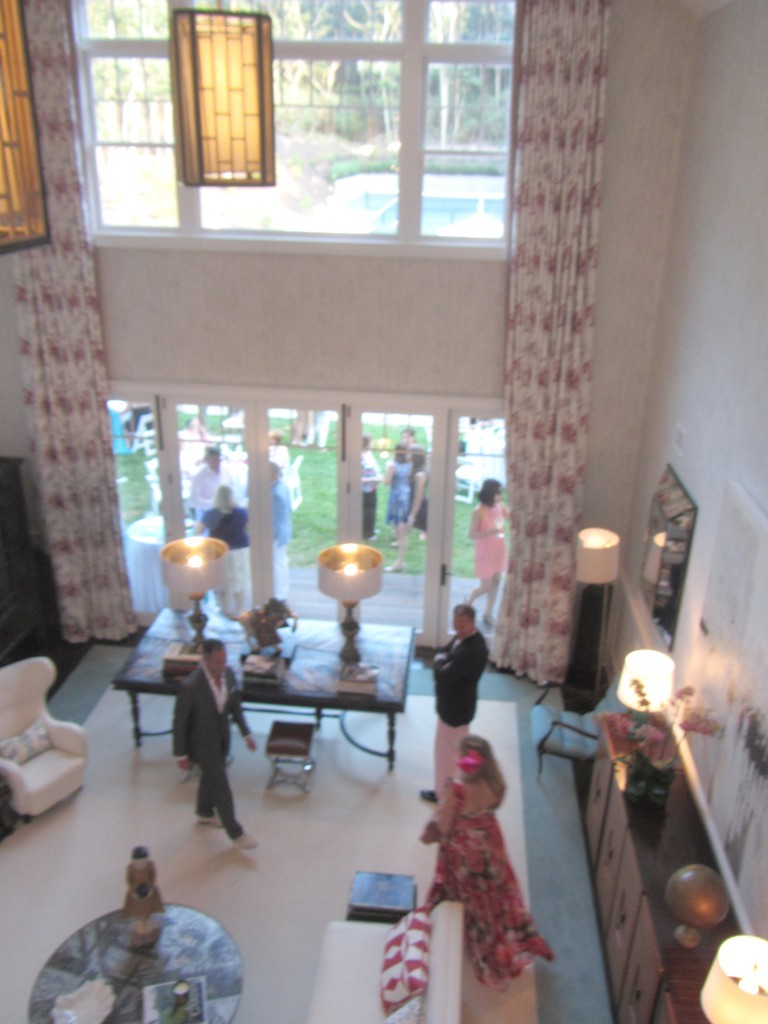
Below (2) photos taken from upstairs of the guests cruising through the entry foyer by Michael Herold Design, and the living room by Brian del Toro Inc.

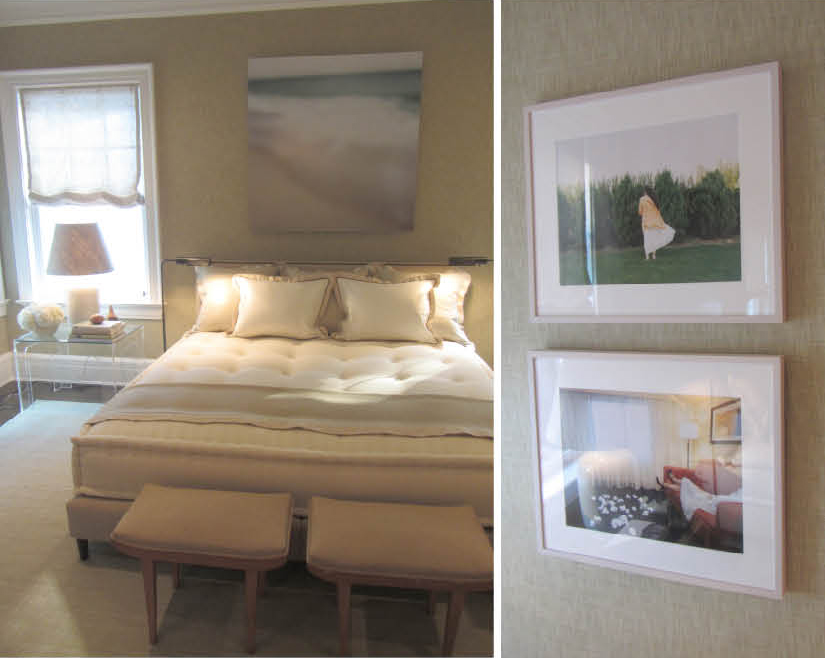
Brady Design‘s beautiful and serene guest room/tv room. The hand-crafted mattress upholstered in baby alpaca was the inspiration for the room, as it could be used as a lounge during the winter OR covered with sheets during the guest-ing season.

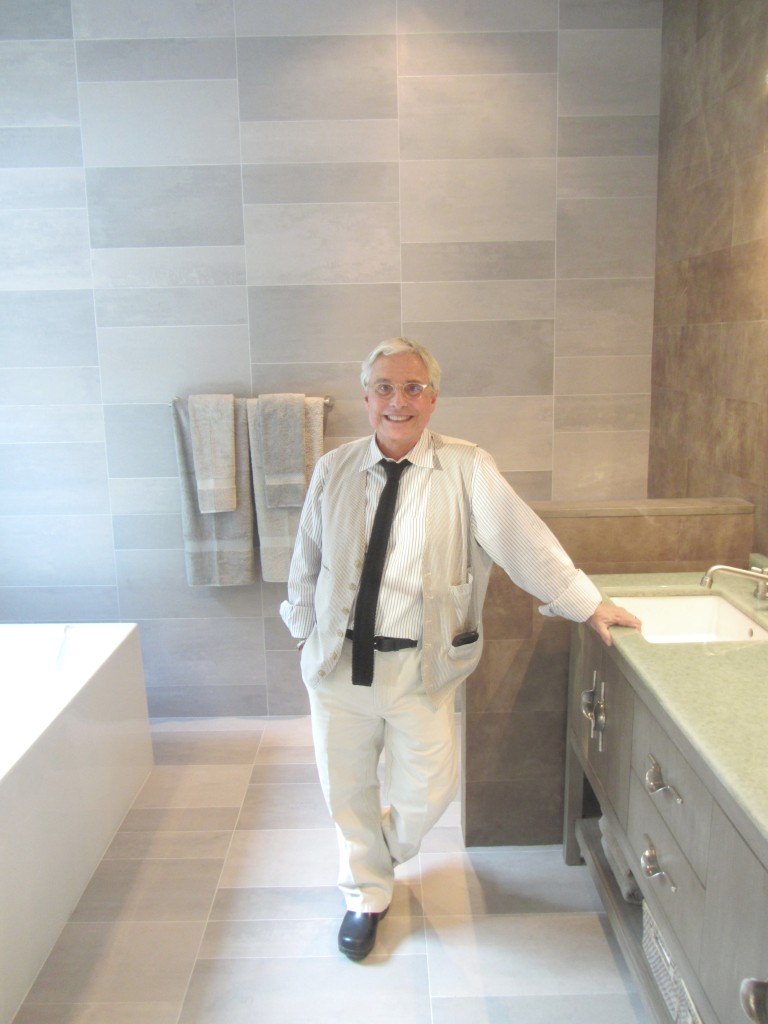
Alan Court & Associates‘s (Alan shown below) created a stunning guest bath with stone and leather walls! I had to touch.

Barbara Page Home‘s playful guest room overlooking the backyard had dramatic photography from Robin Rice Gallery

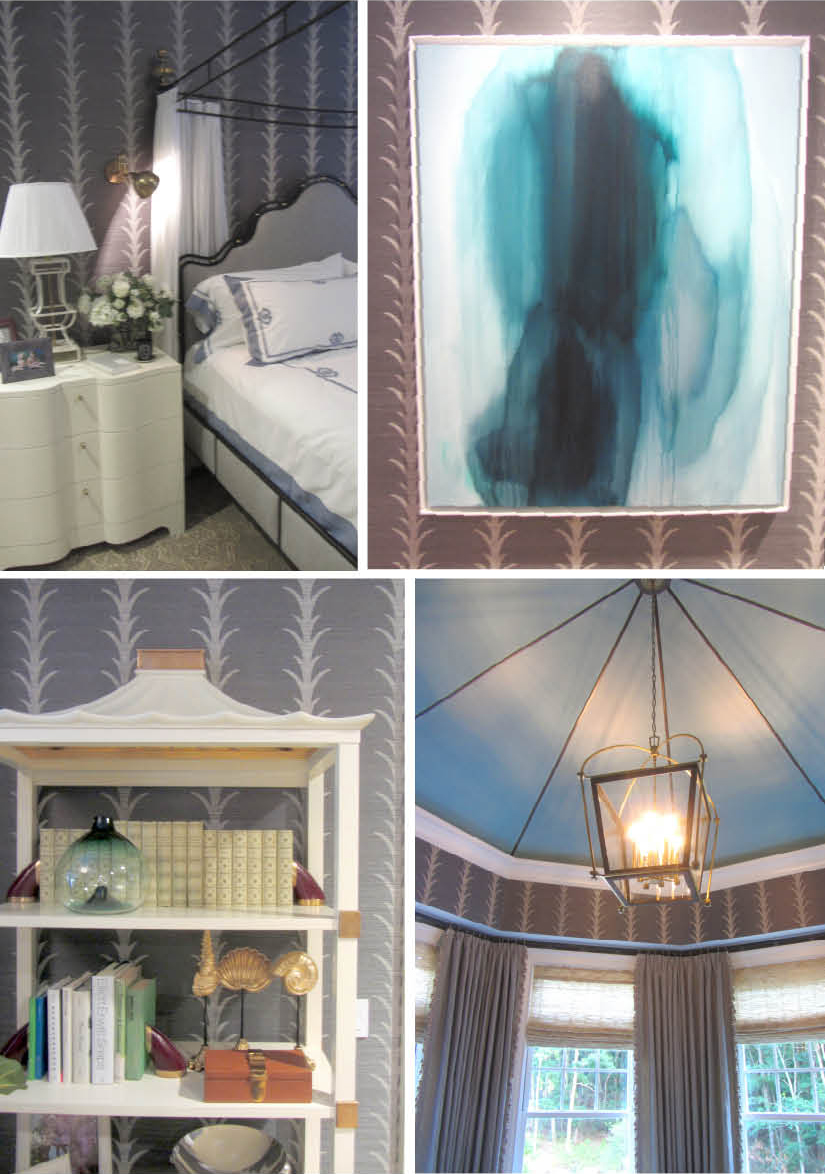
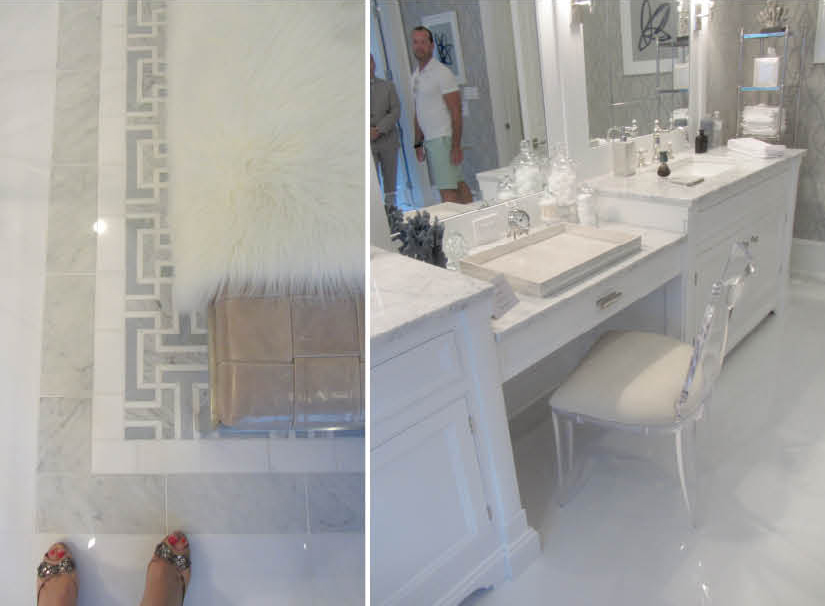
Celerie Kemble‘s master bedroom with charcoal seagrass walls and pops of turquoise and blue hues.
The charming Mr. Mario Buatta, before and after my chest shrug run-in. I guess he got too hot! Here’s a link to the piece I wrote about his book that comes out in September

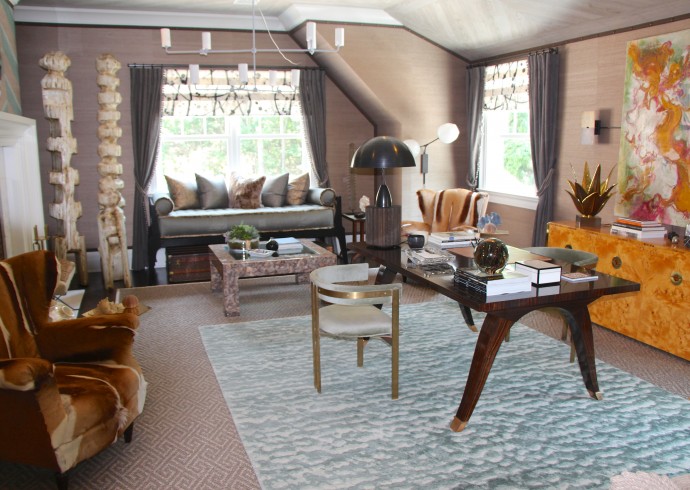
Below is my favorite room in the house, by Bradley Stephens, Stephens Design Group (photo courtesy of KDHamptons.com). These masculine quarters share a 2-sided fireplace with the master bedroom and the ceiling (though you can’t tell from the photo) covered in a fabulous, distressed-wood wallpaper. Bradley said it was a painstaking job, but added so much to the room that it was worth the effort. The room was eclectic and handsome and had a wonderful mix of art and artifacts, including an dissected lobster, similar to one I saw a few years back in the world-famous taxidermist, Deyrolle (one of my favorite places in Paris).

Michael Mariotti’s glamorous master bath with patterned seagrass walls, ornate tiling, and a beautiful leather bench with flocatti throw.

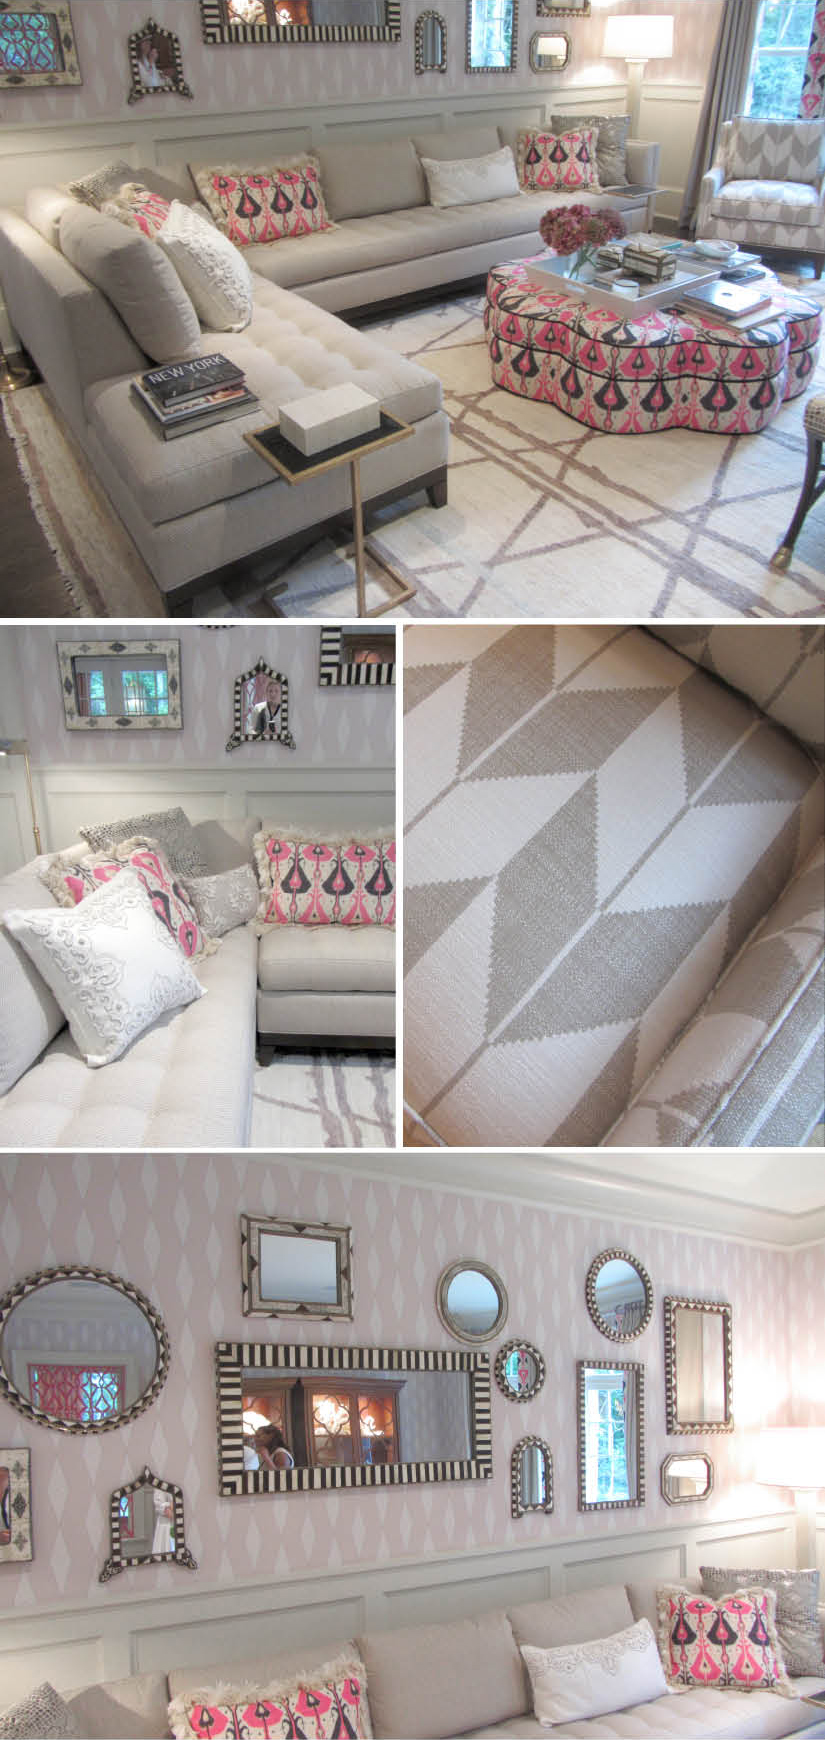
Sherrill Canet Interior’s Morroccan-inspired family room for Pearson (where all the furniture and textiles are from). Sherrill laid all the mirrors out on the ground in the middle of a market in Morrocco in order to visualize them in this comfortable and graphic room!

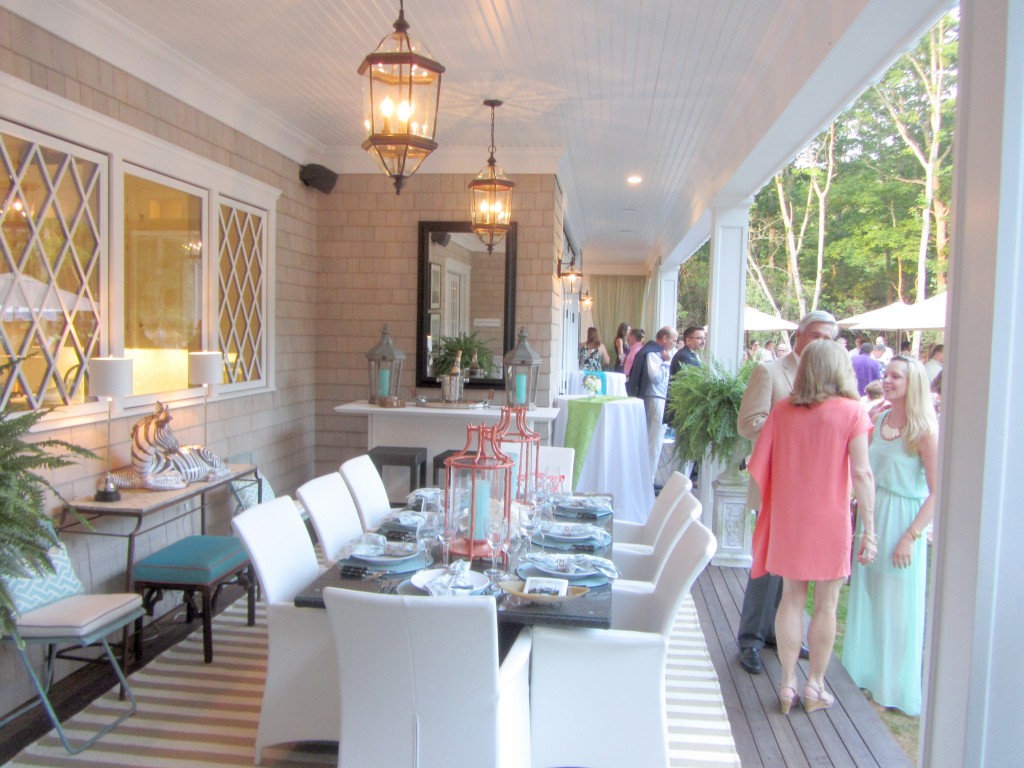
Ken Gemes’s casual outdoor dining area facing the backyard party

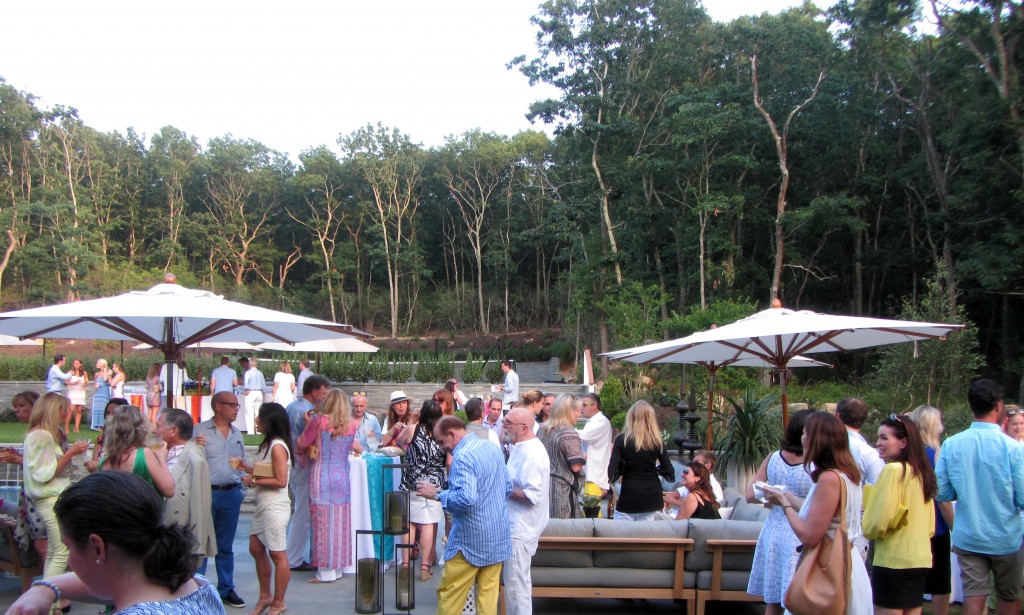
The lively outdoor party

One of the aforementioned fashion-foiling sprinklers (below left); and the guests running from the scene (below right). My sad, wet, bejeweled shoes (not shown)
Click here for Editor at Large’s video coverage of the event with Traditional Home’s stylish Tory Mellot (who I worked w/at Elle Decor) doing interviews.
To read about other fabulous Hamptons events (and laugh hysterically), check out my cousin Ted Kruckel’s most recent BizBash column, “This Year’s Hamptons Events: From the Sublime to the Ridiculous”

Creative Commons License
amerelife.com by Meredith McBride Kipp is licensed under a Creative Commons Attribution-NonCommercial-NoDerivs 3.0 Unported License.

© Meredith McBride Kipp and amerelife.com. Unauthorized use and/or duplication of this material without express and written permission from this blog’s author and/or owner is strictly prohibited. Excerpts and links may be used, provided that full and clear credit is given to Meredith McBride Kipp and amerelife.com with appropriate and specific direction to the original content.

Bring the Ikat to the Beach

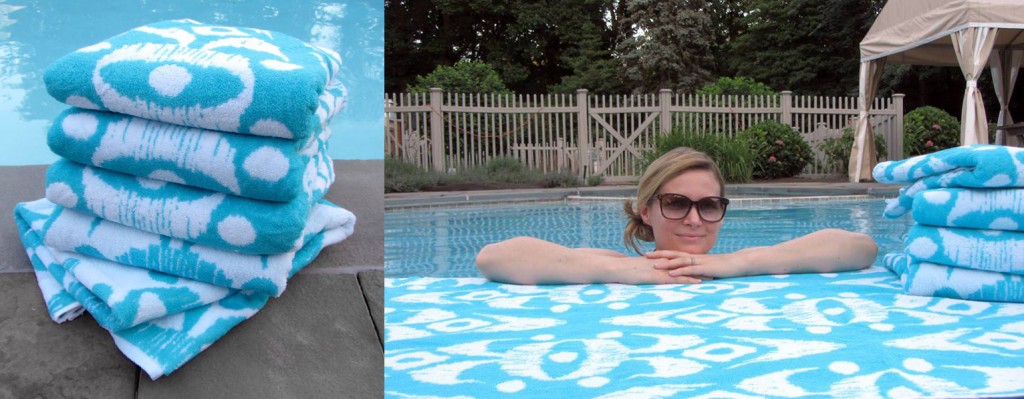
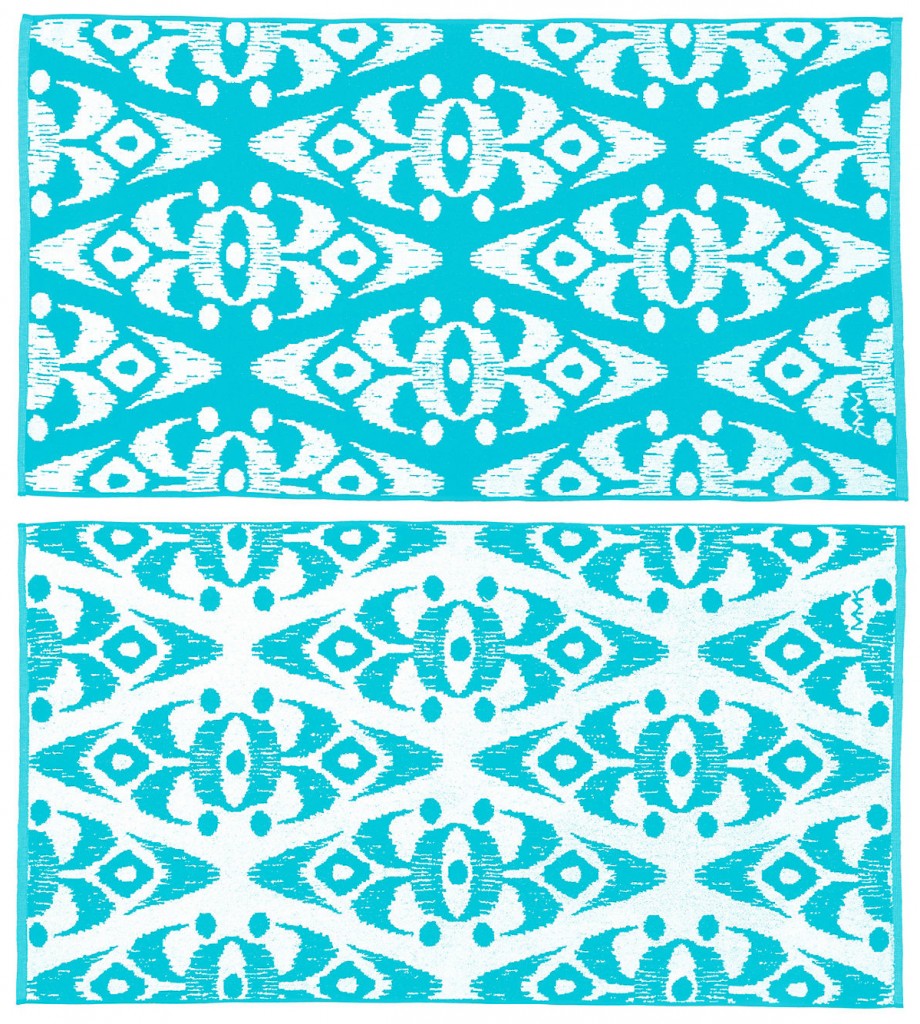
I’m so honored to announce that the glamorous online retailer, One Kings Lane, is featuring my ikat pattern for their Artist Edition Beach Towel Series this week! I custom designed the classically-inspired ikat pattern for them, and I think it looks just randy in aqua! They look great folded, rolled, over a towel bar, peeking out of a beach bag, wrapped around your hips, wrapped around your kid, and so on!

Click here to purchase on One Kings Lane.
The sale ends tomorrow, Friday July 12, at 11am and will not be available after that.

Let me know what you think! xx Mere

Thoughts on the Viceroy Anguilla


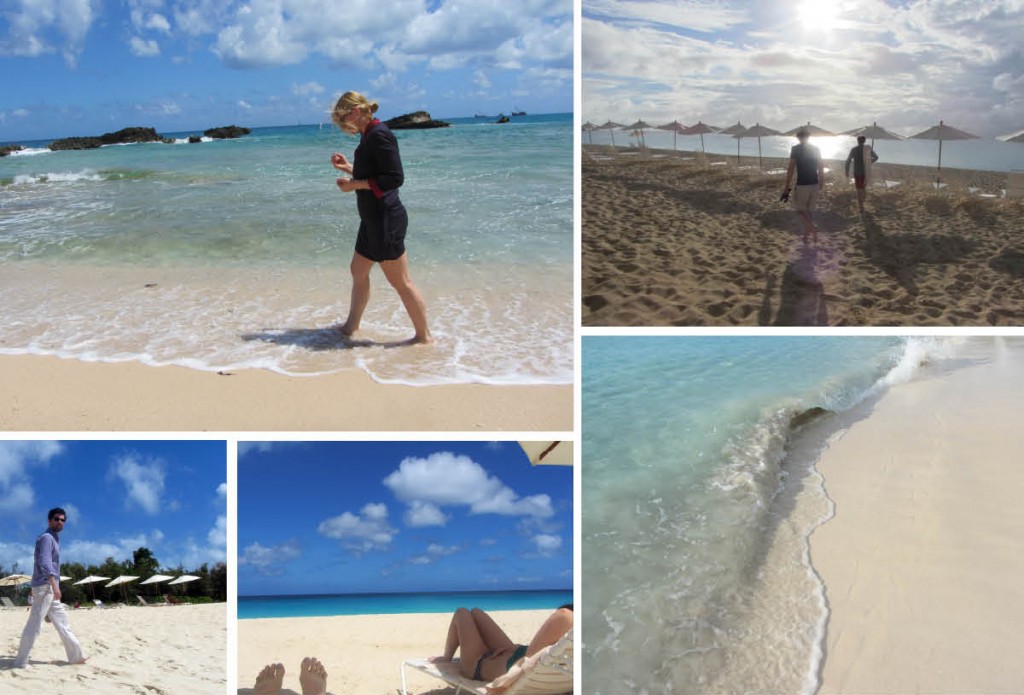
Four years ago, my husband & I spent an idyllic honeymoon in Anguilla (at the Cap Juluca resort)—a deluxe slice of paradise in the British West Indies—so to say I’d been aching to get back since is the understatement of a lifetime. I had also yet to see the much-anticipated and very controversial Viceroy Anguilla; that happens to be decorated by one of my favorite designers, Kelly Wearstler. After recently meeting with the sweet, petit duo (Kelly Wearstler & mogul husband Brad Korzan)—while doing some creative consulting for them—I was even more compelled.

Getting to Anguilla is an adventure on it’s own. If you don’t have a PJ or a small fortune to fly to the island directly, you can (do what I’ve done twice now) and catch a reasonable direct flight to St. Martin. You land in the Dutch side of St. Martin, go through customs, take a half-hour cab to the French side of the same island, go through customs, take a 45-min boat ride to Anguilla, go through British customs, and then you’ve got a 15-minute drive. The streets are not well marked and everyone gives you directions by way of “large tree” or “old stone church”, but there are so few roads, it’s almost impossible to get lost.

The Viceroy is at the west end of the island in an area called Meads Bay. After about 15 minutes of dusty roads speckled with modest shelters, the sight of the grand Viceroy entrance is a startling one. In perfect mid-century-glam Wearstler-fashion, large slabs of marble, smooth waterfalls and pedestals-of-fire lure you into the enclave and deliver instant chills: of fear and excitement.
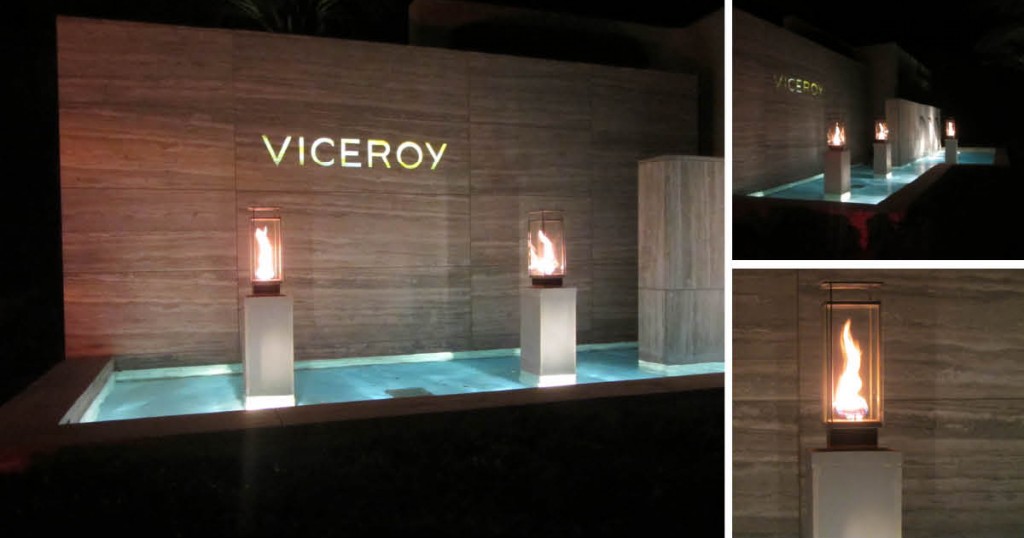
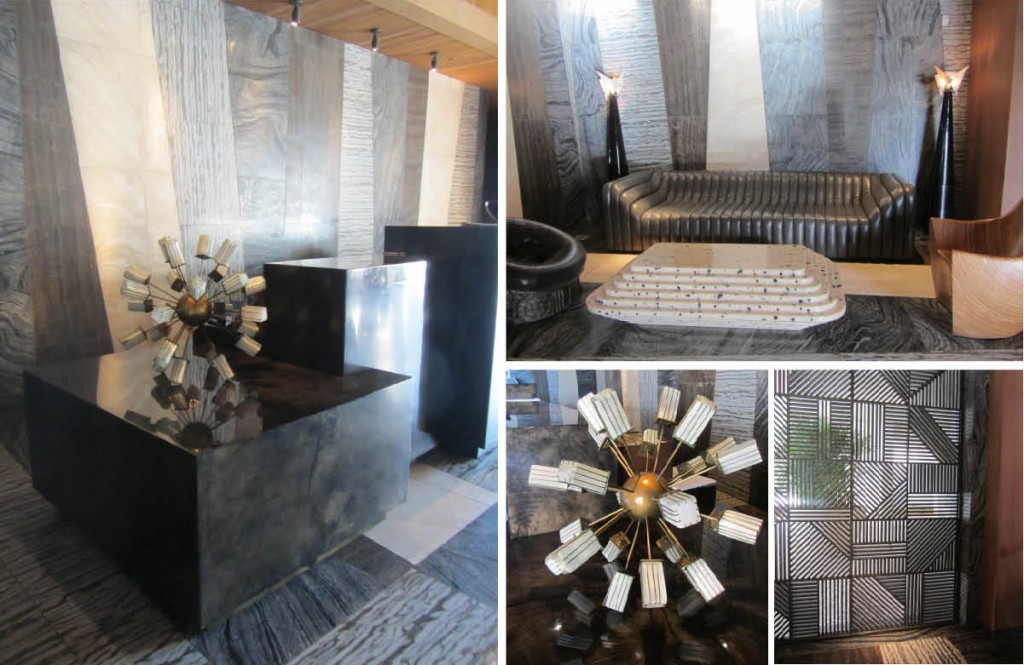
Upon arrival, you are swallowed into a dark, ornate lobby—robust with decorative bobbles—and then spat out into a vast, sun-drenched colonnade of empire palms flanked by two marble halls that direct you out to the water’s edge. Jutting out from the top of a craggy reef cliff, sits the head of the Viceroy. Waves crash up against the rocks from below and (if you’re a Bond girl) you can’t help but think ‘ooh, villain lair!’.

According to forthcoming Anguillans, this particular part of the main structure was so impulsively built that during storms large waves pound right into the main restaurant, Coba, and flood the space—damaging the exquisite decor and custom furniture—regularly. Adventurous diners have reportedly requested the up-close experience at the risk of being abandoned and soaked. This phenomenon comes as pure amusement to some locals whom dreaded the construction of the resort from the get-go: native Anguillans and visitors alike covet Anguilla for it’s serenity and small-town-security, so such a large compound threatened the volume of outsiders coming to the island.
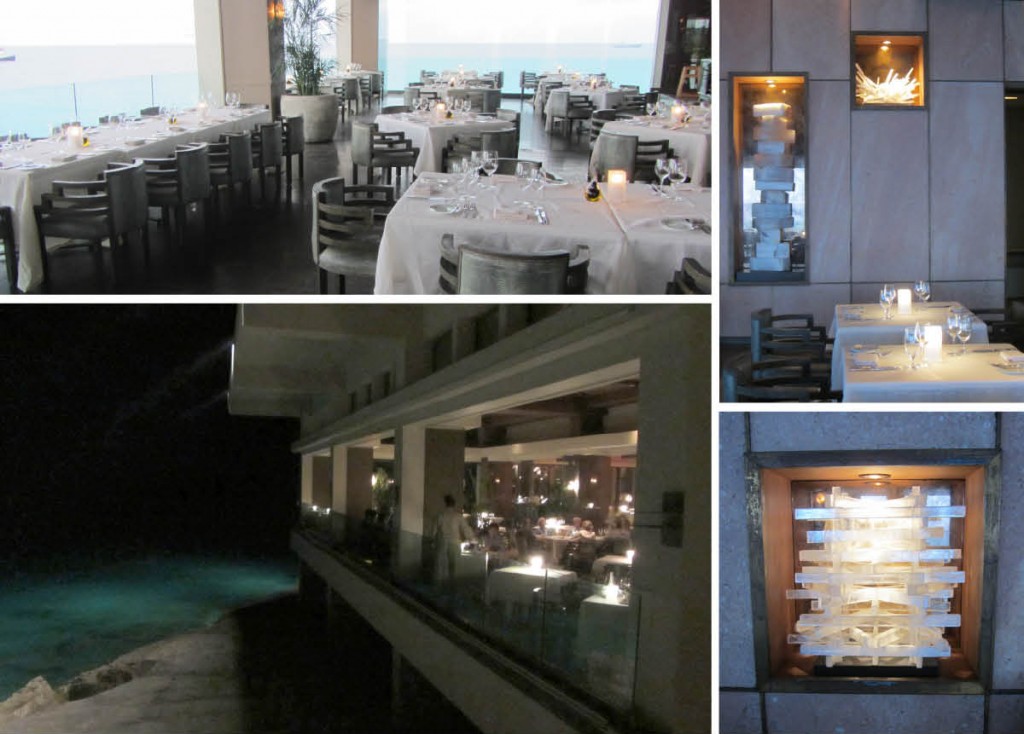
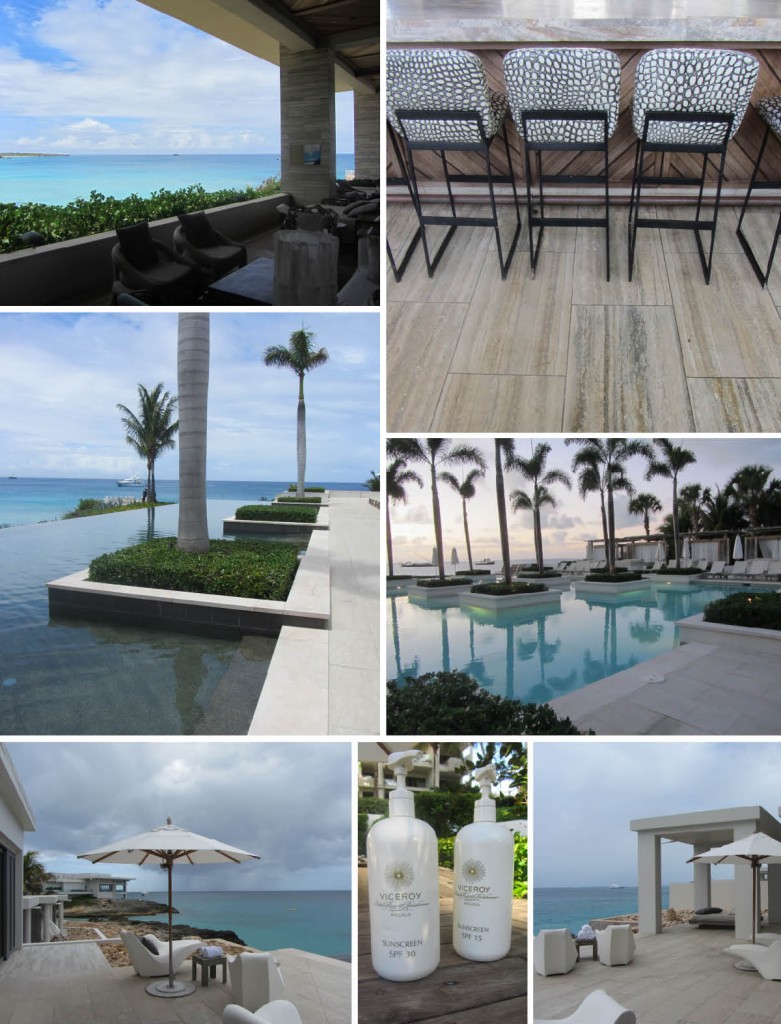
A cucumber-infused-vodka bloody mary (in an alligator-skin seat at the Sunset Lounge bar) and the alluring infinity pool nearby will help you forget this dichotomy immediately. As it turns out, the private pool-side cabanas and spa are not to be missed either. And if you get a spa treatment, you are welcome to use to the private patio & pool that overlooks the ocean: it’s incredibly sexy! I’d also recommend dinner at Coba: the view is to die for, the food is excellent, and the sound of the crashing waves is energizing.
A member of the delightful and attentive staff gave us a tour of the lodging options at the resort. Each room and suite is meticulously decorated a la Wearstler, and with great attention to privacy. The Residences (villas & townhouse) are delicious, multi-suite, beach-front homes equipped with pools, to-die-for outdoor showers, gigantic bathrooms, and gorgeous professional kitchens.
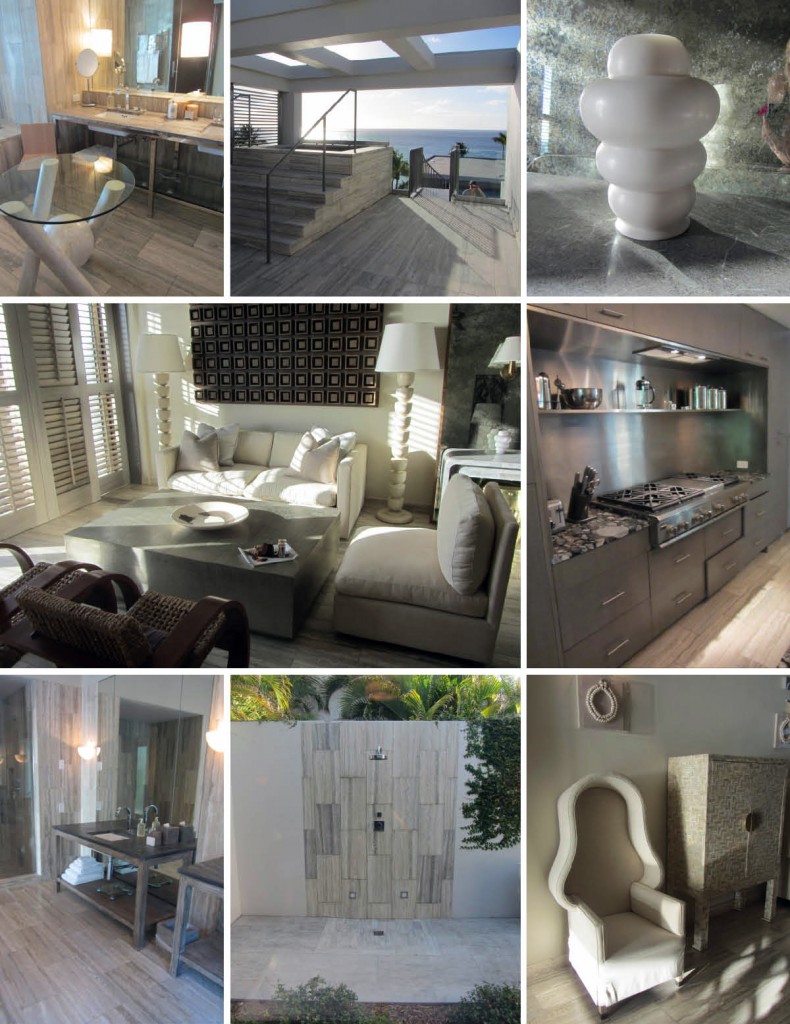
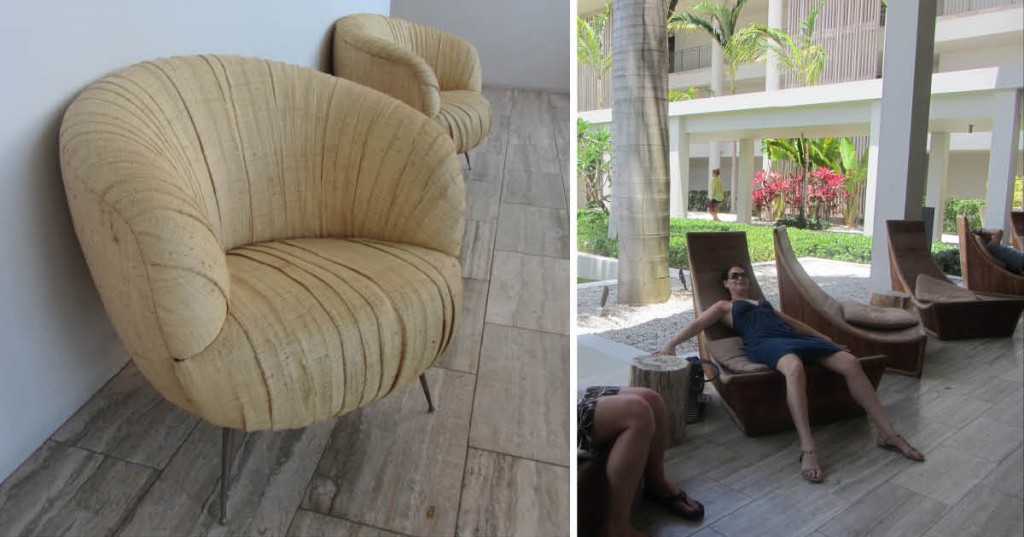
Although we found that most of the seating in the resort is challenging to actually sit in (exhibit A, shown below), I was pleased to see the beachy-take on some of Wearstler’s signature pieces—like the seagrass-upholstery on her typically leather Souffle Chair. I was impressed that she was not only able to blend her rock ‘n roll signature with the natural surroundings, but also make them sing. With all the opulent lounging, dining, bathing and recreational options at The Viceroy Anguilla, the guests will never want for more (nor a flight home)… but maybe just one more cucumber-infused bloody mary…
MY ANGUILLA RECOMMENDATIONS:
Rental car: Bass Car Rental. They can meet you at your hotel or ferry. Beats catching super-pricey cabs everywhere. And it’s so fun to be able to freely explore the whole island.
Fishing: If you like hard-core deep-sea fishing, take a day-trip with local fisherman, “Nature Boy” Webster. His family (of Irish decent, though you’d never know from his sun-kissed skin) has been living on Anguilla for 300 years. He’s a fascinating guy to spend the day with.
Dining: Don’t miss Veya, Straw Hat, Blanchard’sBlanchard’s Beach Shack (is the best bang for buck on the island). Le Bon Pain Bakery makes the best cafe latte, baguettes, sandwiches and pastries on the island.
Don’t Miss: Bankie Banx Dune Preserve beach bungalow/bar. It’s the funkiest place you’ll ever see (treehouse meets shipwreck) and Bankie is one cool ass, sexy ol’ rasta. They regularly have live music, and make great drinks & bbq.
Sandy Island: an incredibly beautiful & tiny island about a half mile off the shore of Anguilla. Pack a book, some serious sunblock, snorkeling gear and your wallet and go for the afternoon. They have a hut with a nearly-full bar and a great seafood menu, but other than that, it’s just sand and water. You can catch a shuttle boat from the dock in Sandy Ground (ask the bar tender at Johnno’s: they will keep you rum-punched-up until the boat arrives to pick you up).

Creative Commons License
amerelife.com by Meredith McBride Kipp is licensed under a Creative Commons Attribution-NonCommercial-NoDerivs 3.0 Unported License.

© Meredith McBride Kipp and amerelife.com. Unauthorized use and/or duplication of this material without express and written permission from this blog’s author and/or owner is strictly prohibited. Excerpts and links may be used, provided that full and clear credit is given to Meredith McBride Kipp and amerelife.com with appropriate and specific direction to the original content.

Tea is for Travel

Photography by Laura Moss. Styling by me, Meredith McBride Kipp.


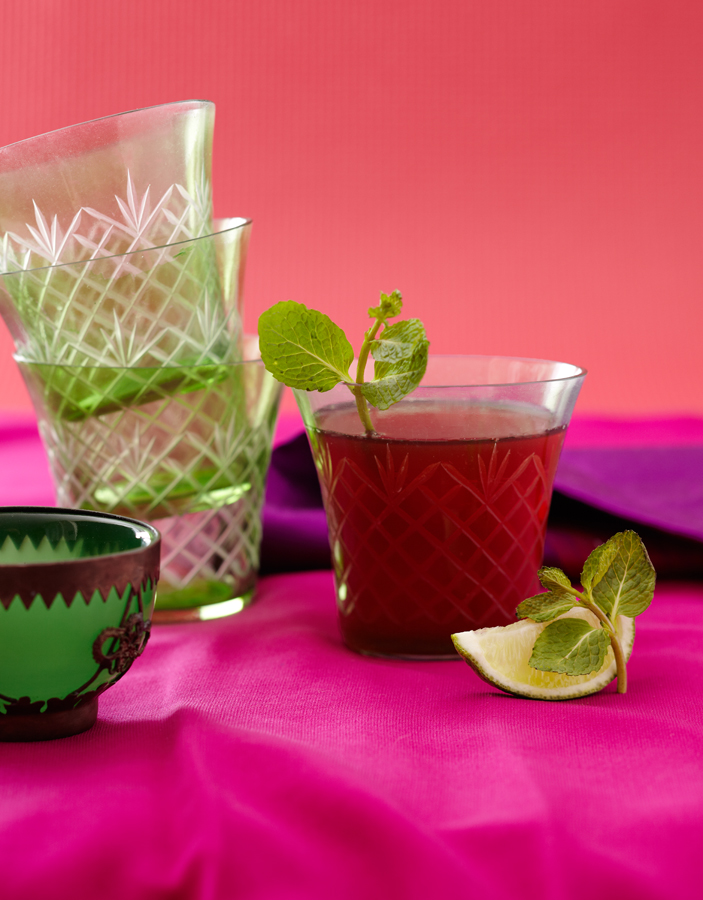
It’s the time of year again when most of us are aching for exotic excursions and warm weather. I came up with a way to savor both; sans security lines at the airport.
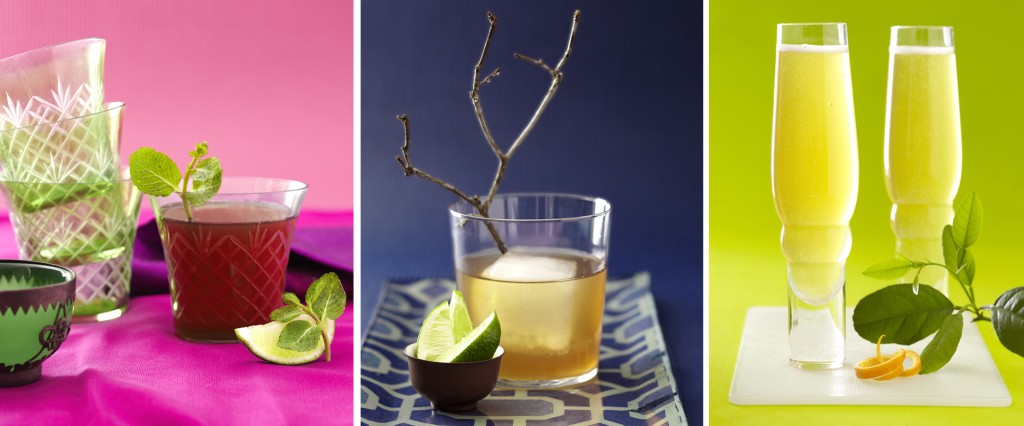
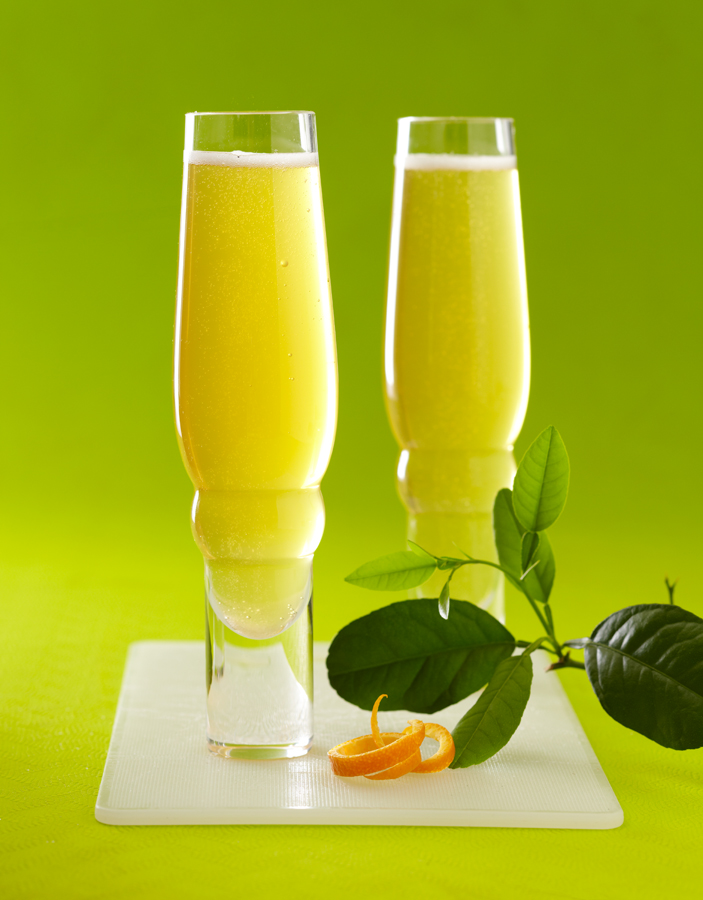
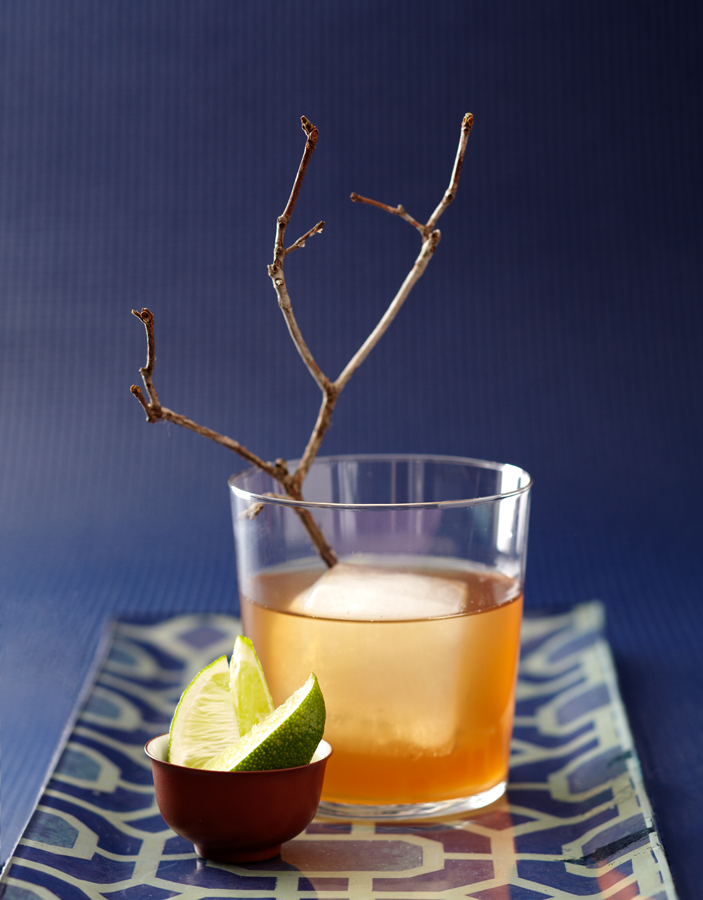
Travel to Morocco, China and the Philippines via these delicious tea-based cocktails that I have painstakingly (wink) tinkered with and tested.

Let your summer out early with these colors and flavors and ENJOY!
(and leave a comment if you have suggestions on the recipes)

Moroccan Mint Marteani

travel inspiration: Morocco

For the tea:
5 cups water
4 bags of black tea
4 tablespoons brown sugar
Bring water to boil and then add the tea and brown sugar. Let tea cool, then transfer it to the refrigerator to cool completely.

For the cocktial:
4 ice cubes
16 fresh mint leaves
2 cups tea
2 tablespoons Rose’s lime juice
1 cup vodka
Shake ice and mint leaves in a cocktail shaker for a minute or long enough to bruise the mint. Add remaining ingredients and shake. Pour into glass and garnish with lime and fresh mint sprig. makes 3-4 drinks

Green Tea Fizz

travel inspiration:  China

For the tea:
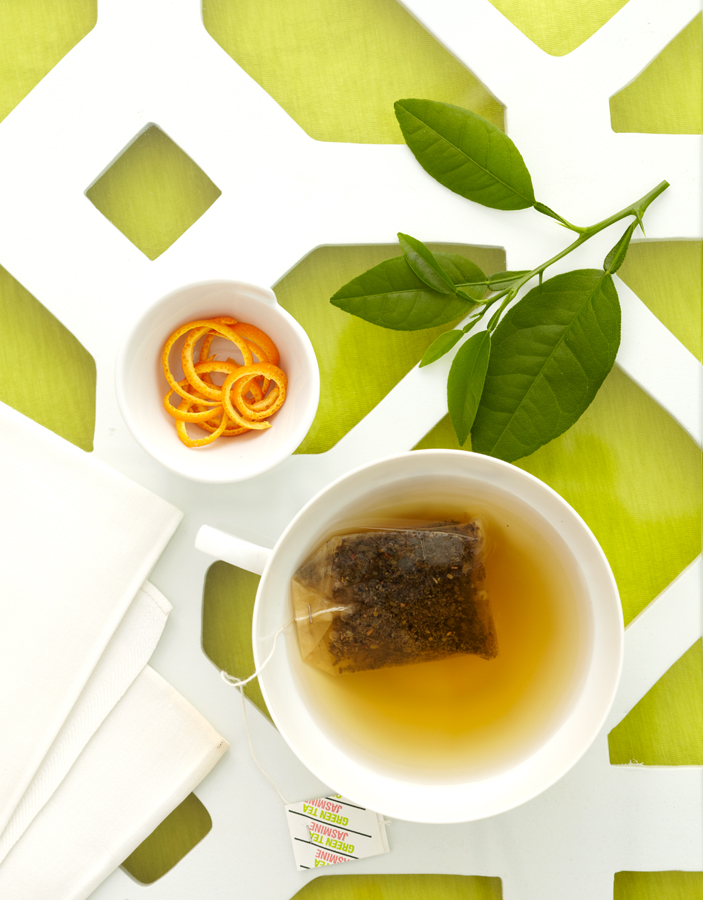
Brew a pot of green tea (I used FAUCHON‘s Le Jasmin Chung Hao). Sweeten it with honey to taste (I used honey from a local beekeeper). Cool the tea in the freezer until starting to frost (you want this drink icy-cold and refreshing).

For the cocktial:
In each glass, pour equal parts green tea and (also extremely chilled) prosecco. Garnish with a squeeze of cumquat or orange, rub the rim with the rind, and serve with a curled sliver of rind on the rim. makes 6-7 drinks


Salabat (Ginger Tea) Mule

travel inspiration:  the Philippines

For the tea:
3 cups water
3 tablespoons brown sugar
5-inch piece of fresh ginger, peeled and thinly sliced into discs (grate a little bit of it too)
Combine all ingredients in a small saucepan over high heat and bring to a boil. Reduce heat to low, then simmer for 10 minutes. Cool tea then transfer it to the refrigerator to cool completely.

For the cocktial:
2 ounces Goslings dark rum
4 ounces cooled and strained Salabat ginger tea
Club Soda
Lime
In a glass filled with ice, add the rum and ginger tea. Top off with club soda, and a squeeze of lime. makes 1 drink

Photography by Laura Moss. Styling by me, Meredith McBride Kipp.

Creative Commons License
amerelife.com by Meredith McBride Kipp is licensed under a Creative Commons Attribution-NonCommercial-NoDerivs 3.0 Unported License.

© Meredith McBride Kipp and amerelife.com. Unauthorized use and/or duplication of this material without express and written permission from this blog’s author and/or owner is strictly prohibited. Excerpts and links may be used, provided that full and clear credit is given to Meredith McBride Kipp and amerelife.com with appropriate and specific direction to the original content.
DIY Shagreen: Console Transformation


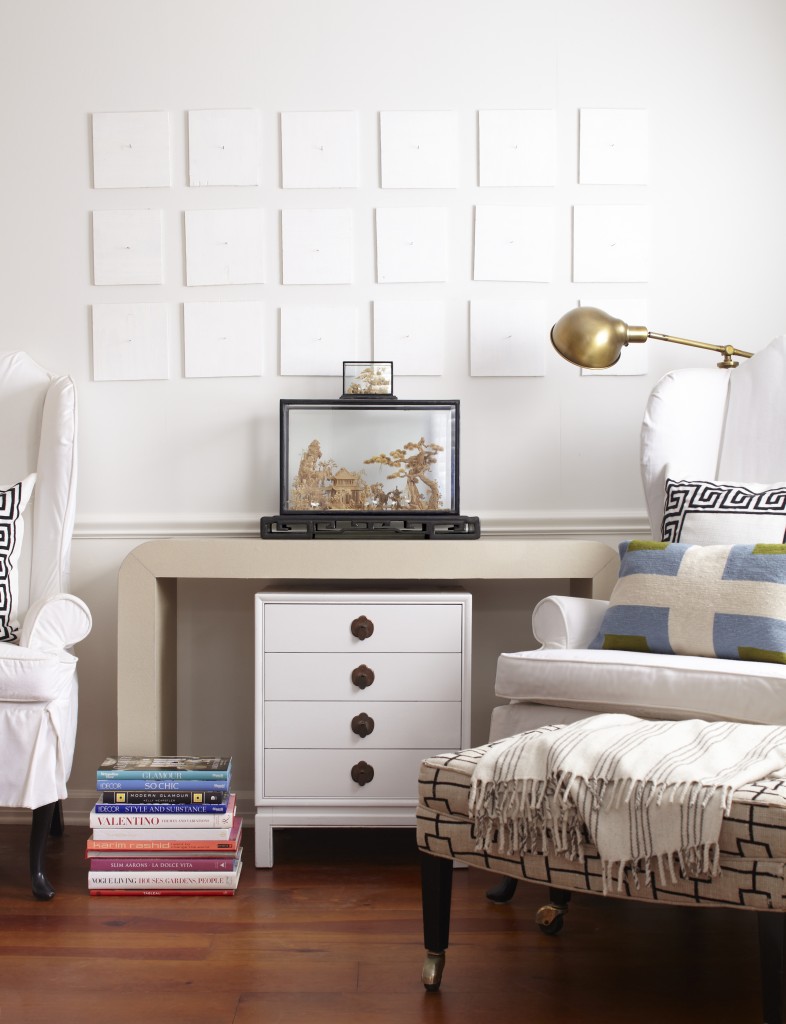
Photo by Laura Moss. Interior design & styling by me, Meredith McBride Kipp.

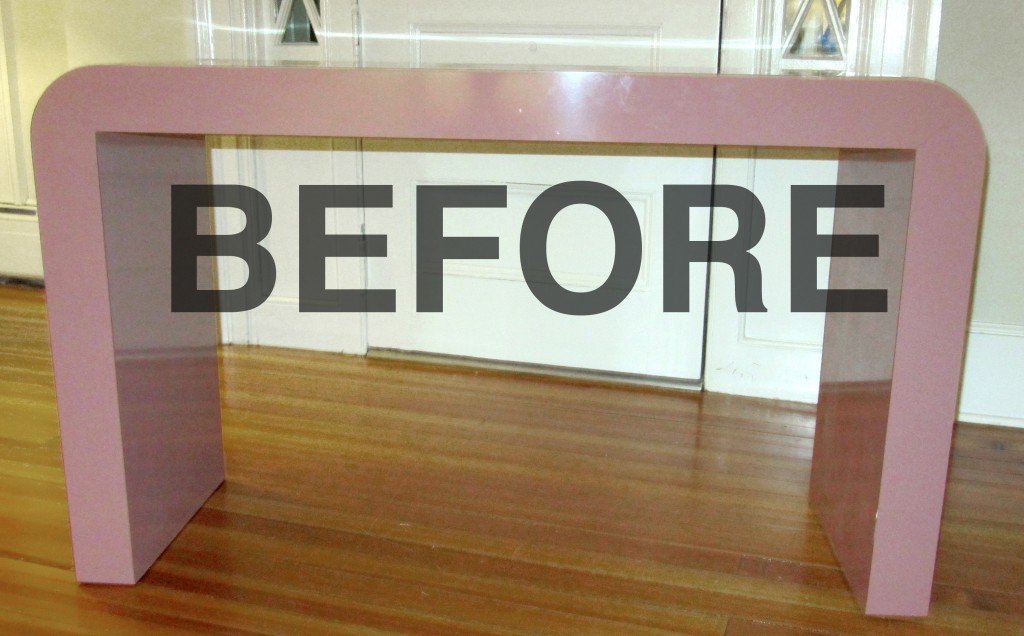
I found this great console table recently and dragged it home. It’s got great lines and would look perfect covered or lacquered in just about anything (except mauve). I envisioned covering it in real shagreen (j’adore shagreen) but my lack of diamond-tipped tools and experience steered me towards a nice faux alternative (they have alligator, ostrich and other textures too)!

If you dare to DIY—avoir patience! Here’s how I did it:
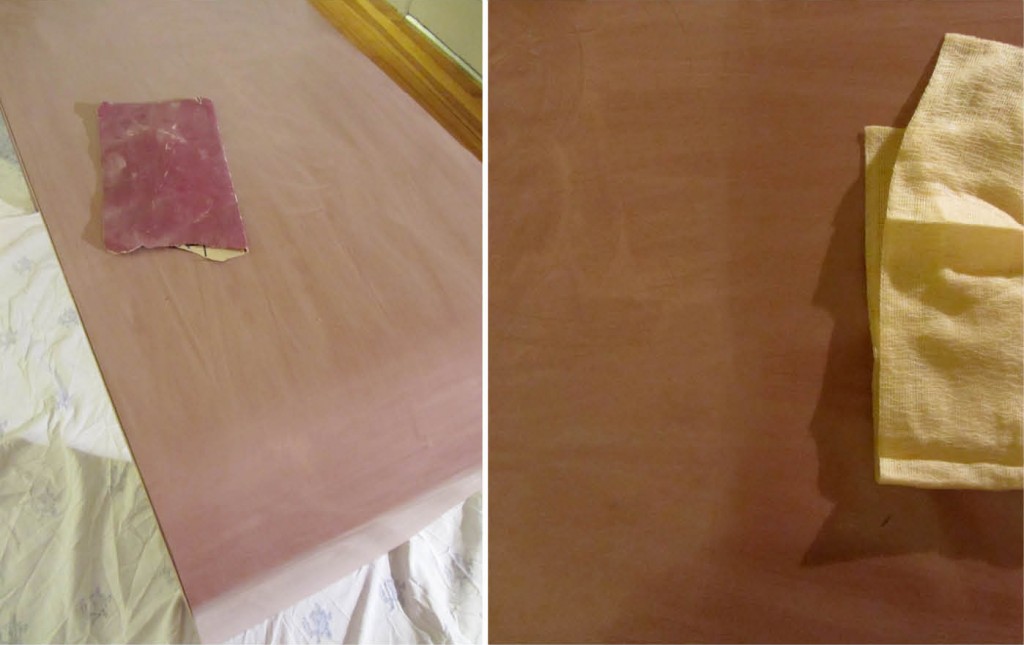
1. I cleaned the table thoroughly to remove all oils, dirt, etc. Then, sanded the entire table with a fine grit paper (I would go a little heavier next time: the more surface texture you can create the better) and wiped it down with a tack cloth: much better than cleaning again because you don’t want to add moisture to the surface you are about to adhere to.
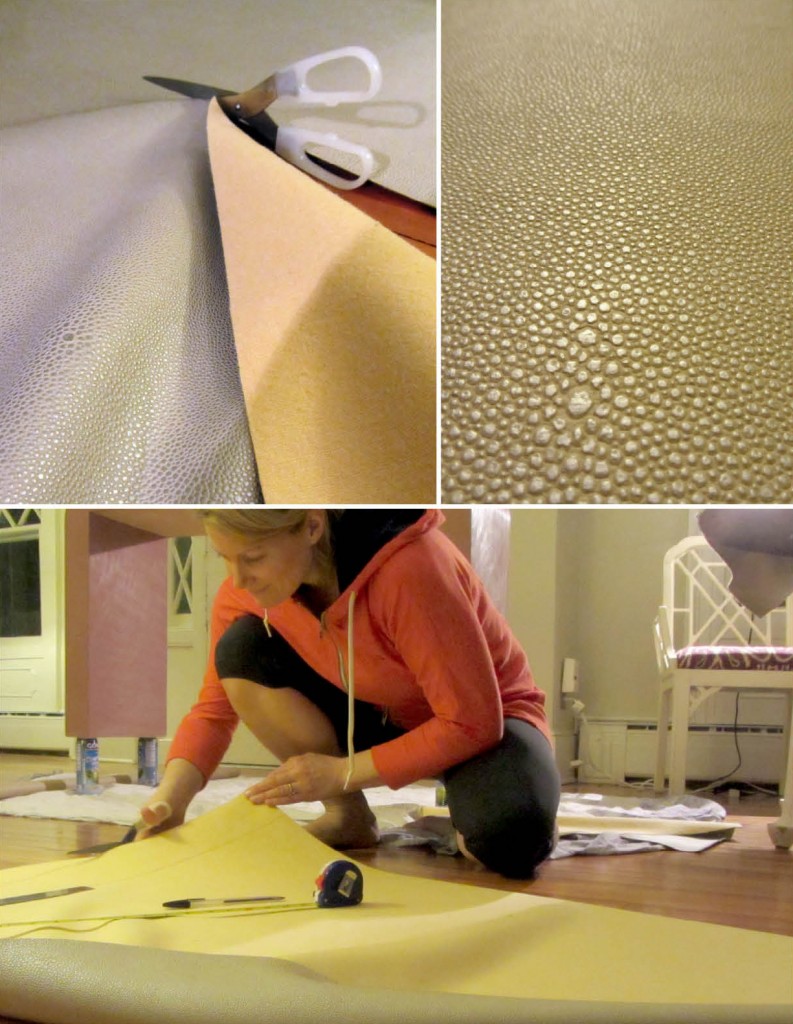
2. I measured out all my leather pieces (with a little excess) and cut them with scissors. If you’re going to cut the pieces to precise dimensions, I’d use an exacto and cutting mat. If you are using a textured fabric or leather, make sure you center your pattern before you cut your pieces.
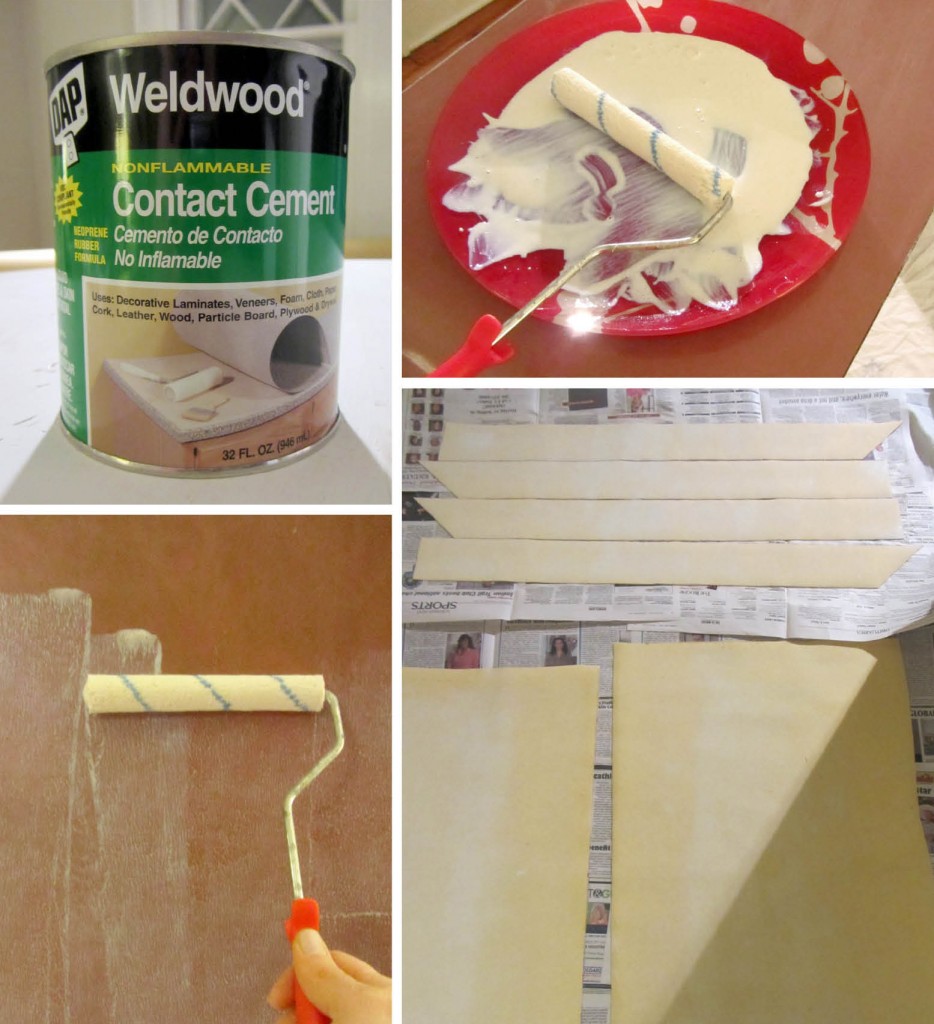
3. After stirring the DAP Weldwood Contact Cement (follow the directions well), I poured it into a glass tray (easy-wash surface)—for my mini-roller—and applied it generously to all surfaces of the table as well as the backs of all the pre-cut leather pieces.
4. After letting it “set for over 40 mins”, I attempted to apply all the pieces, but had little to no luck bonding leather-to-table. I went to bed completely irate: for not doing it the easy way from the get go (glue gun, staple gun, heavy duty spray adhesive: my usual). To my surprise and delight,  I awoke to surfaces that actually bonded! They had just needed more cure time. From there it was easy…
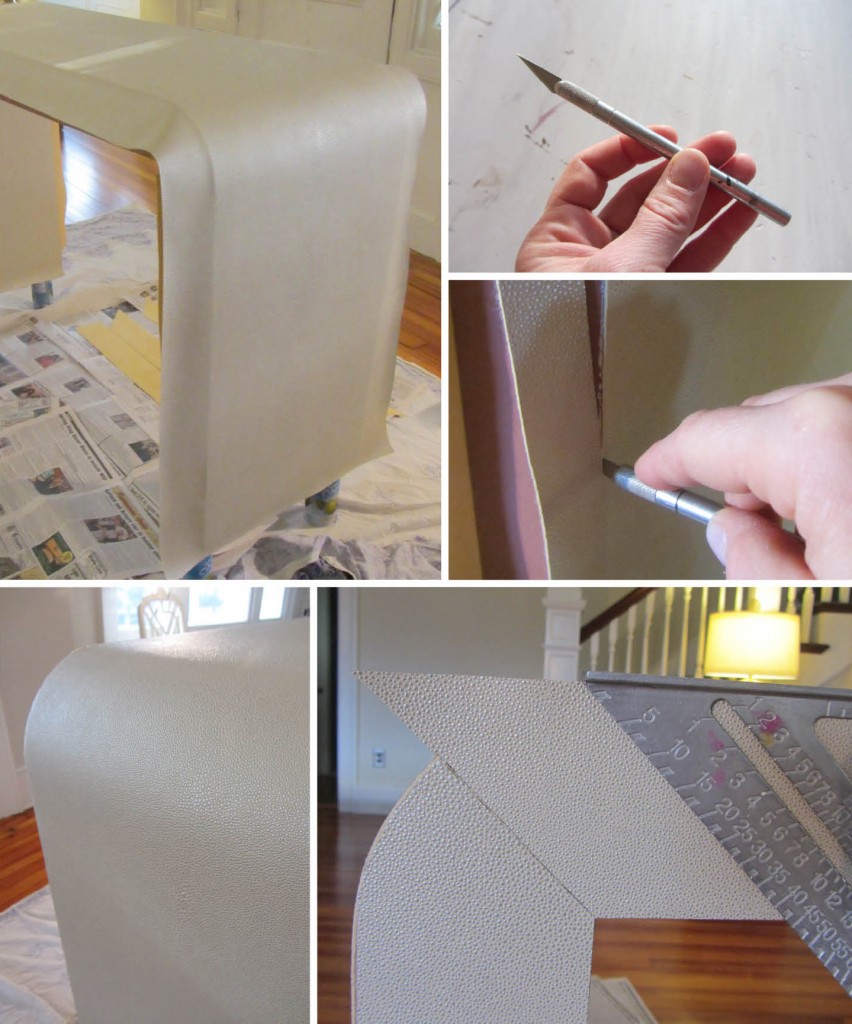
5. I aligned and bonded all the leather surfaces and trimmed them with a sharp exacto (always & often change your blades!), using the table itself as my straight-edge. The material cut like butter.
6. I cut the 45-degree angles with a proper metal angle (after learning the hard way on the now “back” of the table) and trimmed off all the excess.
7. I reached out to my leather expert cousin, Ted Kruckel, at Gigi New York (where all of my favorite accessories are from) for recommendations on what to use to finish the edges with. He recommended I use Basic Adhesives for custom-matched leather edge paint. Since I wanted to finish this project asap— so I could share w/y’all immediately— I decided to custom-mix acrylic t-shirt paint instead (same material I’m almost positive), and I painstakingly hand-painted all the edges. This gave it the finished, deluxe look I desired. et Voila: free to fabulous in less than 24 hrs…
Creative Commons License
amerelife.com by Meredith McBride Kipp is licensed under a Creative Commons Attribution-NonCommercial-NoDerivs 3.0 Unported License.

© Meredith McBride Kipp and amerelife.com. Unauthorized use and/or duplication of this material without express and written permission from this blog’s author and/or owner is strictly prohibited. Excerpts and links may be used, provided that full and clear credit is given to Meredith McBride Kipp and amerelife.com with appropriate and specific direction to the original content.