Recreational Herb

010_overall1_004b_herb
If you’re anything like my husband and me, you are already booking up your weekend with projects and perhaps even picking up some materials on your way home from work. Here’s a quick and easy DIY for your kitchen that will give you lots of satisfaction and good bang for buck.

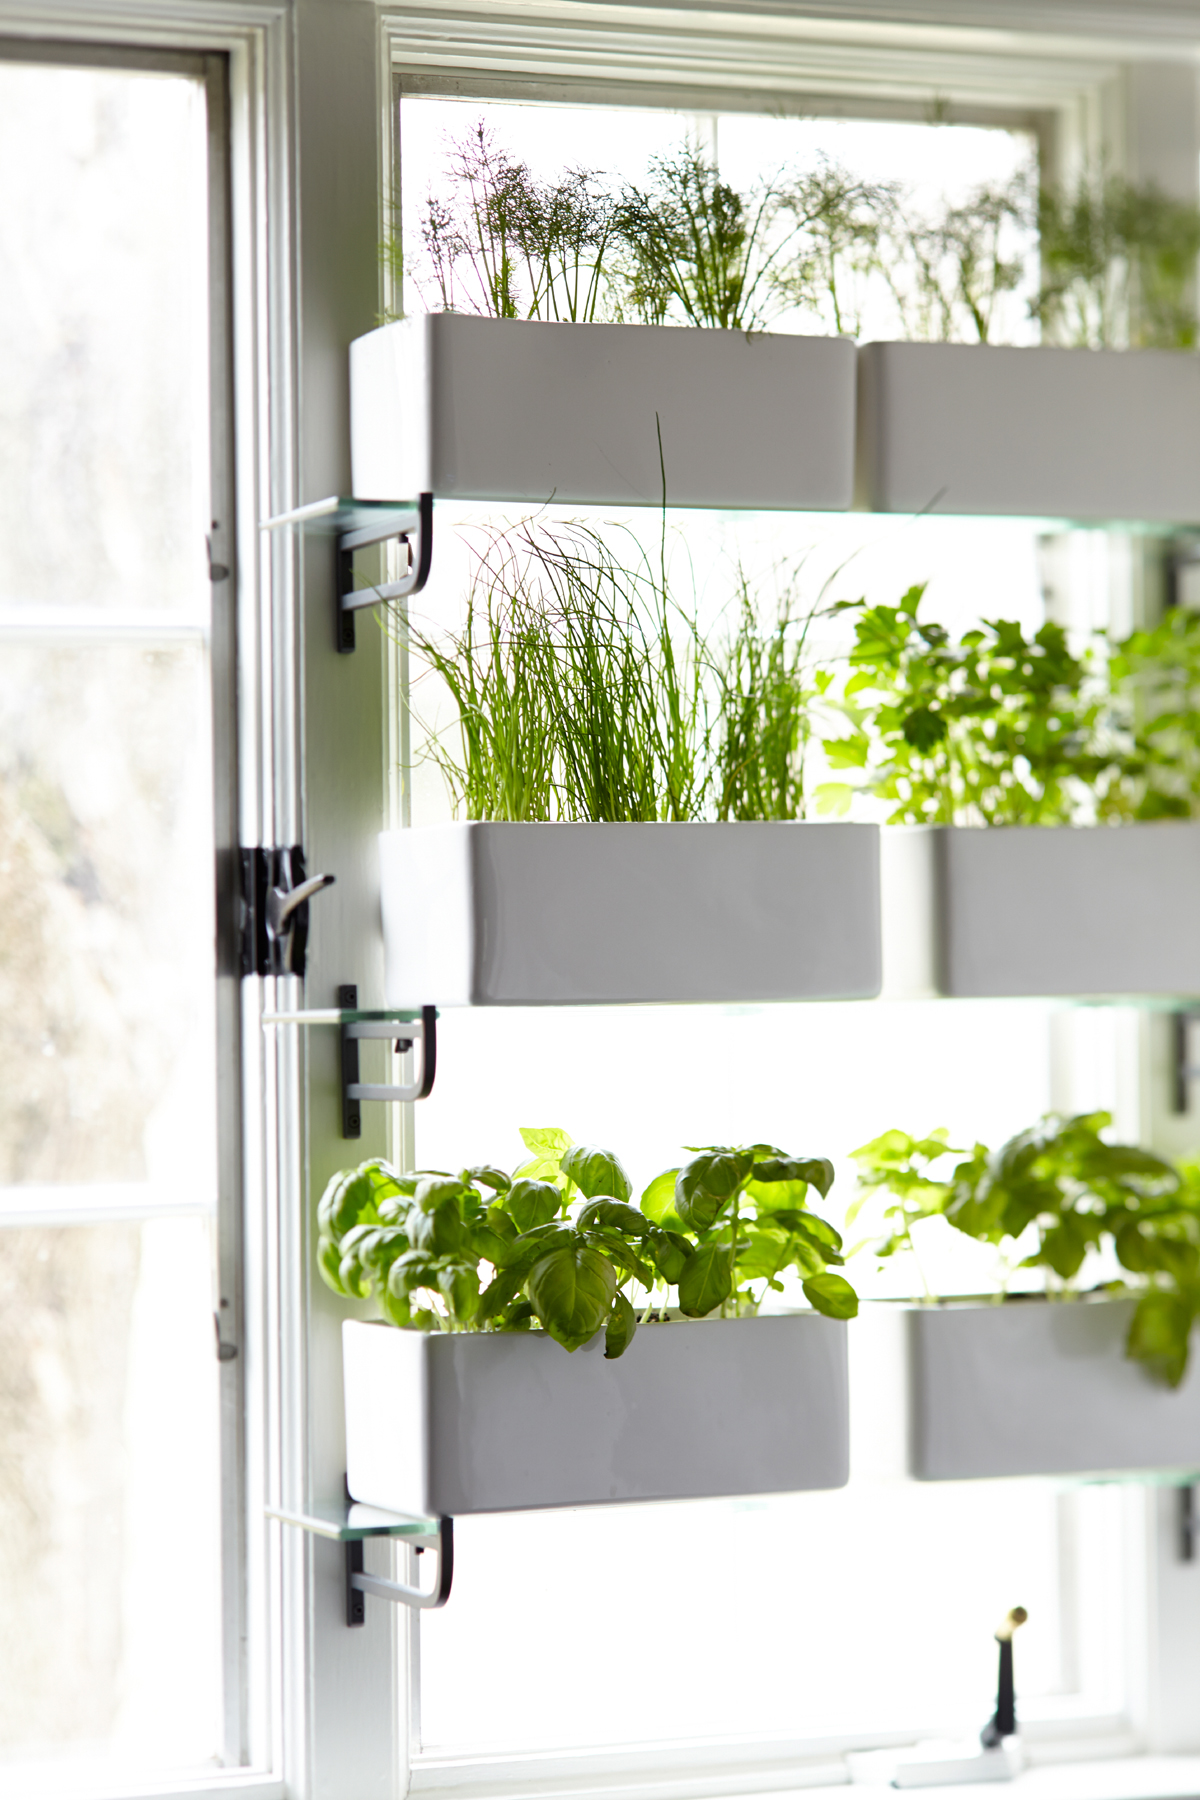
We wanted fresh herbs on hand for all our cooking but don’t like the look of an over-crowded window sill nor did we want to install one of those greenhouse windows because—while luscious from the inside—they look completely tragic from the outside. So I came up with this simple solution—glass bathroom shelves with rectangular planters—and my husband sourced the below materials for a chic, minimalist, and bountiful kitchen herb garden.

Would be a wonderful way to bring greenery (and a little privacy) to a bath or bedroom window as well…they don’t need to be herbs!

Have a wonderful weekend and happy projecting!

Photography by Laura Moss
Glass shelves are 23 5/8″ wide HJÄLMAREN from IKEA and were $18/ea.
The 10x4x5″ ceramic containers we used were similar to this one, $7/ea.

006_herbplanter1_004

Born Again Kitchen

010_overall1_004b

Interior Design by Meredith McBride Kipp & Ryerson Kipp
Photography by Laura Moss
Shoot Styling by Karin Olsen

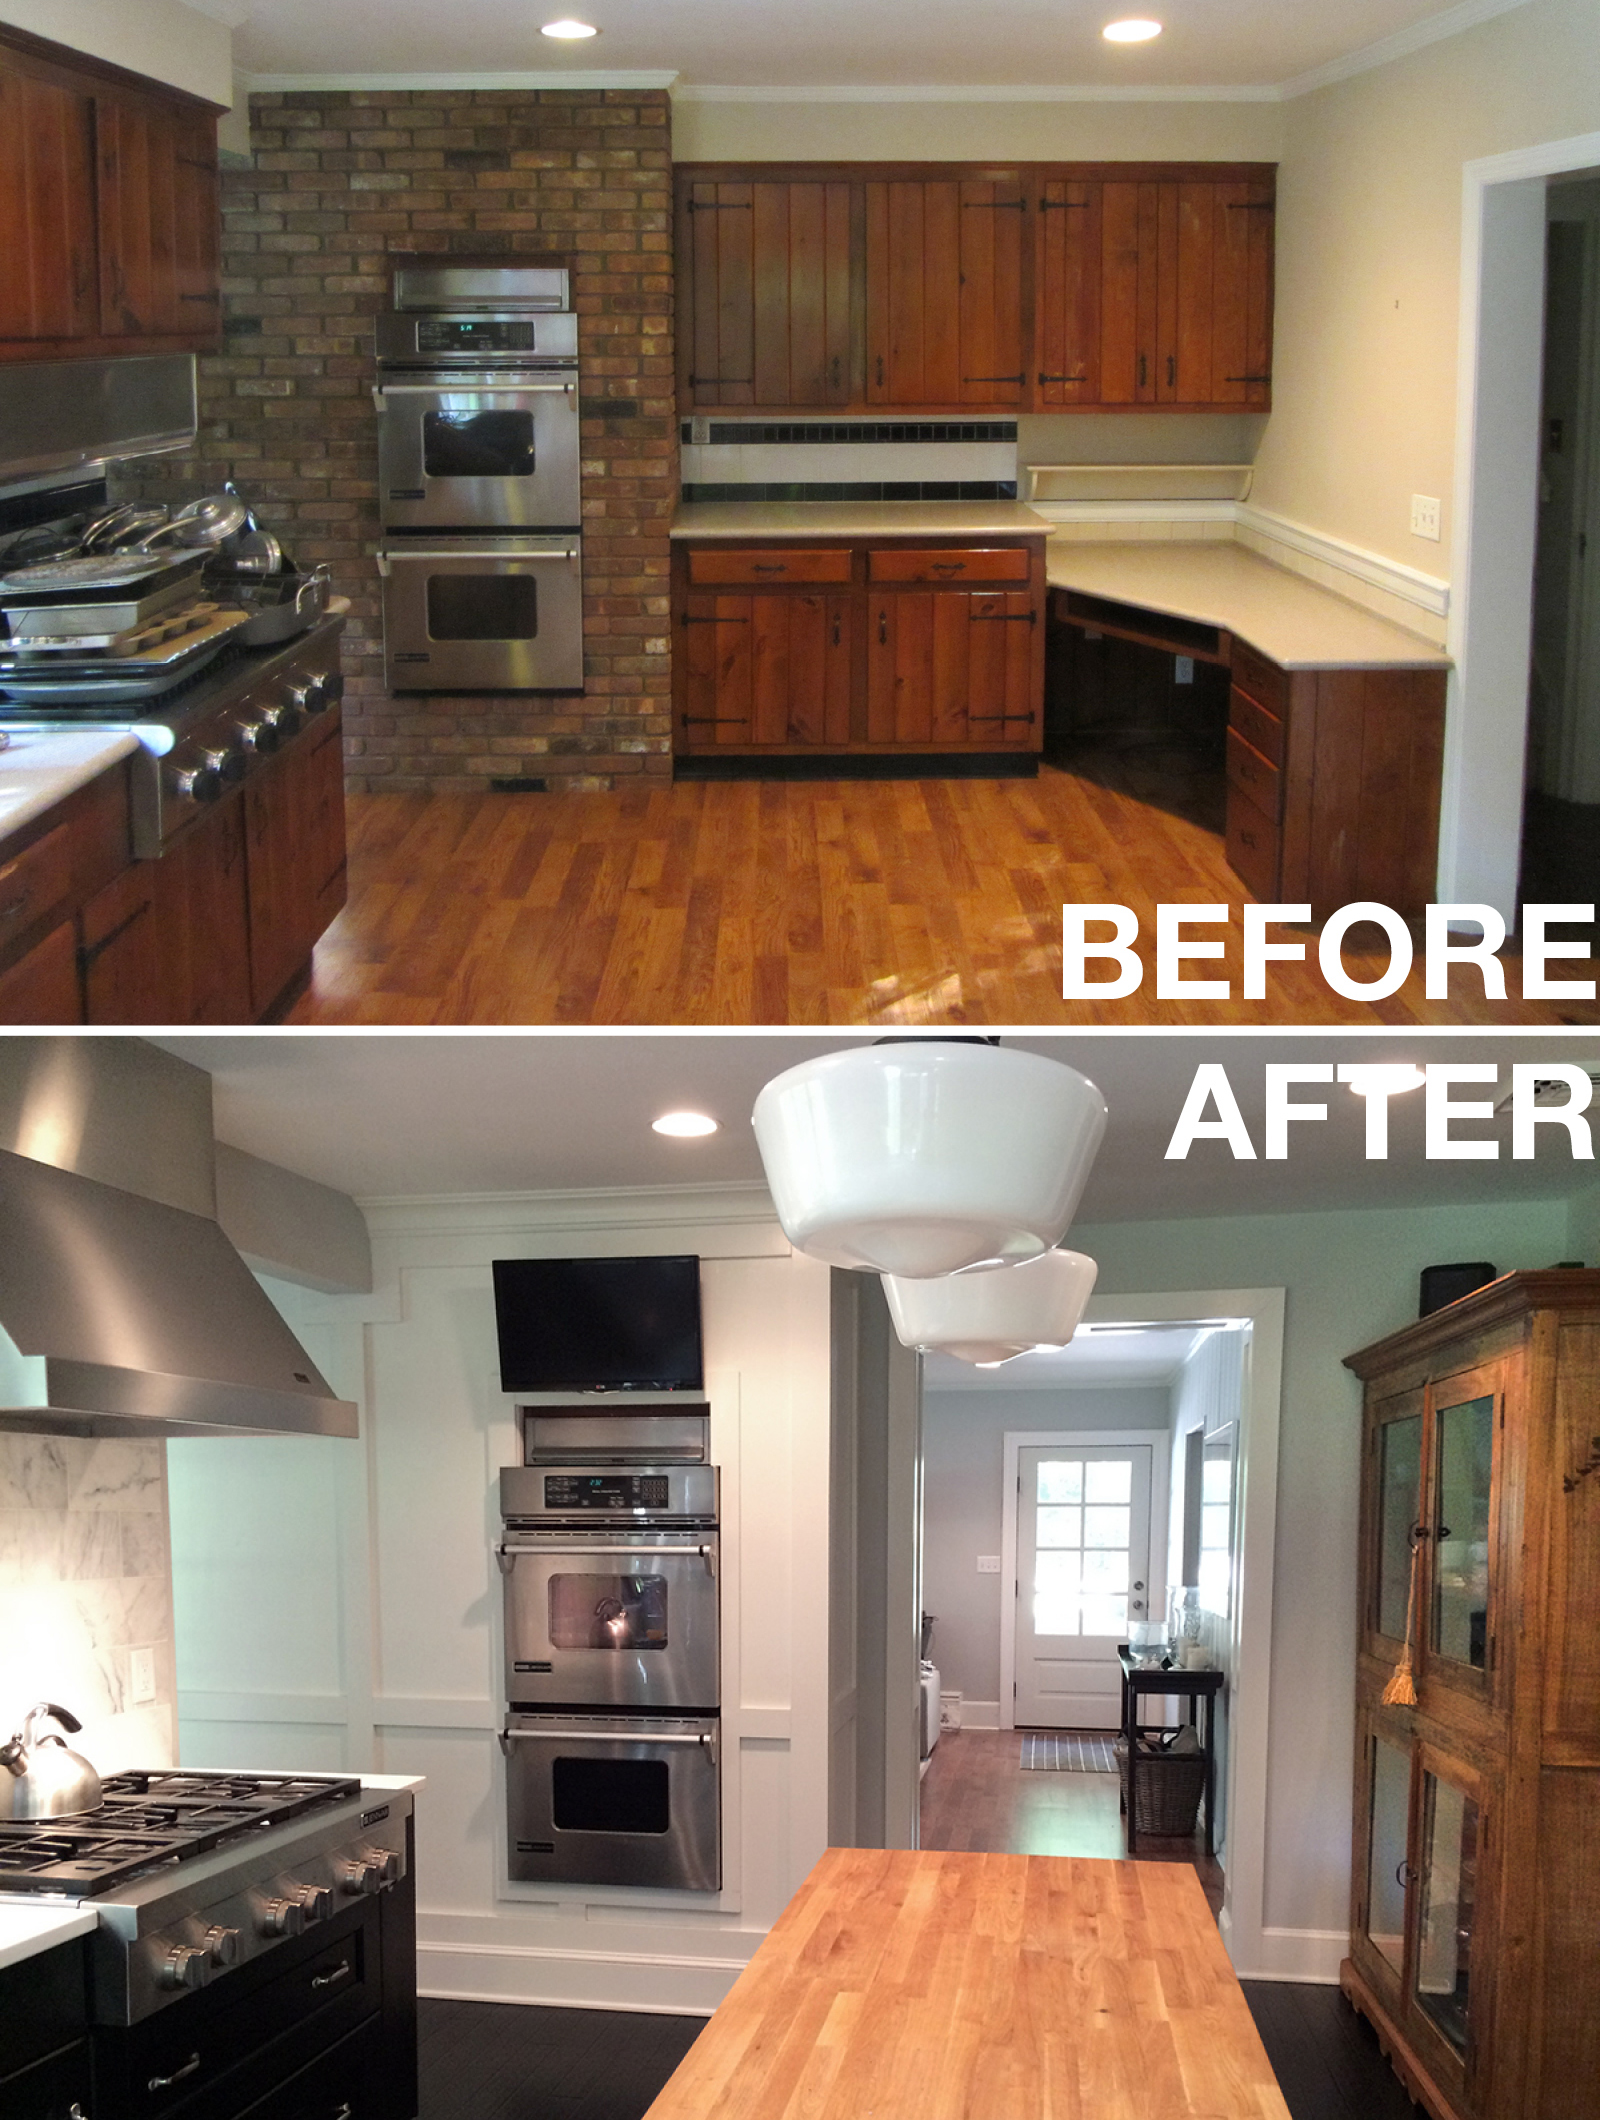
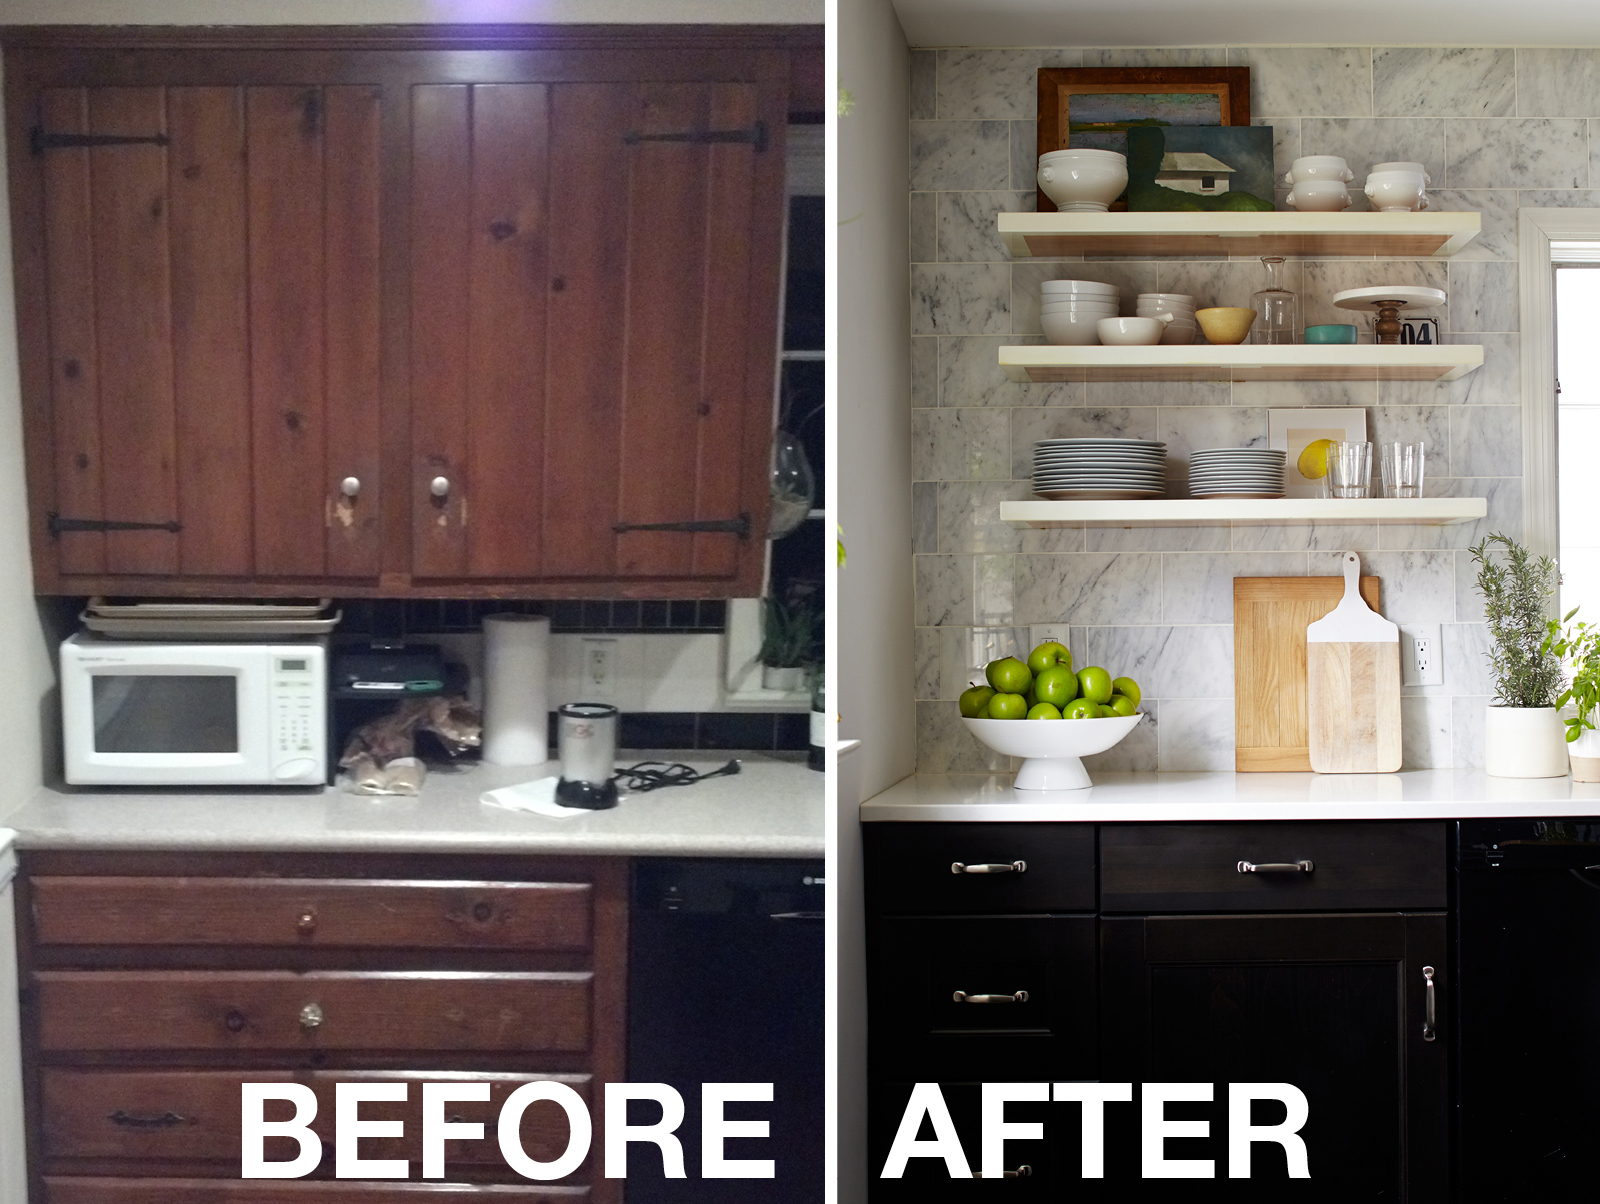
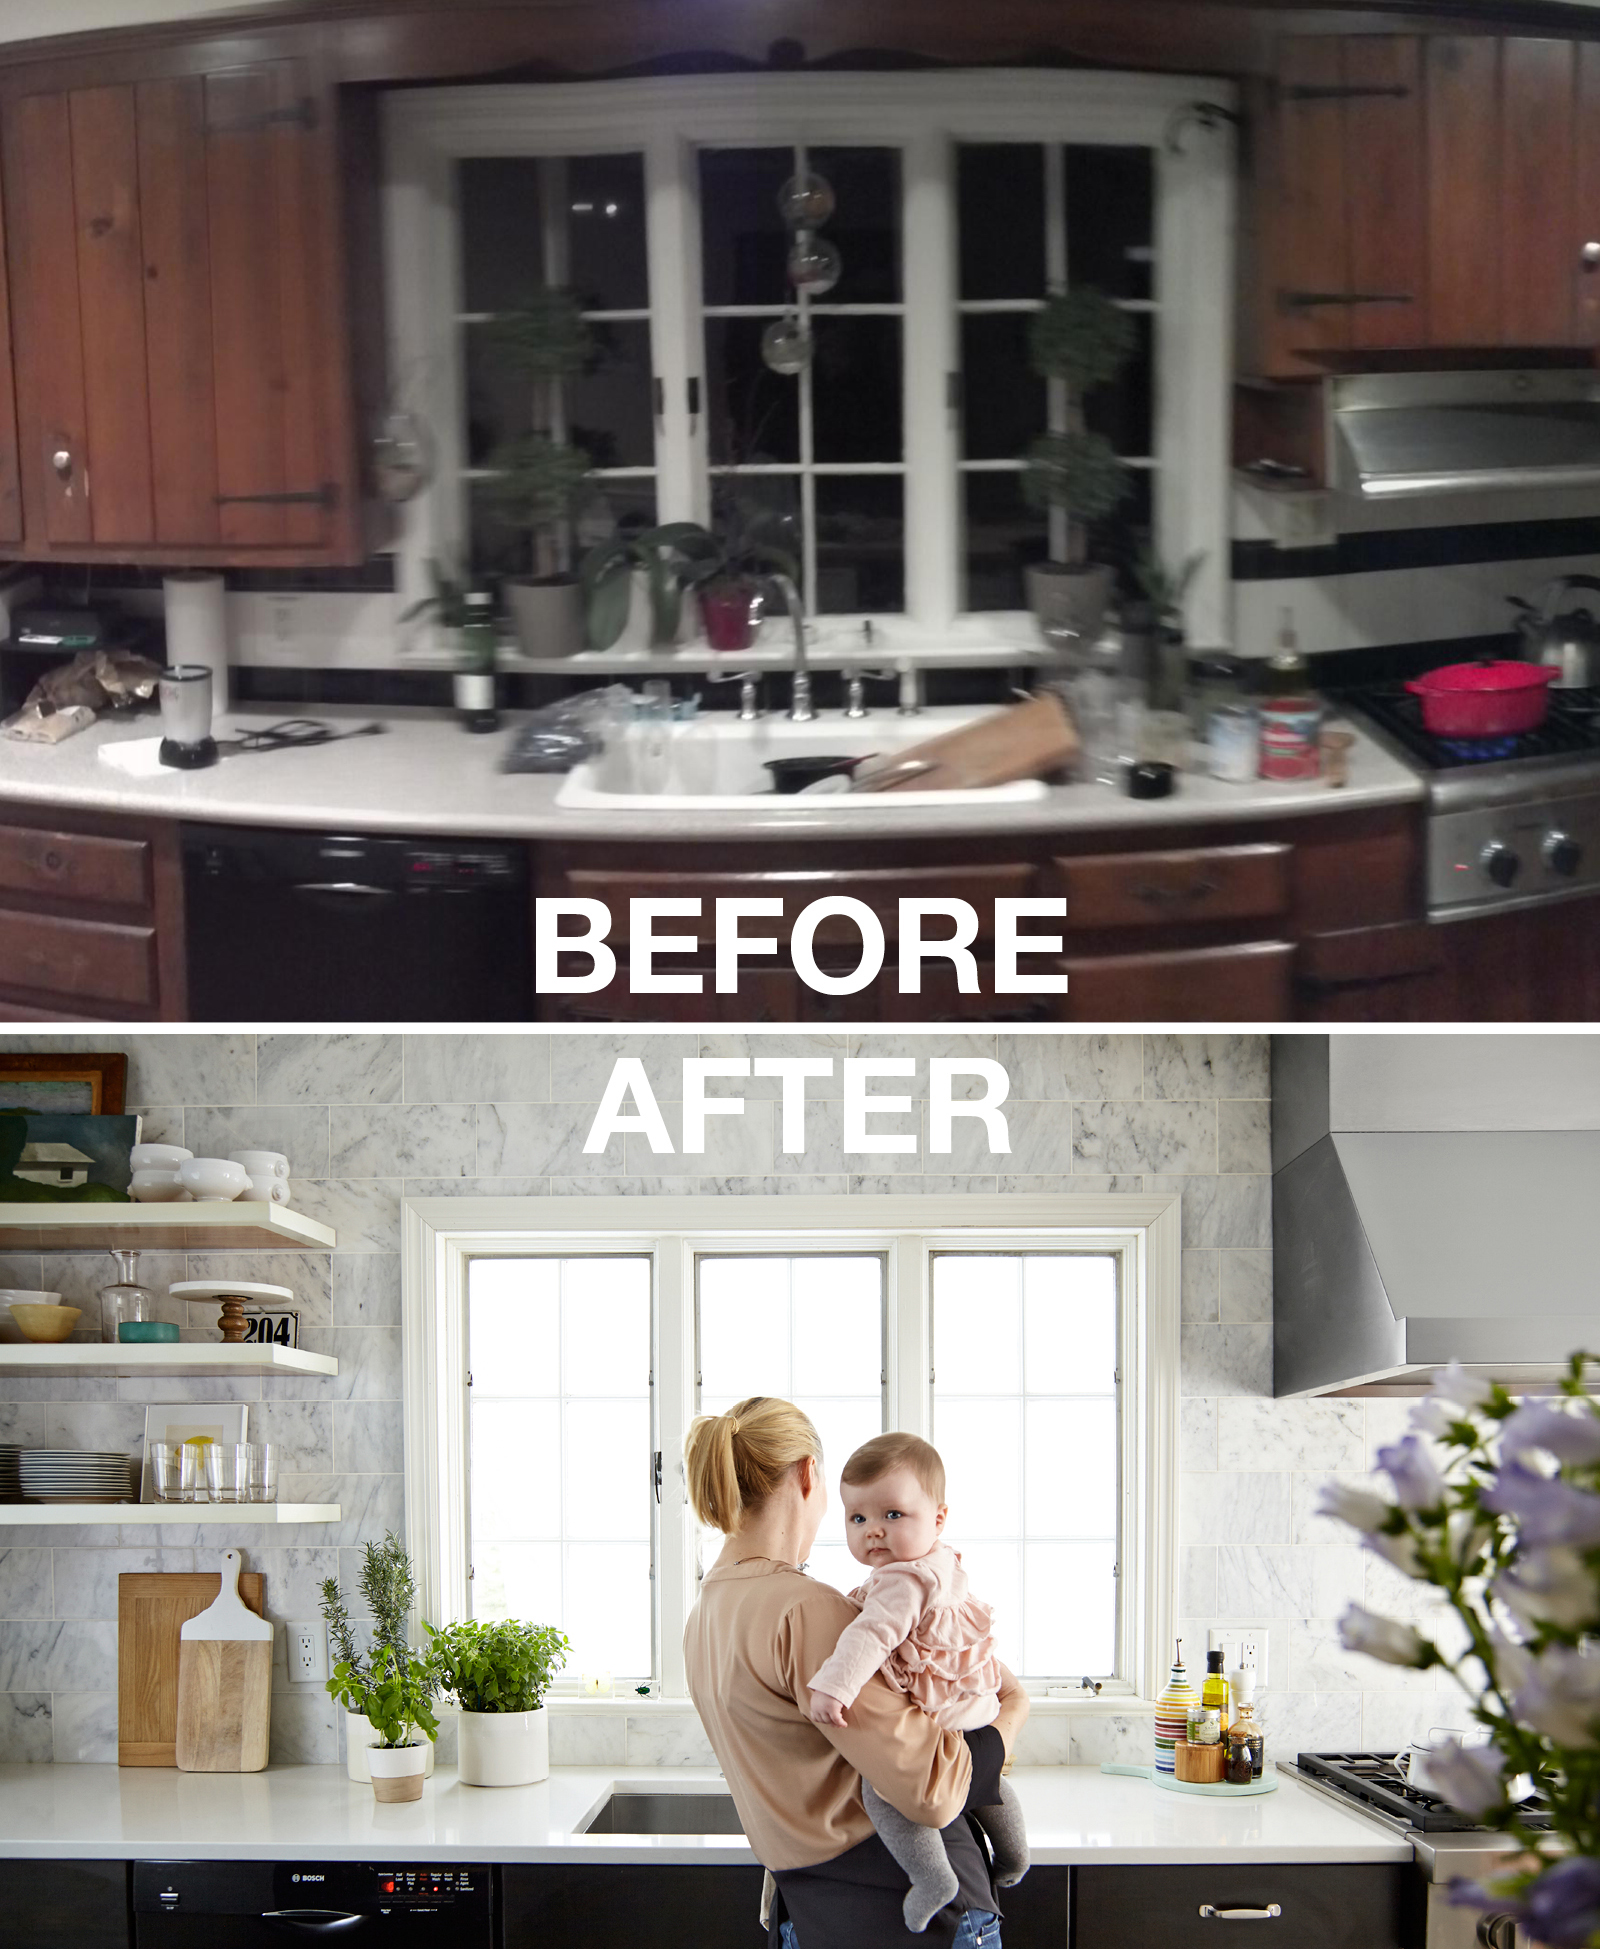
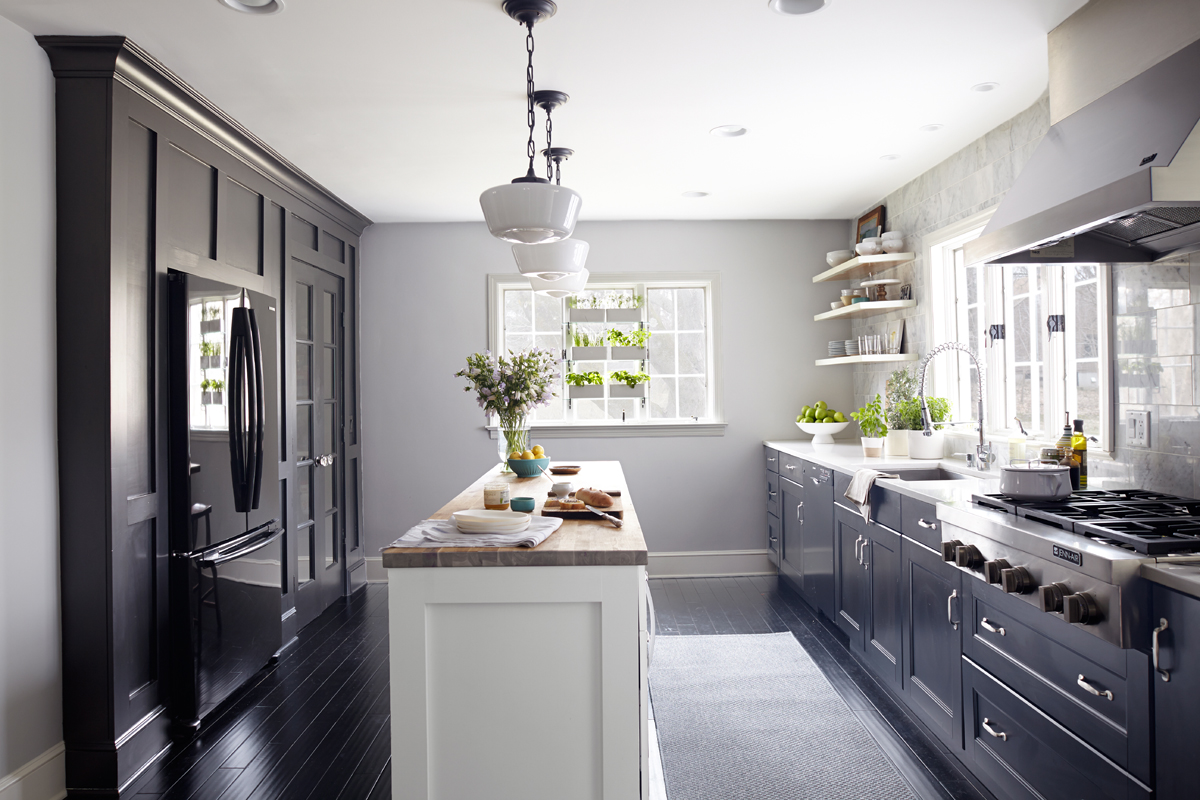
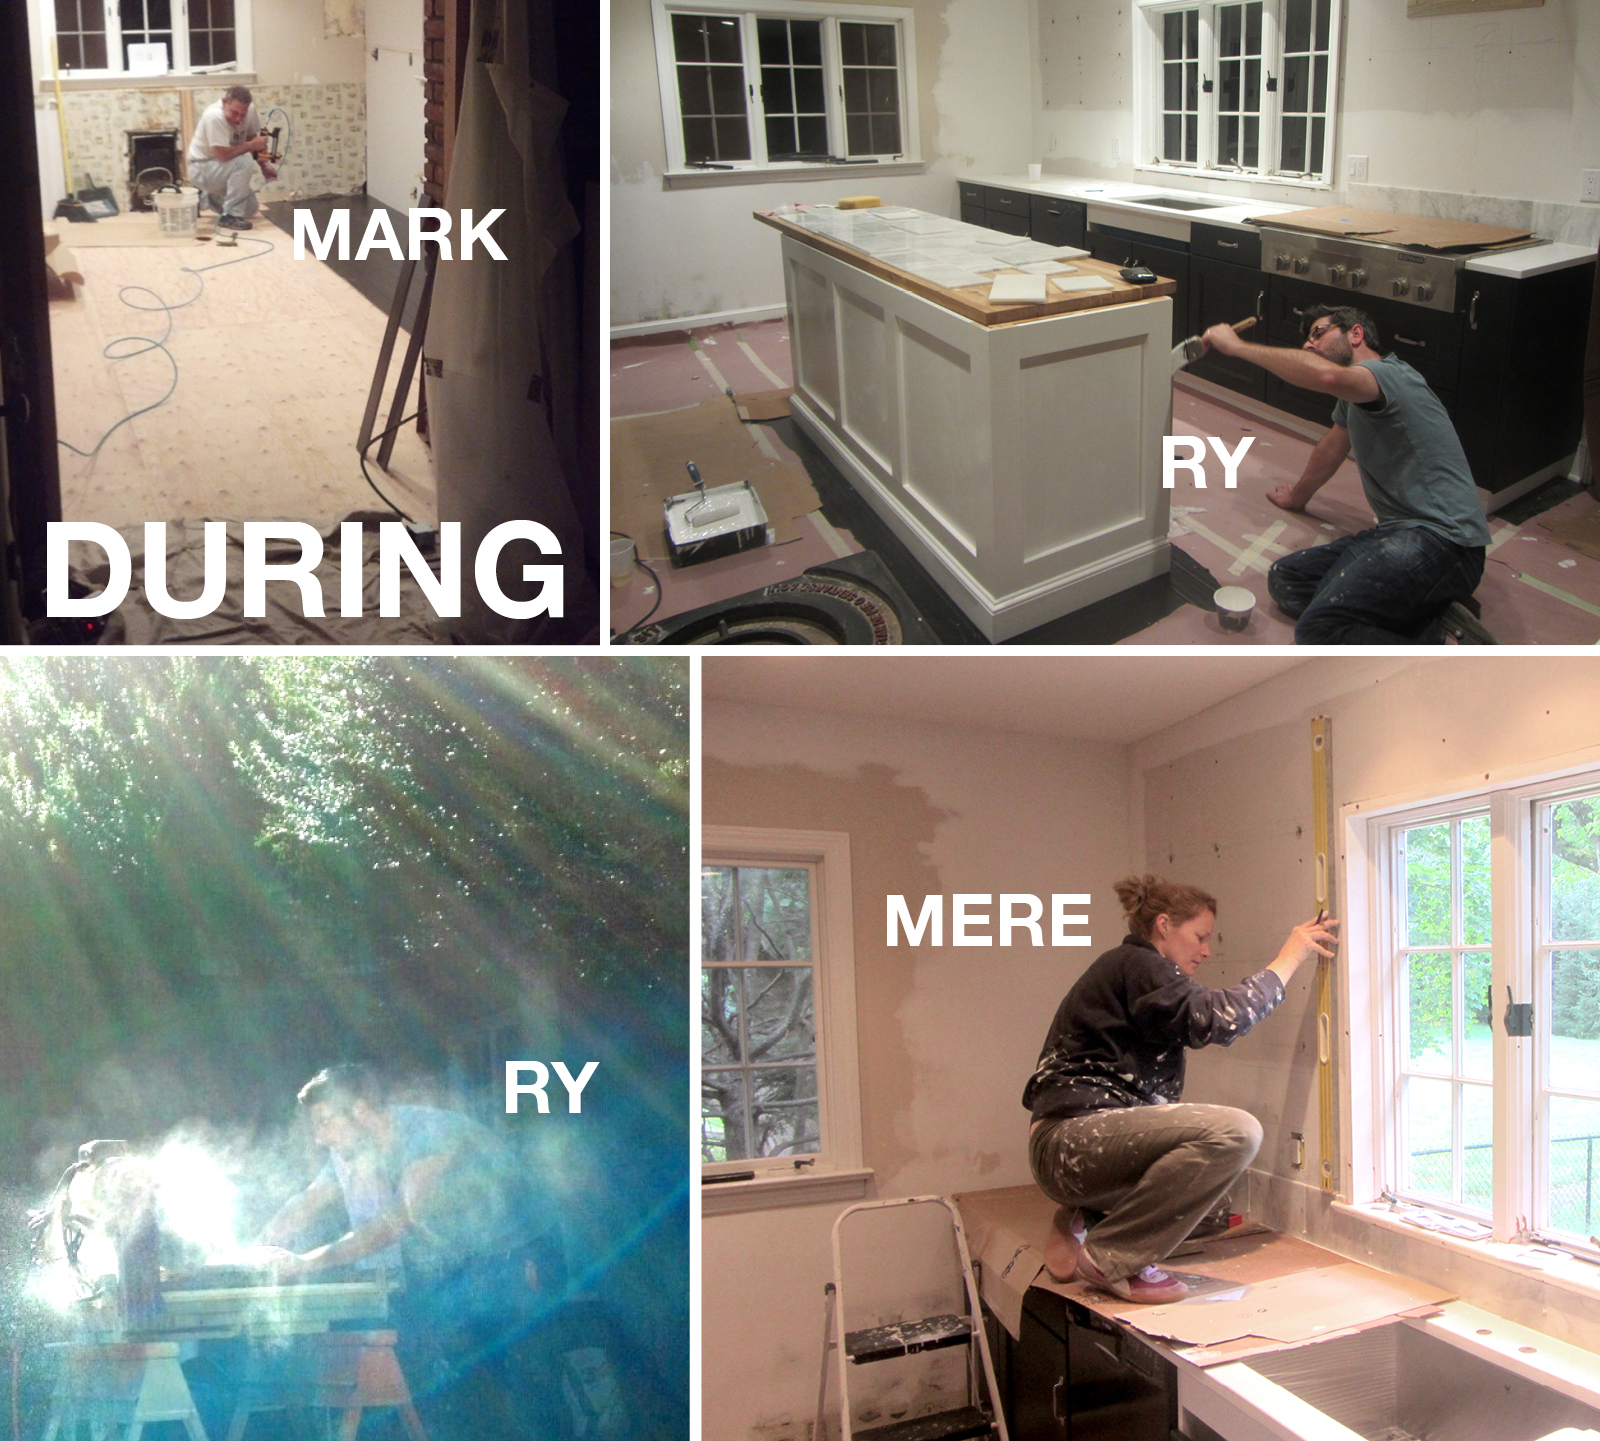
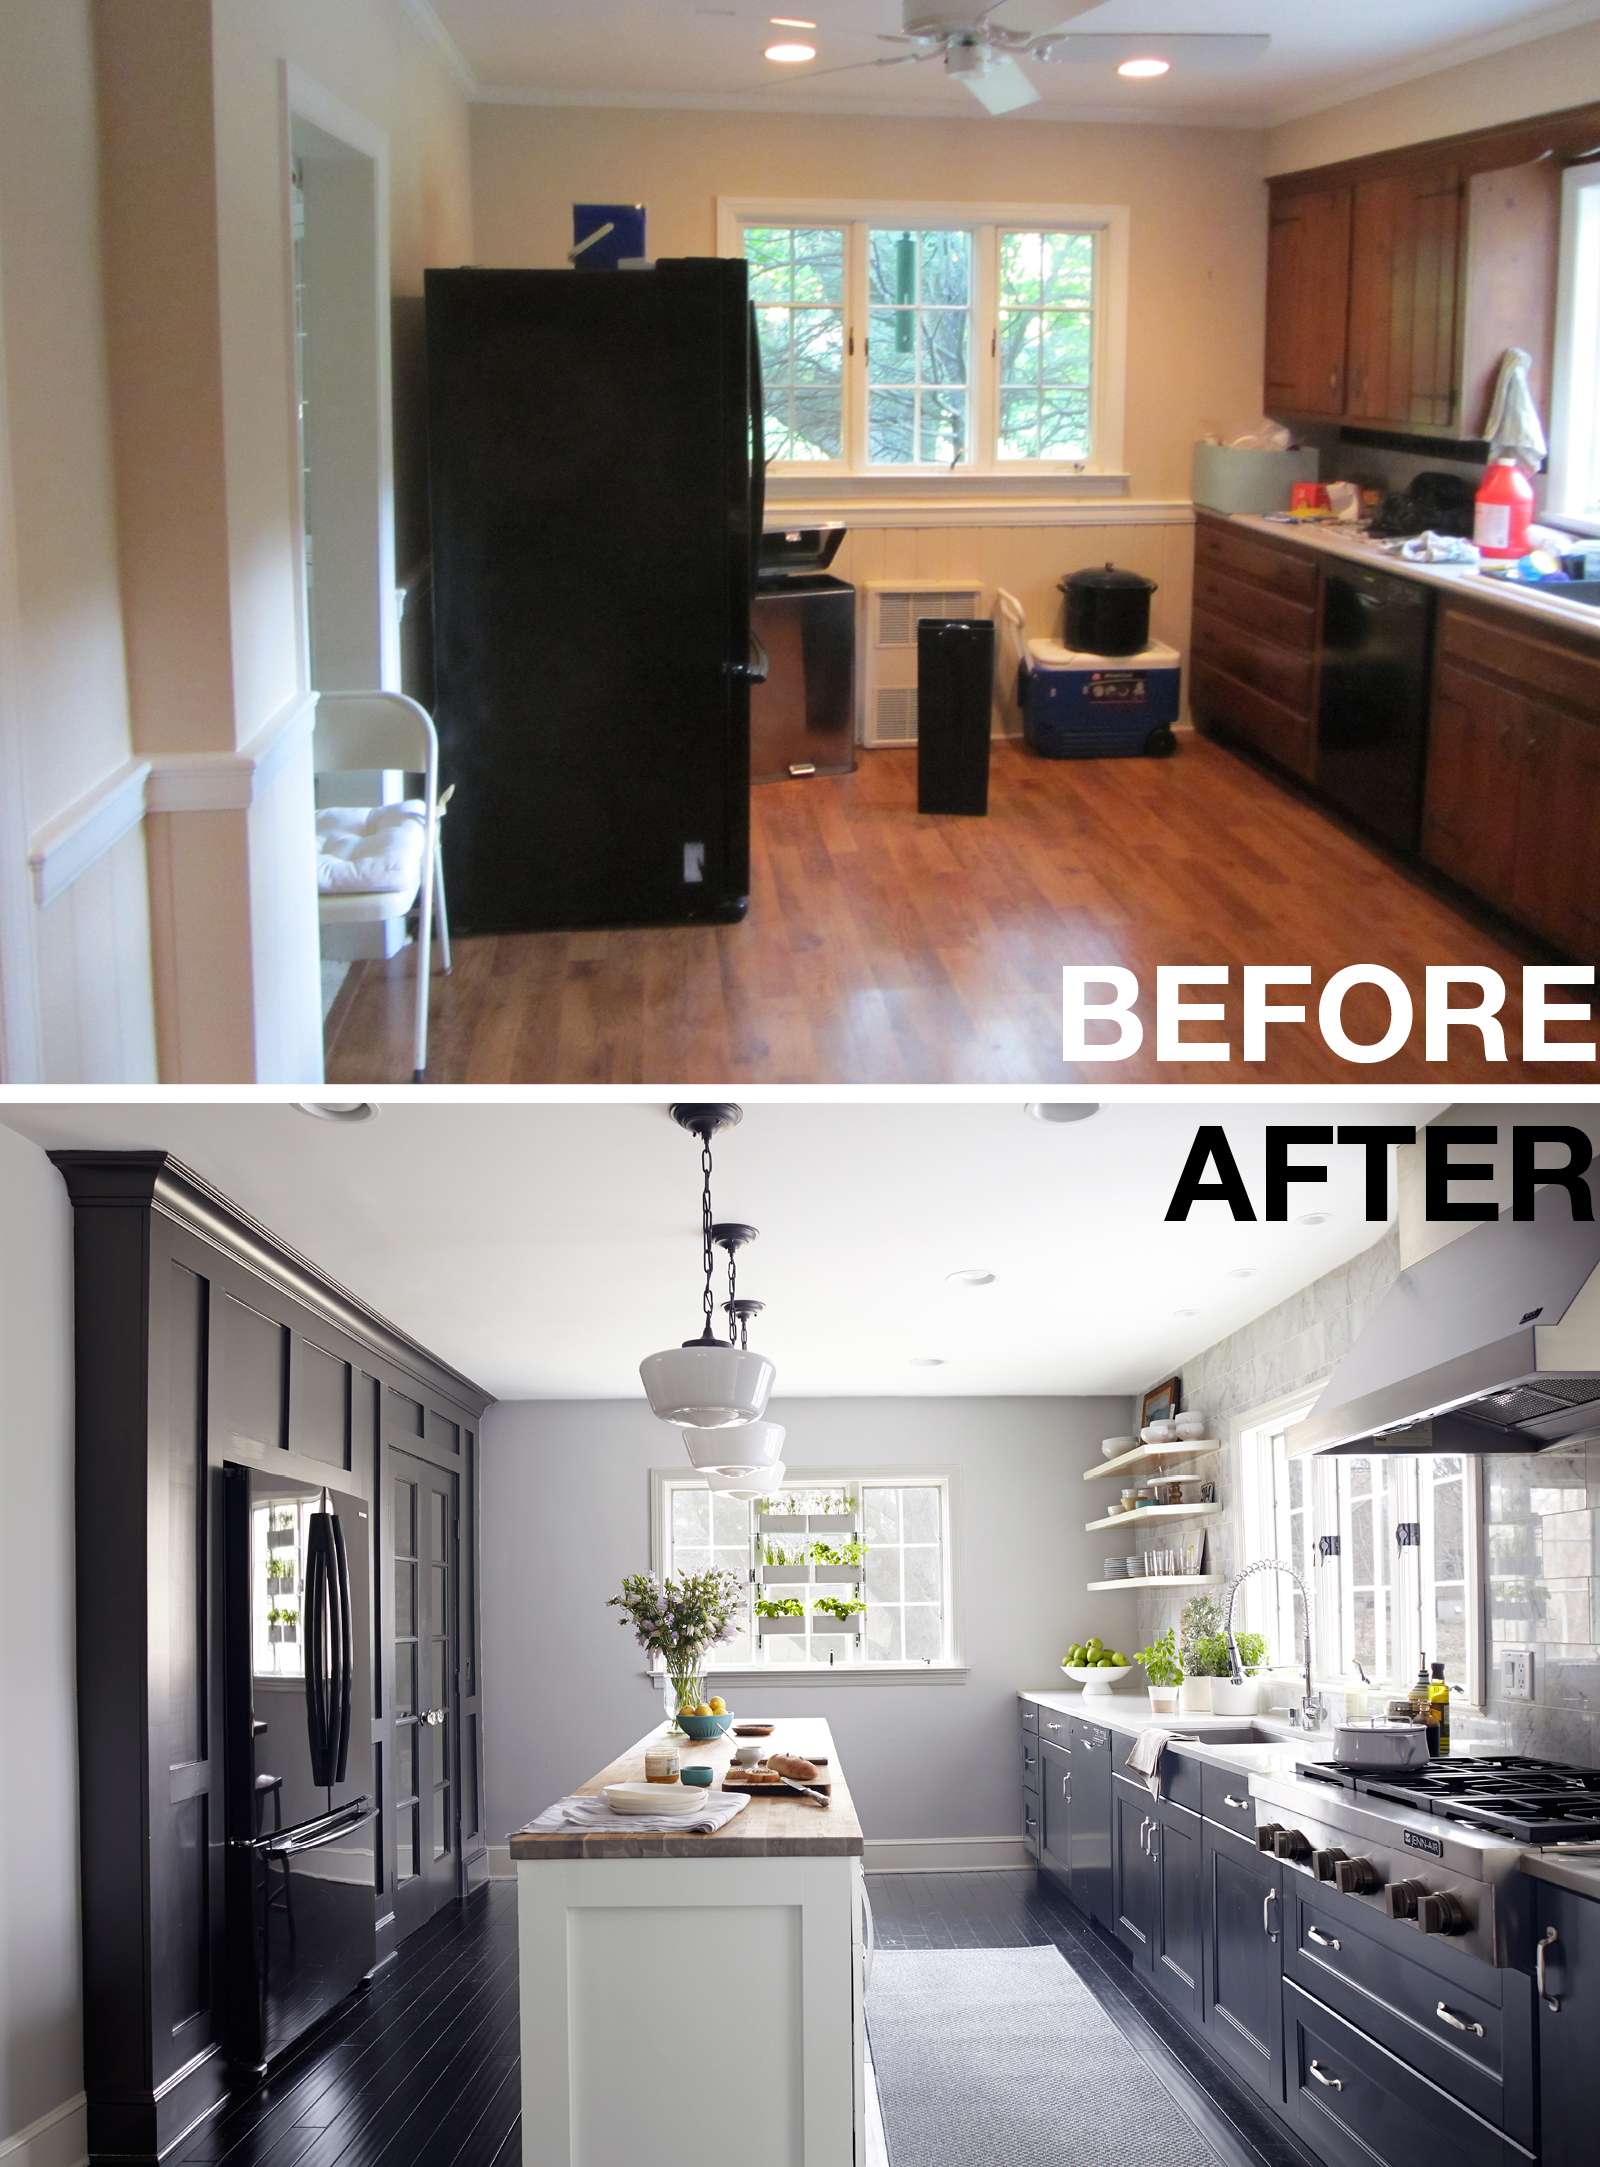
When we bought our dream home—a simple and classic farmhouse (built in 1805) in Franklin Lakes, NJ—the 50’s stained-knotty-pine kitchen was not part of that dream. Despite this fact, my husband thought we should abstain from a kitchen remodel for a few months…or a year even. I should mention now that I’m a renovation zealot? We owned the home for less than 24 hours when I demo’d one of the walls to open the floor plan up to the family room. Surprising as it may seem, we started work on the kitchen immediately.

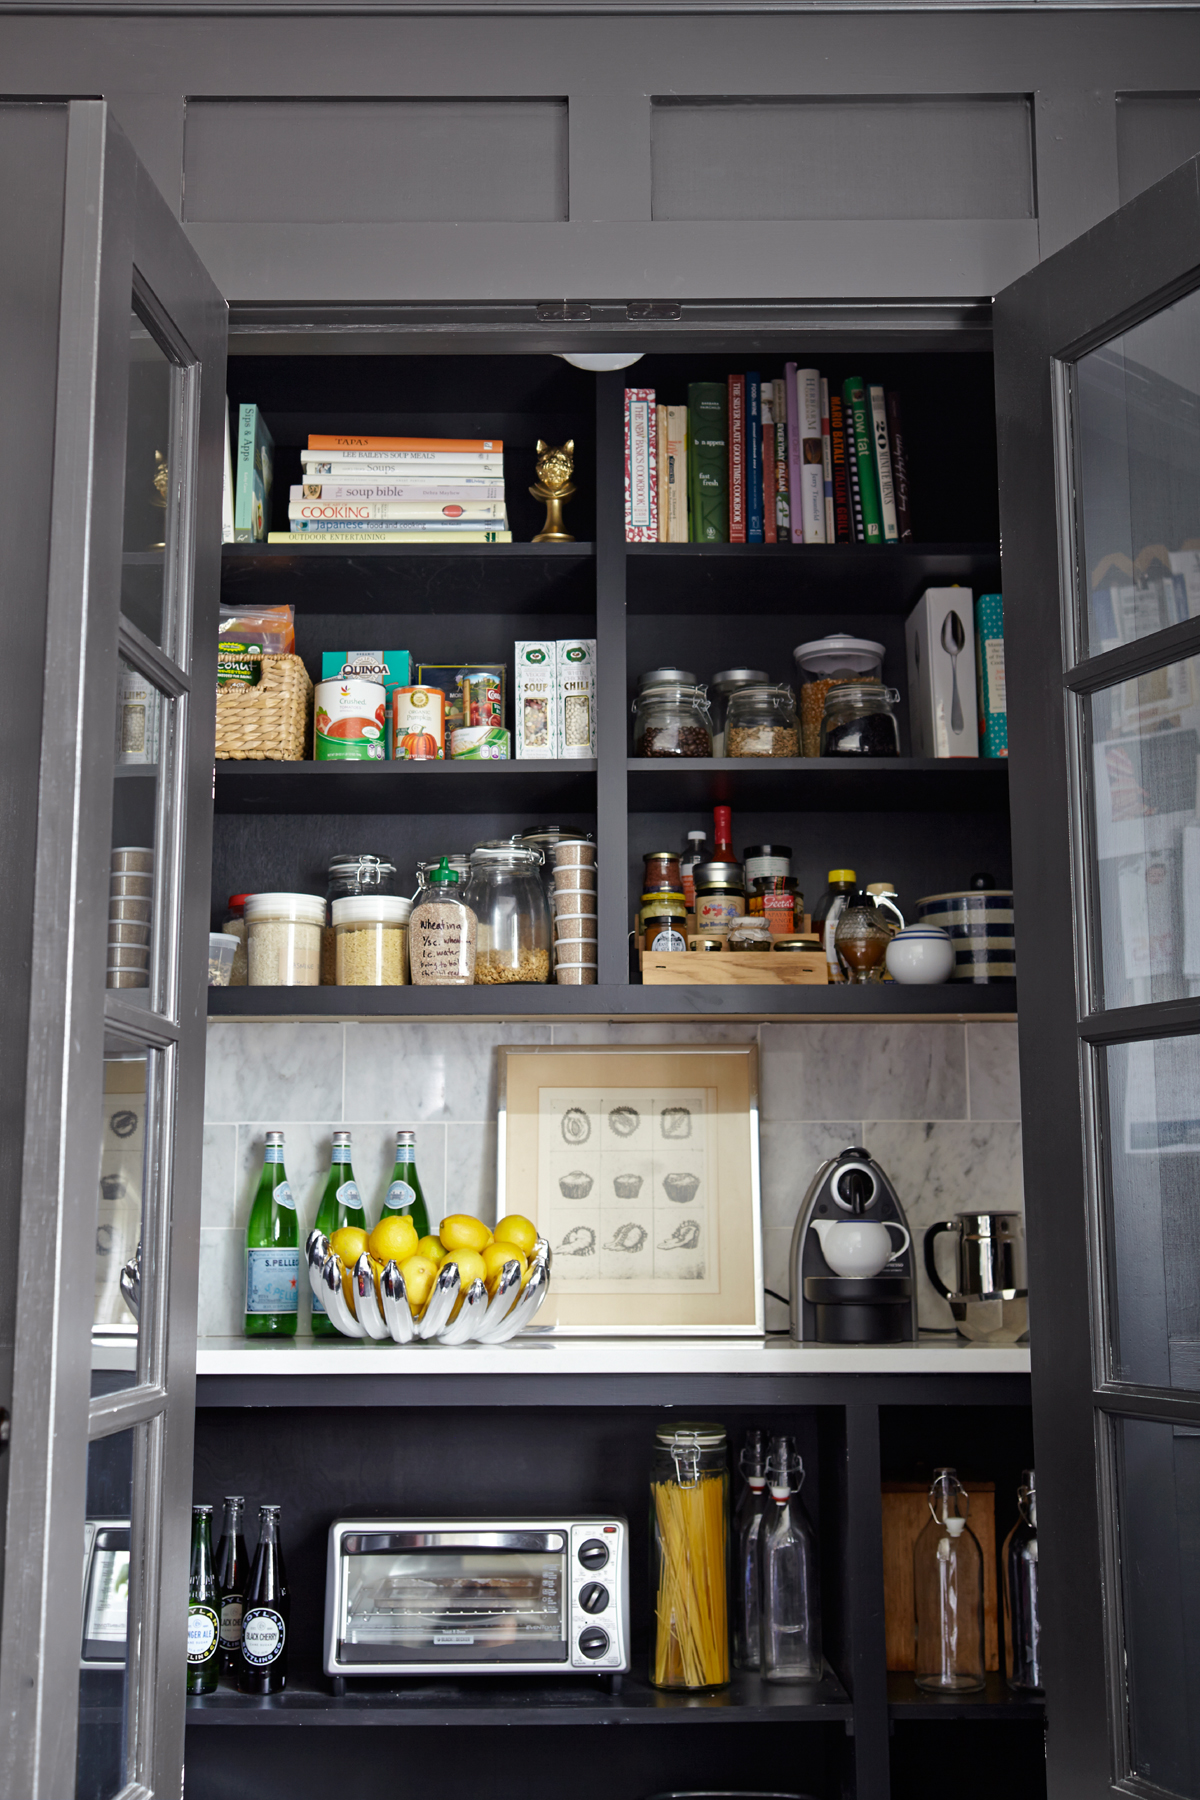
With help from a wonderful builder (Mark Ferrero of Oakland, NJ. phone: 201.926.3967) and advice from the best local architect (my mother, Pam Watt McBride, phone: 201.805.3825) we realized our dream kitchen. Pam gave us the brilliant idea to use 4′ for an adjacent room to expand the kitchen to make space for the refrigerator and a deluxe little food pantry with french doors. By pushing the refrigerator back into the wall and adding a pantry, we were able to eliminate the need for upper cabinets—making the space feel much larger—and gave us room for a long, narrow island.

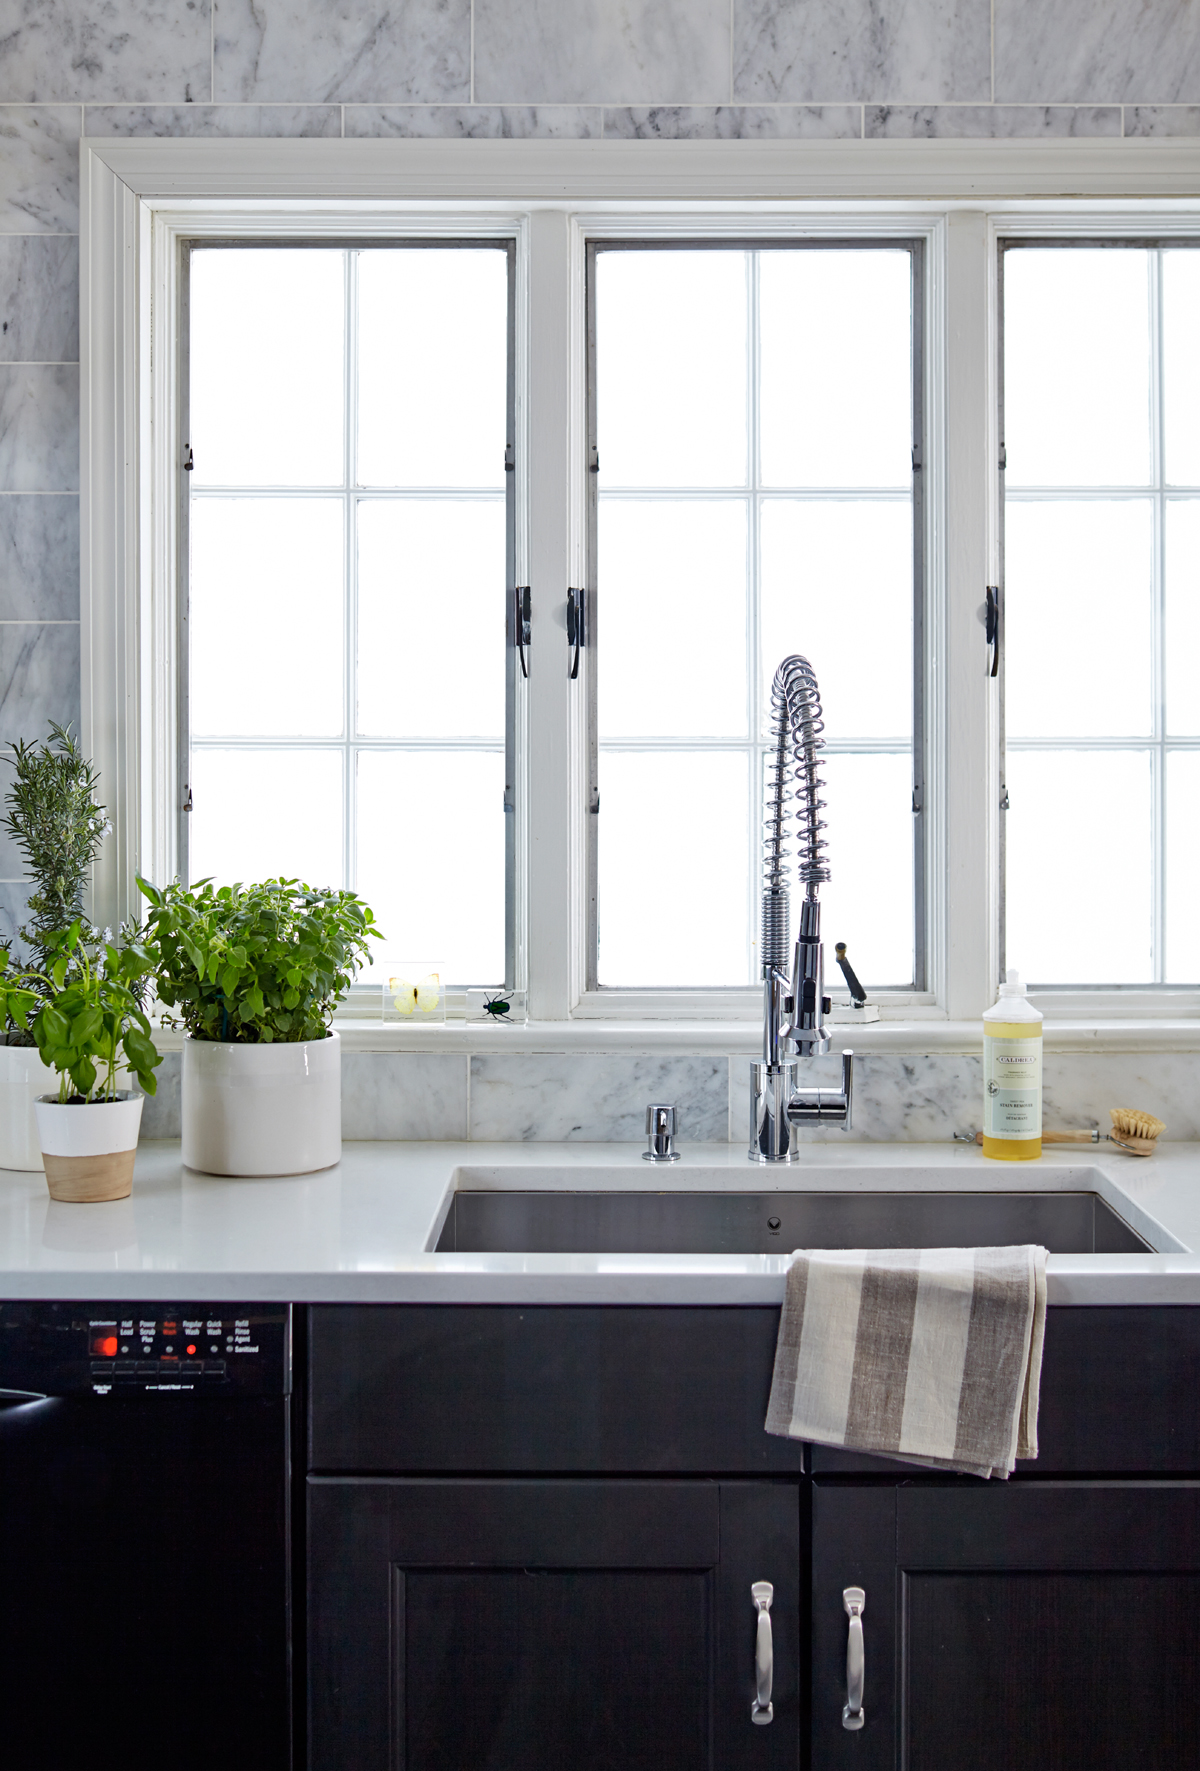
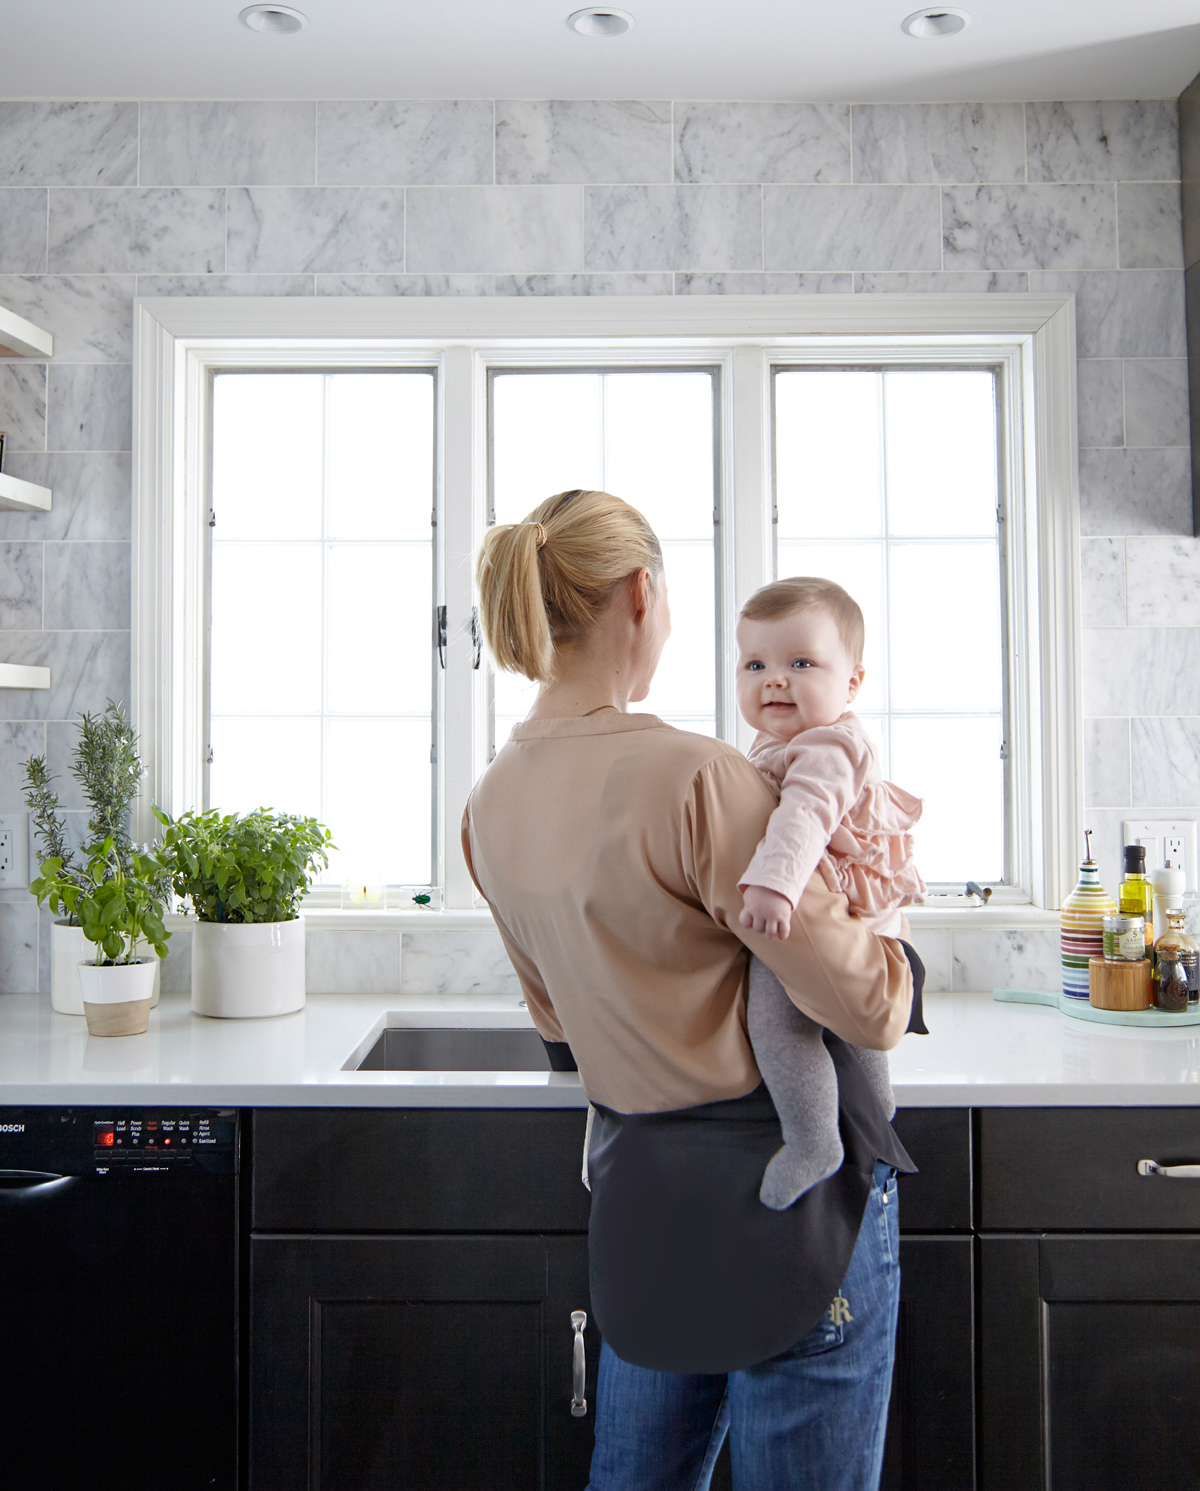
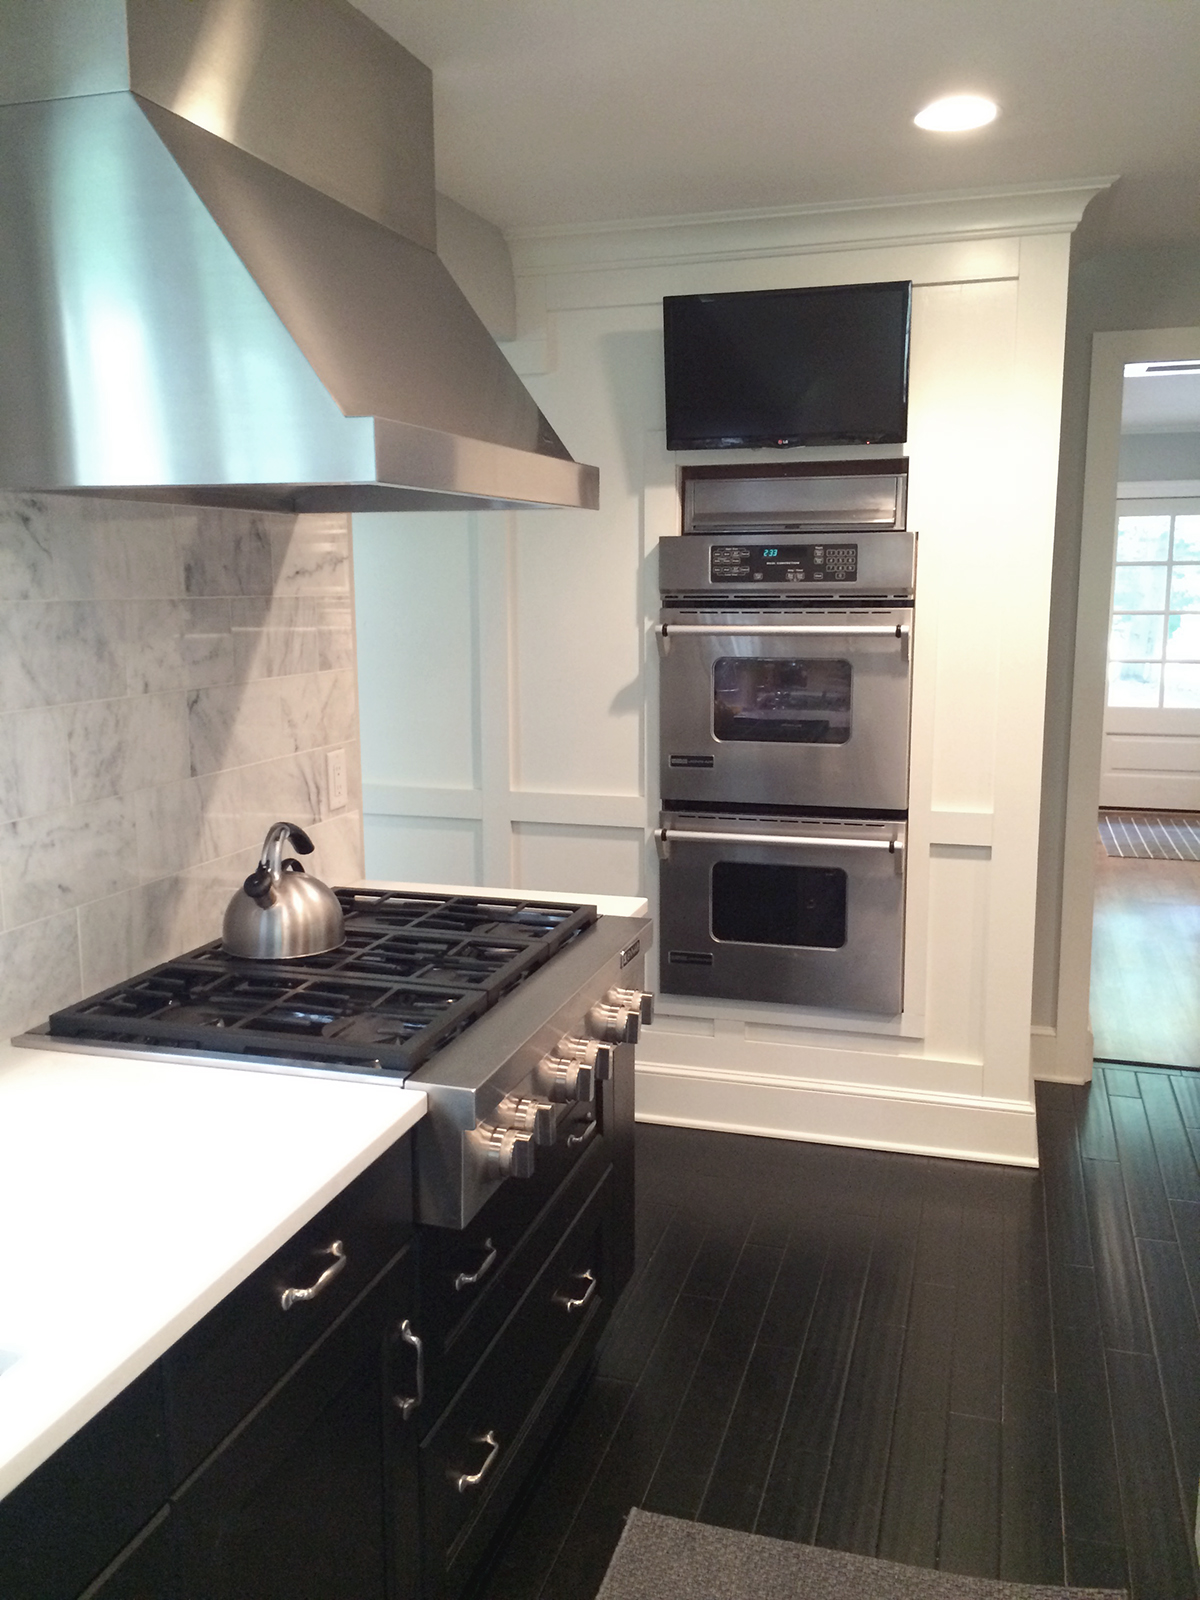
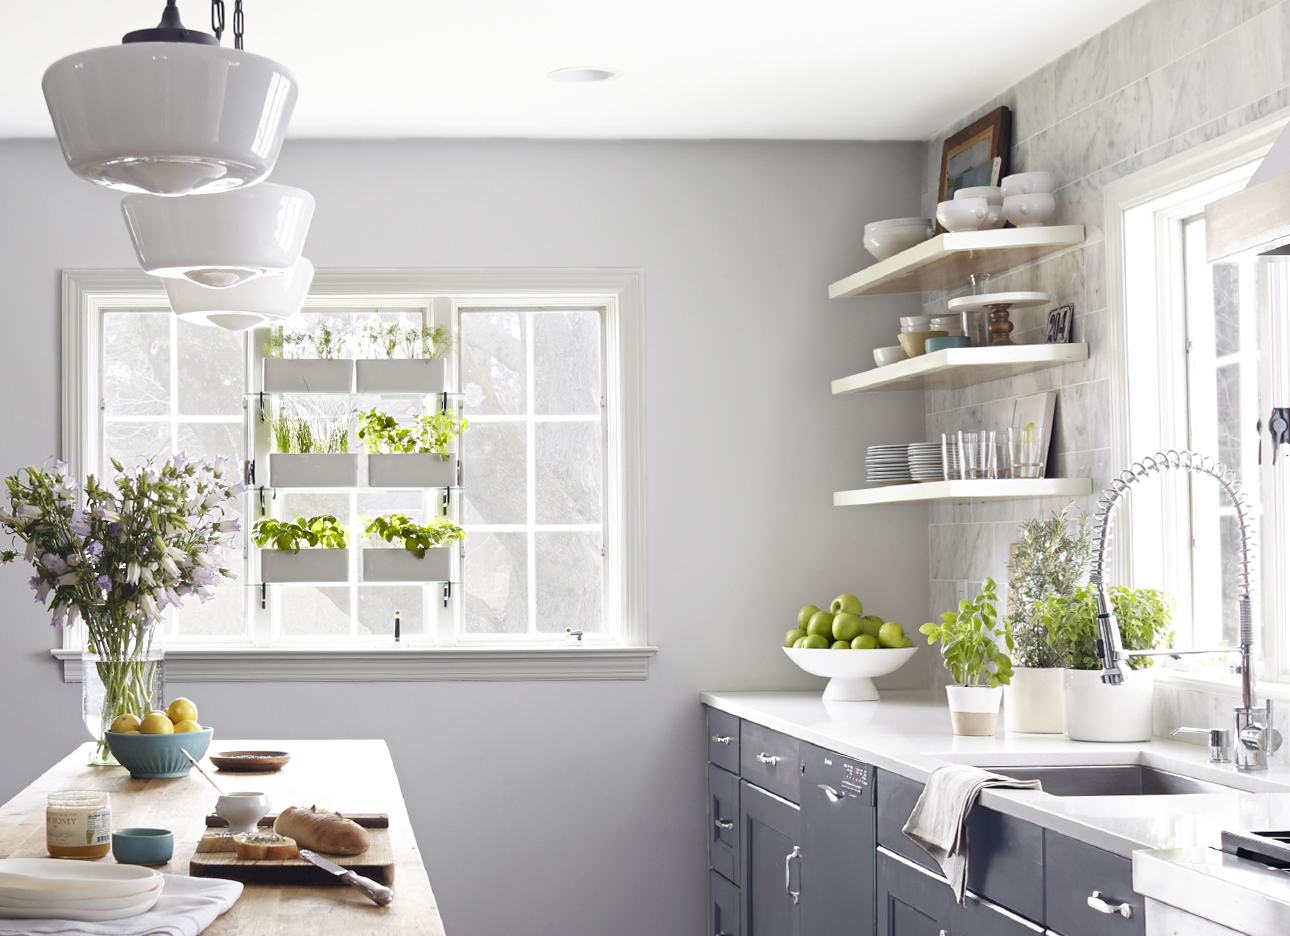
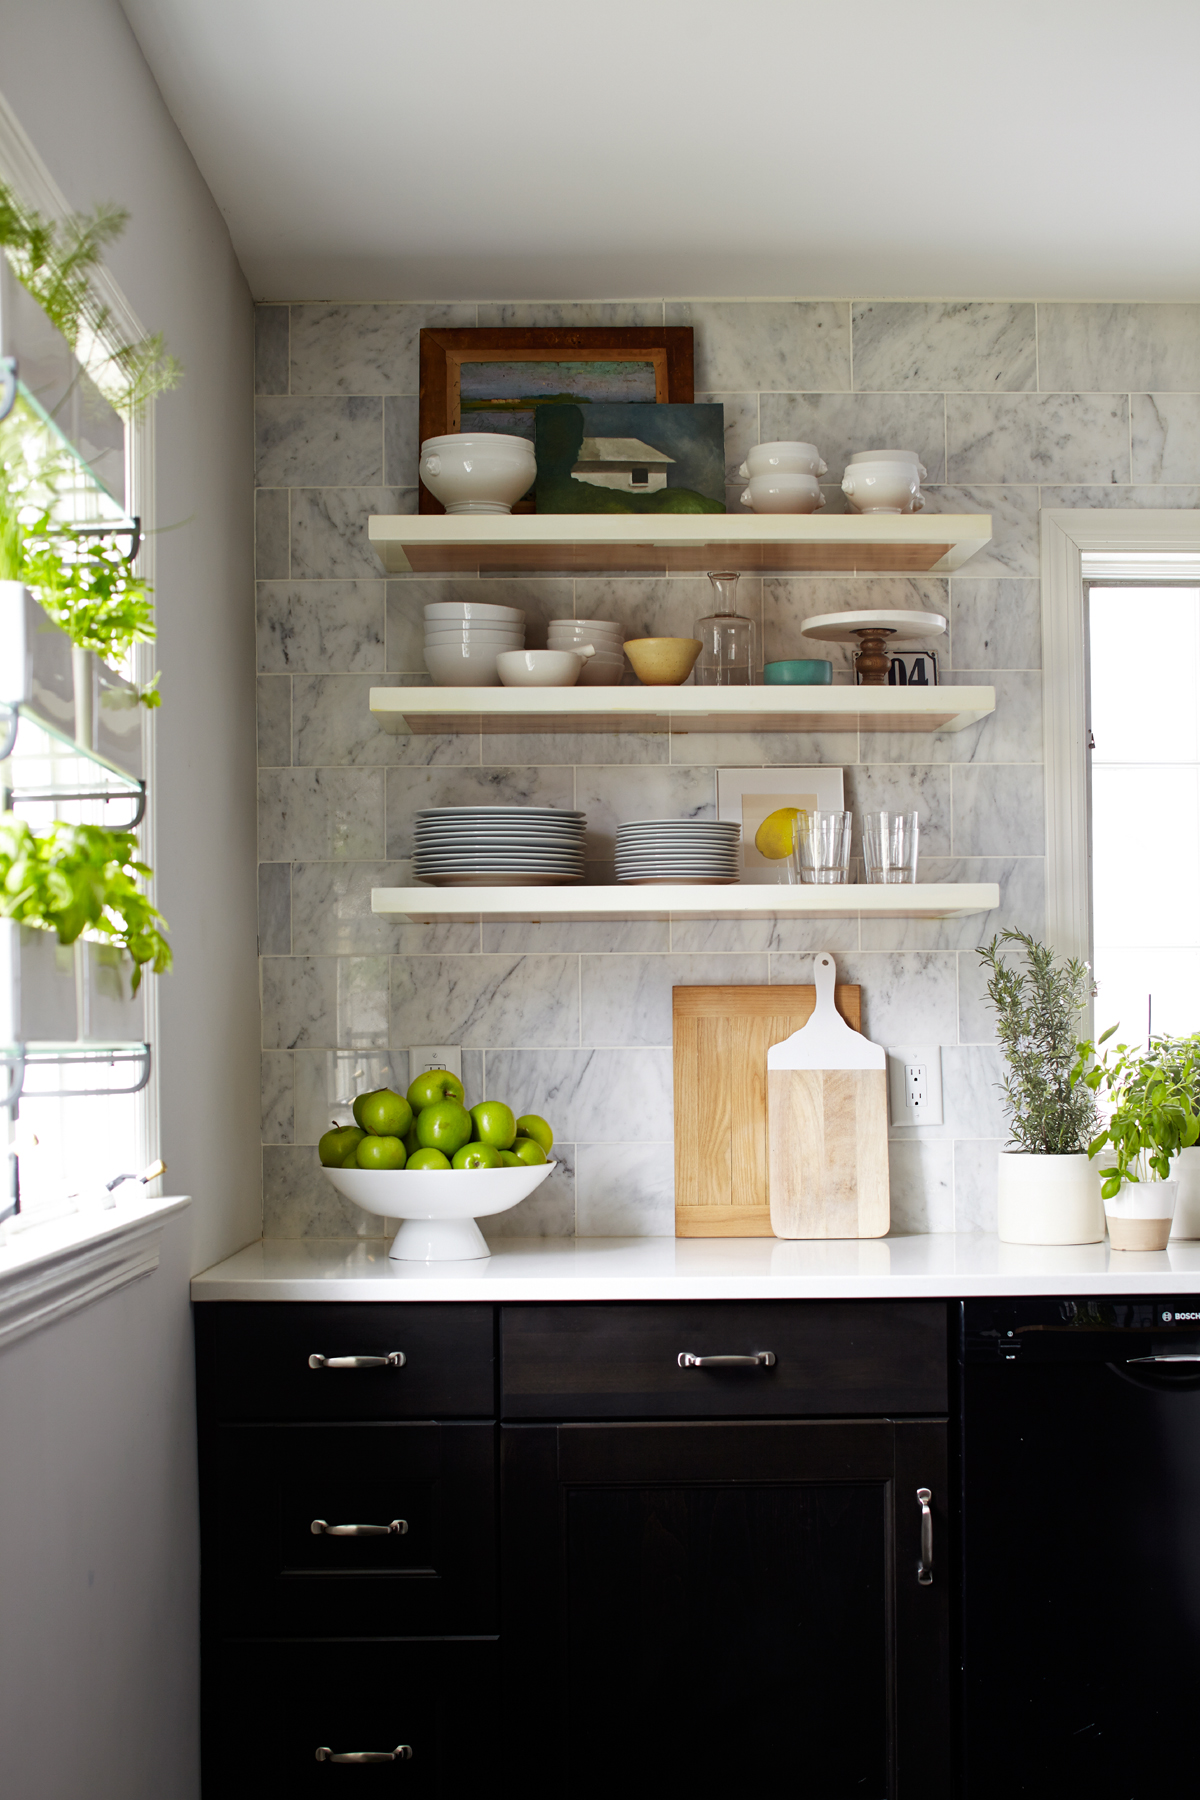
We wanted a classic kitchen—like one you might find in a formal townhouse from the 1800’s—but with a modern and industrial bent. Our farmhouse would have originally had a dirt floor kitchen with a huge hearth—still partly visible in what we are turning into a library. I’d always wanted a black kitchen, but since this room gets very little sun we went half & half.  For serious historical (yet moderne) oomph, we did an entire wall in a 6″X12″ Carrera marble tile and used modern stainless hardware and a chrome sink fixture to tie in our large industrial hood, range and ovens. We paneled over the existing brick wall to give it a more polished look and further drive out the 50’s juju.

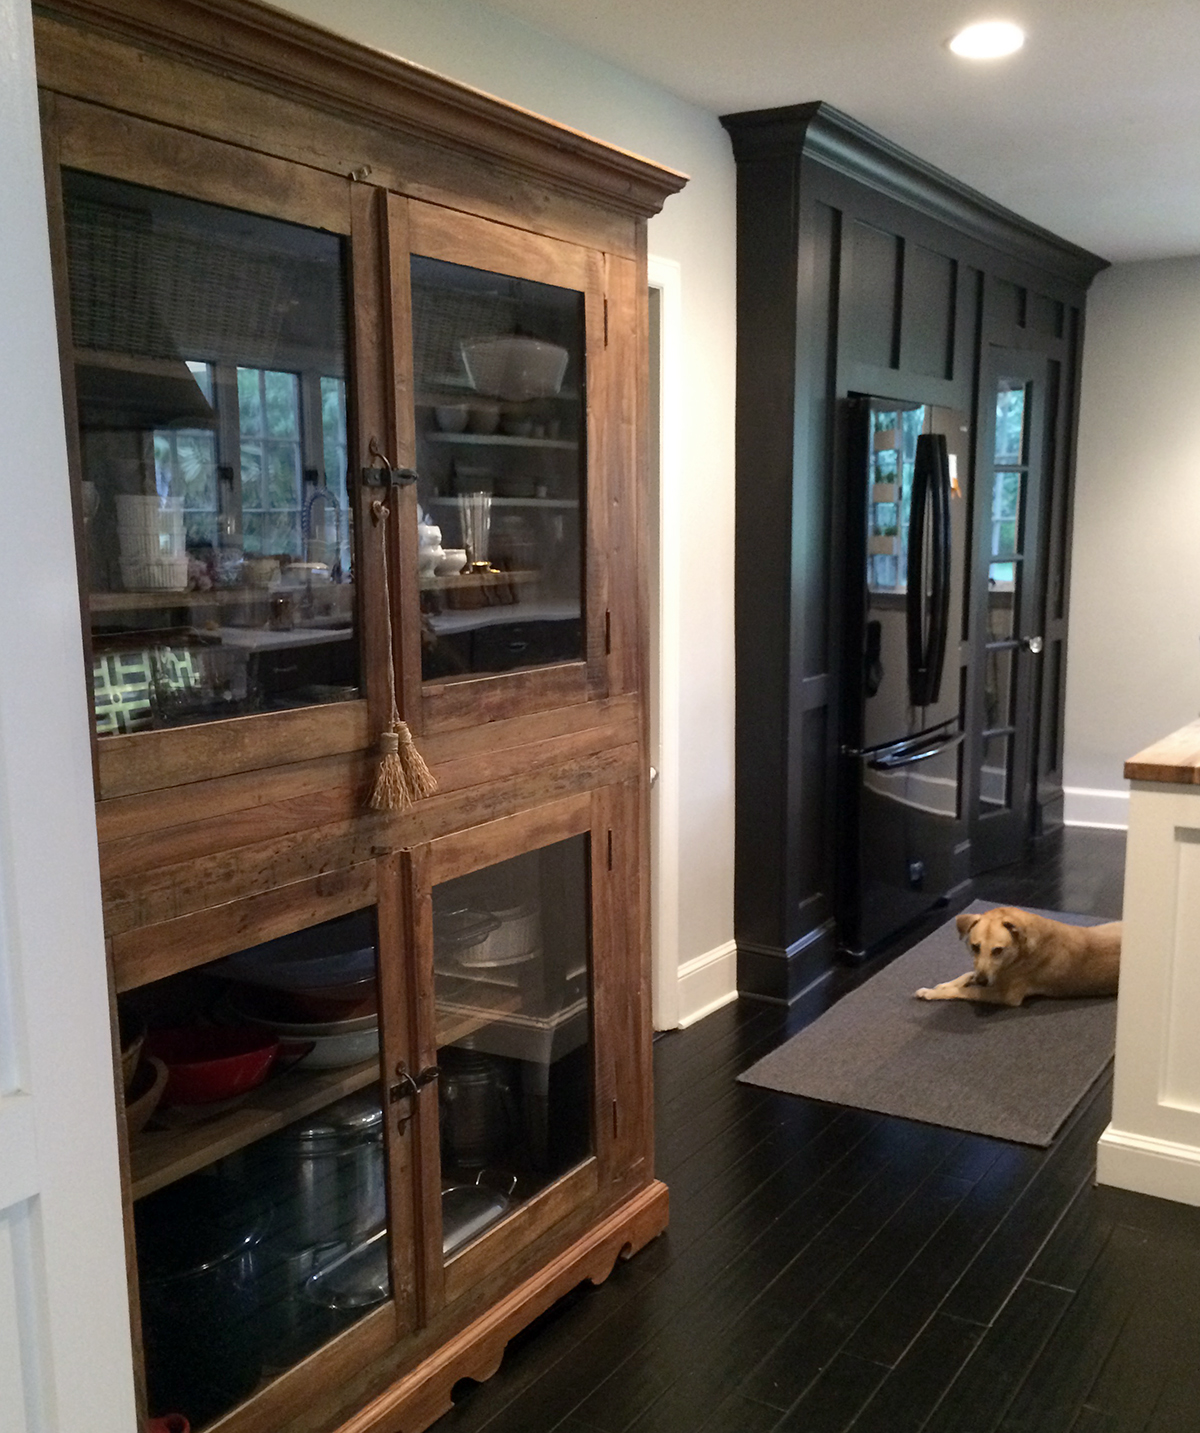
We used a large antique banyan wood and glass case—originally from an apothecary in India, instead of more cabinetry—to give it a more eclectic, unique, and lived-in look. This element also tied in the butcher block island countertop nicely and gave a little more warmth and charm to the otherwise austere kitchen design.

I can’t imagine life without this kitchen; now the heart of our lively home. AND, a great national print magazine—to remain unnamed for now—is coming to shoot it for their publication later this month, so we did something right!

See my RESOURCES below for your kitchen renovations & CHEERS!
002_shelfvingette2_005 003_shelfdetail1_005 008_sink_002 009_sinklifestyle_011 014_counterdetail_006 017_pantry1_002 IMG_6526 IMG_6531


LINKS & RESOURCES
Builder: Mark Ferrero of Oakland, NJ. phone: 201.926.3967
White Counters
Caesarstone, installed by Atlas Marble & Granite (in pantry as well)
Wood Counter (island): Karlby 98″ X 26″ from IKEA. Needs to be oiled regularly with mineral oil $140
Cabinets: Black ones are “Laxabry” from IKEA with a 25-year warranty. White ones under the island are from Green Demolitions, a fabulous salvage place definitely worth checking out.
Sink: 30-inch Undermount Stainless Steel 16 Gauge Single Bowl by VIGO
Faucetdanze Parma Single Handle Pre-Rinse Kitchen Faucet in chrome
Backsplash: 6″x12″ polished Millas Carrera tiles from Metropolitan Tile & Stone in Hawthorne, NJ
Open Shelves: totally custom
Light fixtures: three “Academy” semi-flushmounts from Home Depot customized to make them pendants $135/ea on dimmers
China Cupboard: antique banyan wood piece from India, bought at ABC Carpet & Home customized on the inside with shelves
Pantry Doors: 18″ tempered glass french doors from Kuiken Brothers
Range Stove and Double-Oven: both from JENN-AIR
Range Hood: by BEST and the chimney is custom fabricated and custom finished by Broadhurst Sheet Metal Works
Wine Cooler
(in island): Avanti Dual Zone for whites and reds with temperature control
Floors: Stained black bamboo flooring “Black Mamba” from Lumber Liquidators in Hackensack, NJ
Windows are original
Shingle-style architect: Pam Watt McBride, phone: 201.805.3825
Meredith McBride Kipp Kitchen Interior Design 2 Meredith McBride Kipp Kitchen Interior Design 3 Meredith McBride Kipp Kitchen Interior Design 4 Meredith McBride Kipp Kitchen Interior Design 5 Meredith McBride Kipp Kitchen Interior Design 6
Backyard Decor Solution

Spring Cleaning can be both cathartic and frustrating. As you spend these next few weekends planning for your outdoor life, don’t get worked up about how you’re going to make your backyard look just right.  If you’ve considered refreshing your exterior decor, you’ve likely realized you’ll spend well into the thousands to do so. But don’t panic, I’ve got a solution for you. In an effort to find the right pieces for my own patio, I have searched high and low to find the right products for reasonable prices. Here’s my selection of eclectic & bohemian, yet classic backyard decor. Clickable links to each product below. Happy Spring!

Meredith McBride Kipp Backyard Decor Savvy Selects

1. Scalamandre Melamine Salad Plates
Set of four $24.50, FRONTGATE

2. Pagoda Umbrella in Maui
$199.95, Pier 1 imports

3. citronella grey candle
$19.95, CB2

4. Capella Island Deluxe Armchair
$379.95, Pier 1 imports

5. OUTDOOR IDRISS PRINT LUMBAR PILLOW
$59.50, Pottery Barn

6. chunky white block planter
$39.95, CB2

7. Classic Beach Fold Chair
$229.00, Navy/Sand, Ballard Designs

8. OUTDOOR LARACHE PRINT PILLOW
$49.50, Pottery Barn

9. Ceylon Whitewash Chaise
$549, Ballard Designs

10. Quinn Garden Stool
$119.95, Pier 1 imports

11. Farmhouse Hammock Cushion
$399, Canopy Stripe Taupe/Sand Sunbrella, Ballard Designs

12. dockside II dining table
$449.00, CB2

You had me at Butler’s Pantry…

Photography by Laura Moss
Styling by Meredith McBride Kipp 

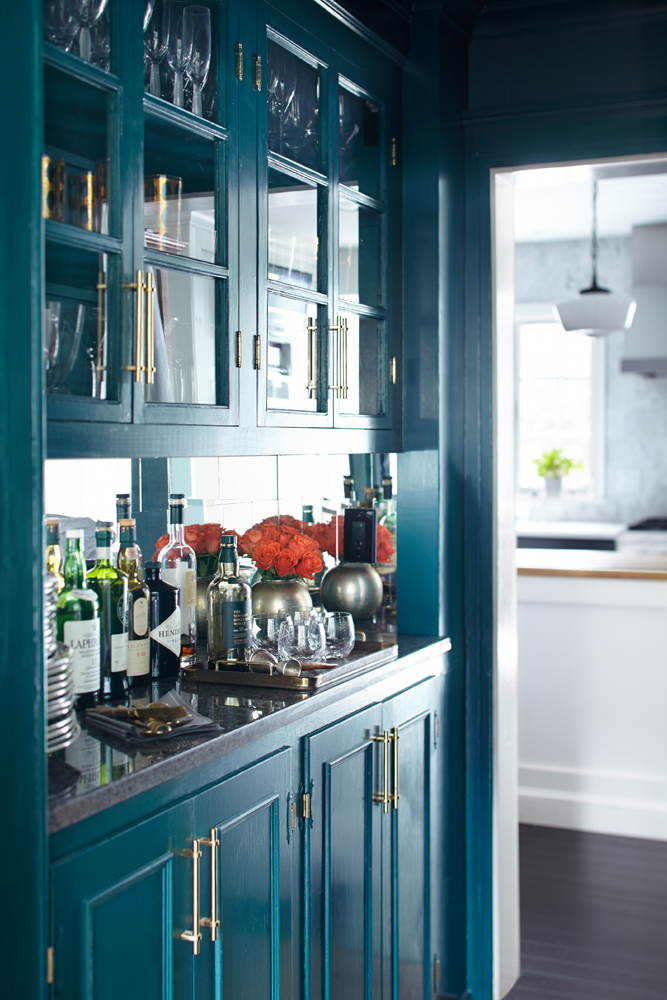
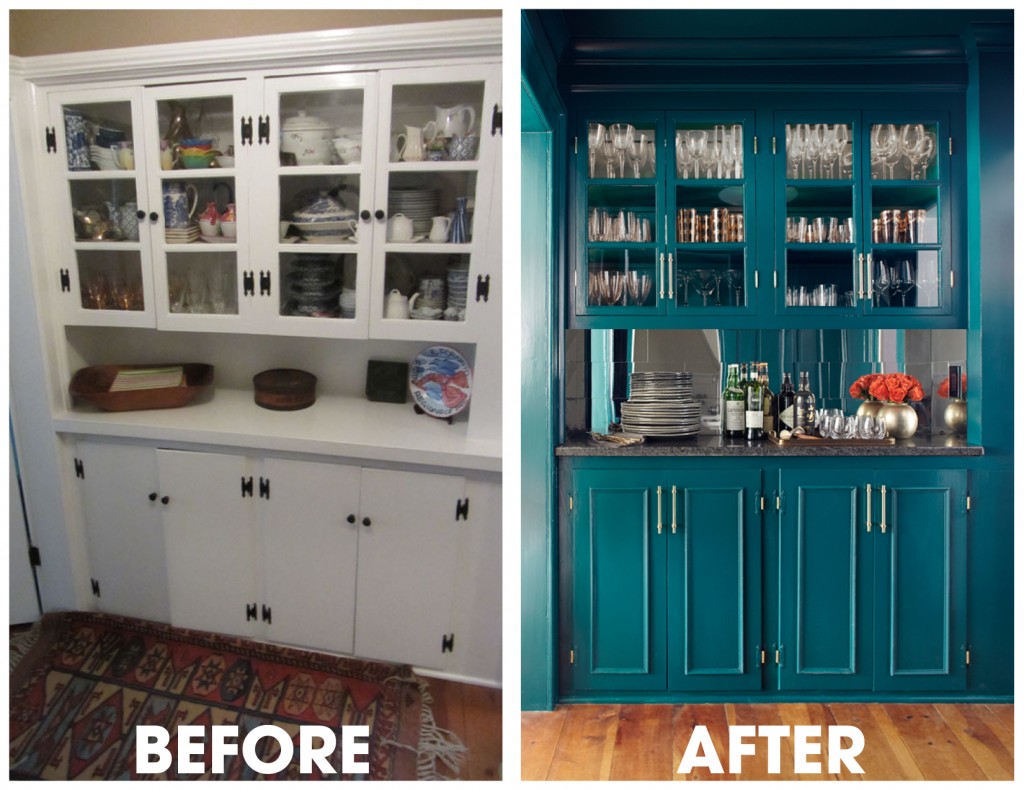
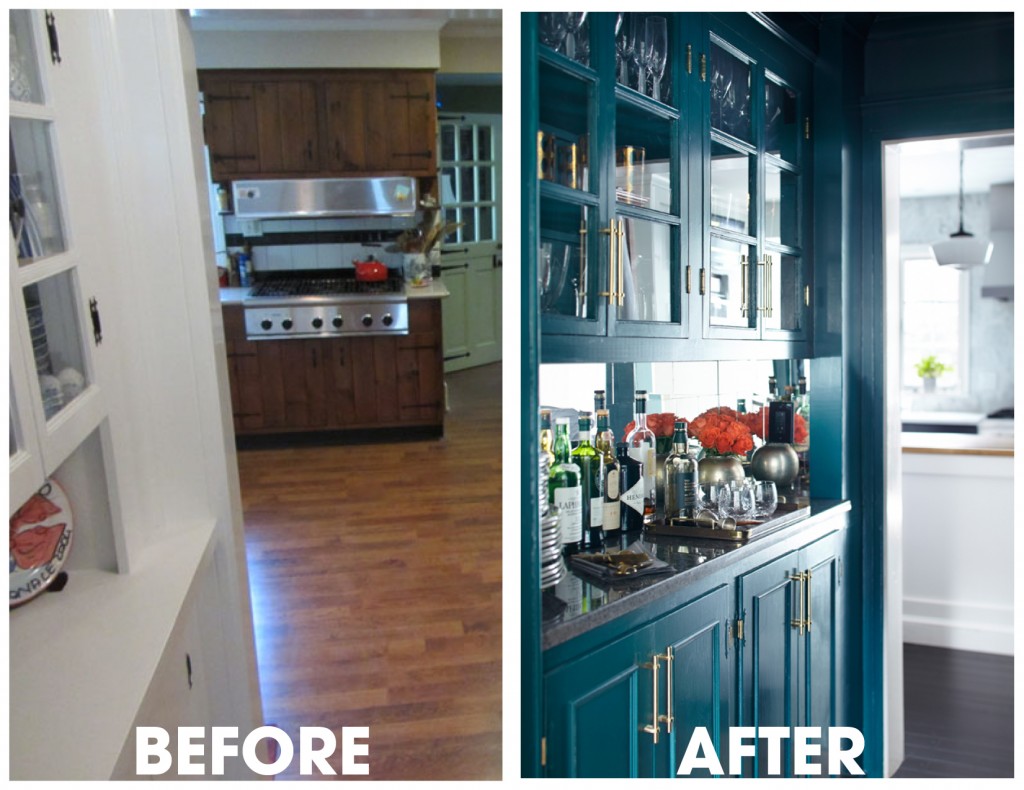
When touring old homes (and new), a butler’s pantry is always the highlight for me. It was one of the selling features when my husband and I bought our 1805 farmhouse. Despite the charm of the home, the butler’s pantry lacked the proper character and polish. We believe it was added in the 1950’s, and was in need of a major facelift. First off, the upper cabinets needed to be moved up nearly a foot in order to actually accommodate the height of a bottle.

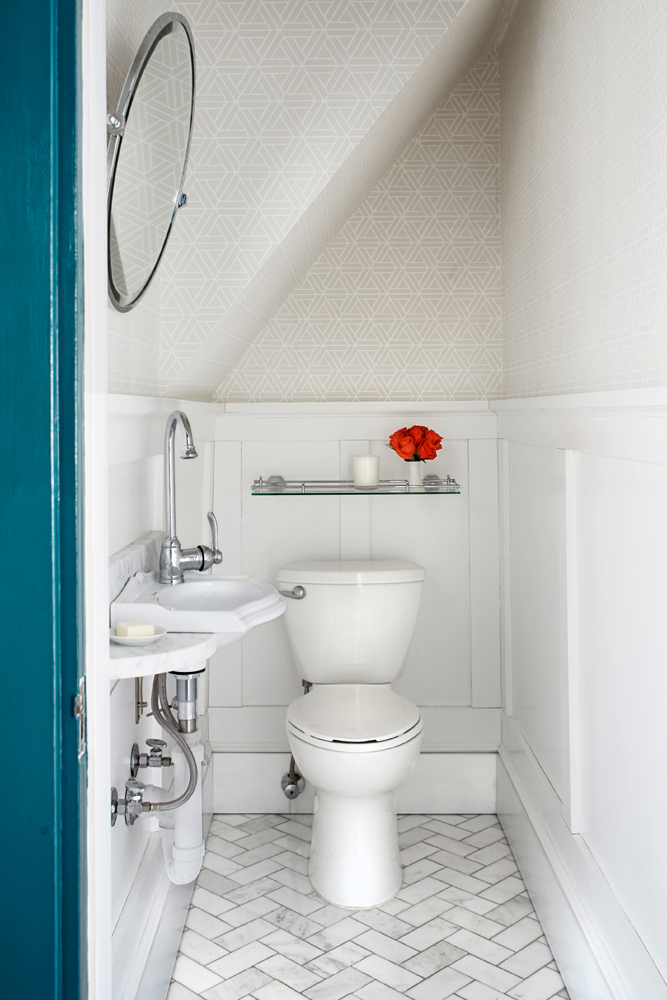
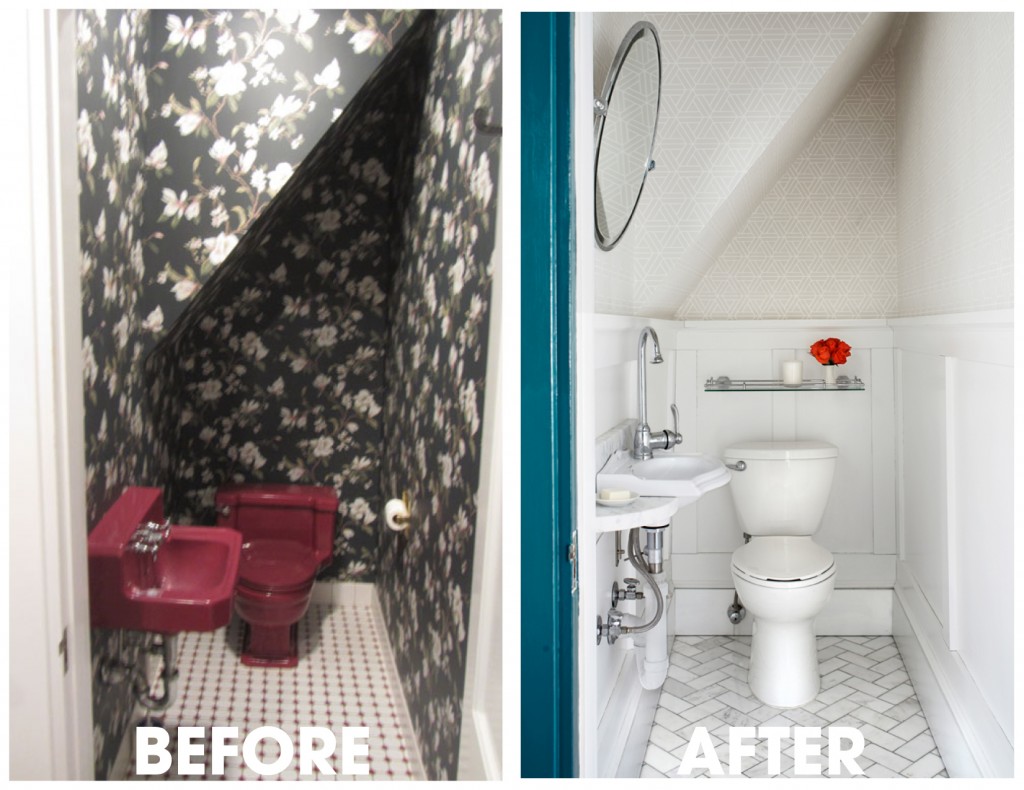
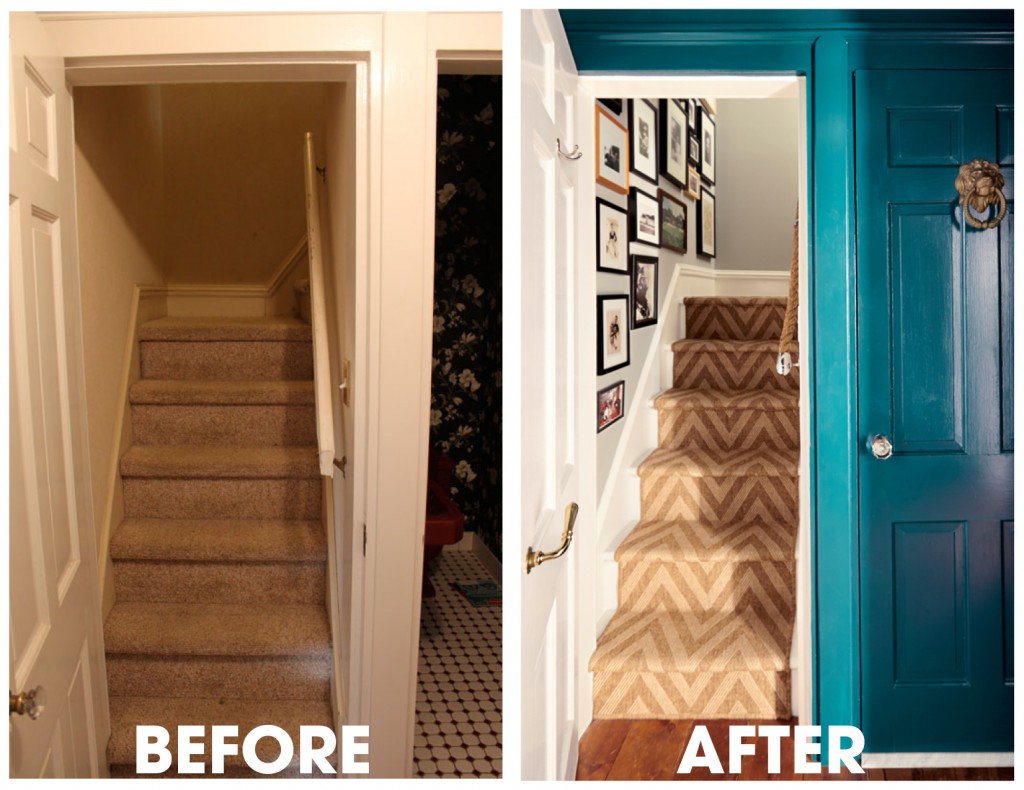
My husband tackled this project with full steam last year while I worked on our soon-to-arrive baby’s nursery upstairs (I will post that decor story soon). Our thought was that ‘if we’re going to have a child, we’re probably going to need a proper place to mix a cocktail.’ (SEE OLD FASHIONED RECIPE BELOW) So we bumped the project to the top of the list. With that he tackled the powder room and the back stairwell. SEE BEFORES AND AFTERS BELOW

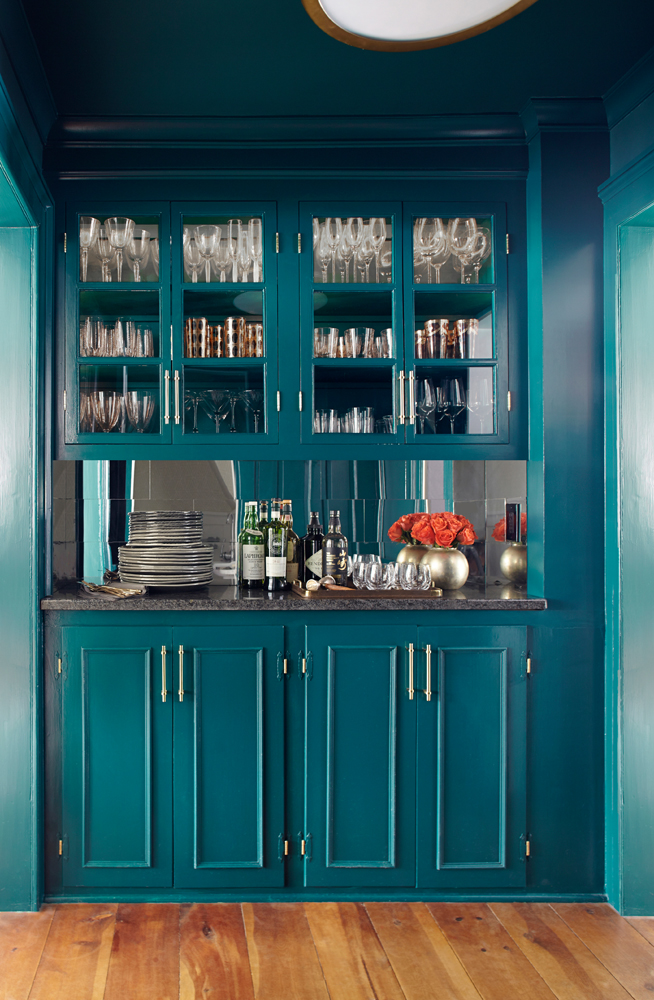
Steps for transforming the BUTLER’S PANTRY:
Removed the overhead soffit and upper cabinets
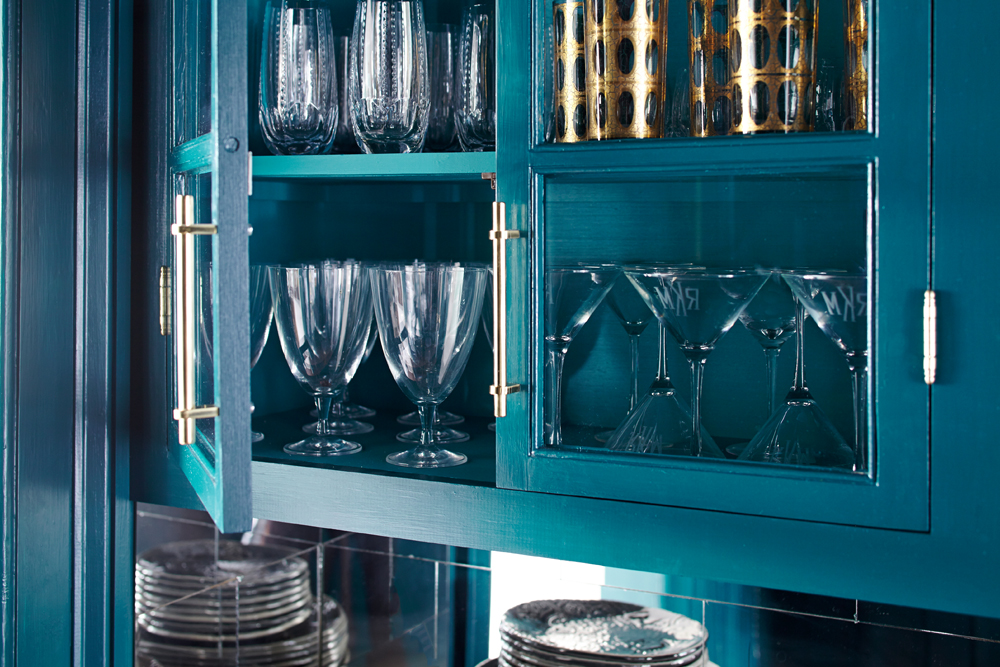
Rebuilt the upper cabinets using only the existing doors (which we think are original from the home’s first kitchen)
Trimmed out the lower cabinet doors
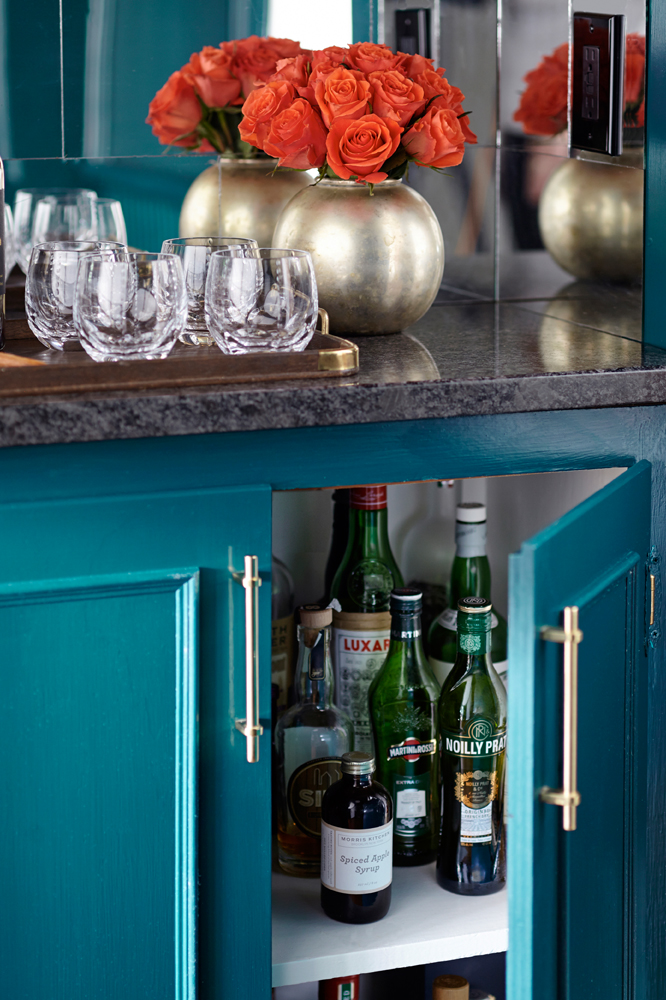
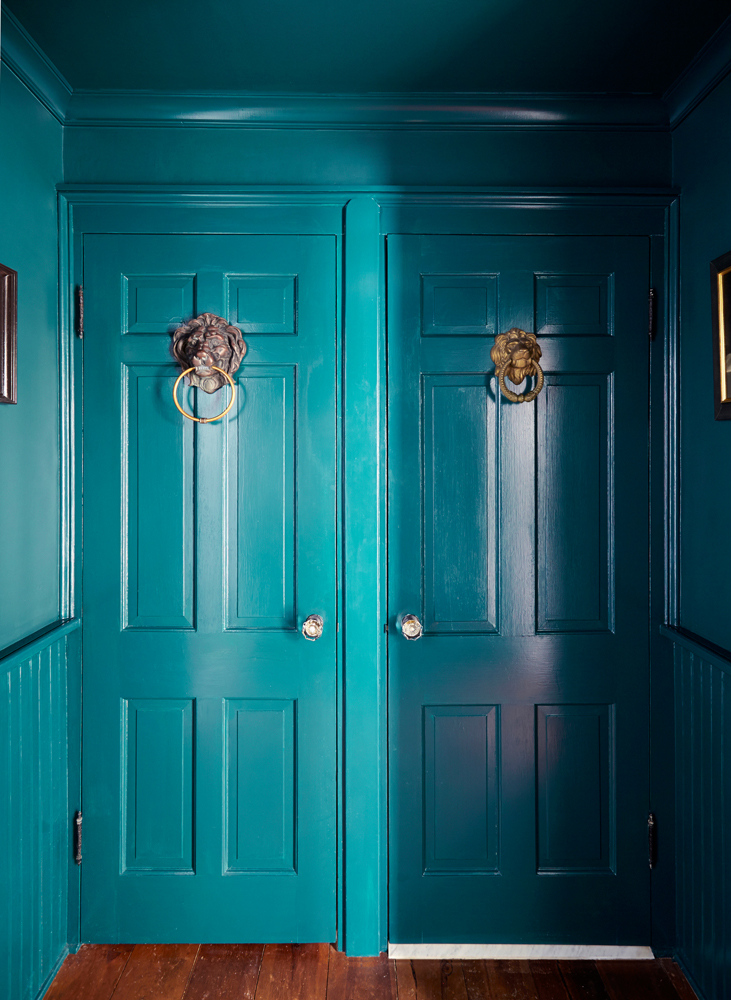
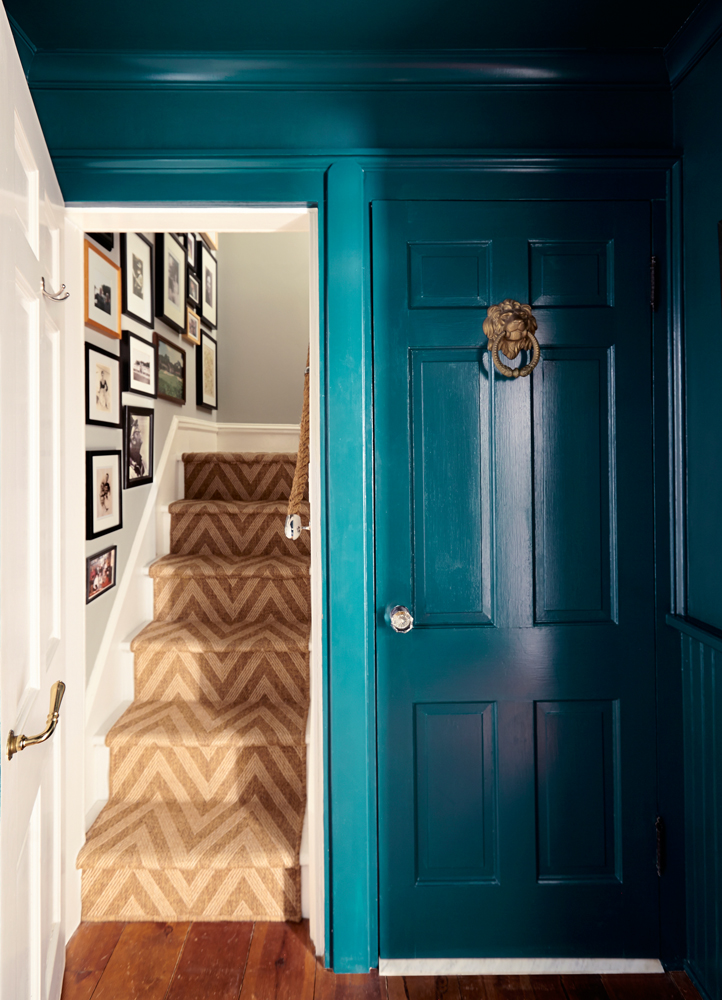
Painted the whole room a delicious prohibition-era-inspired dark teal
Replaced the painted wood counter with black granite
Tiled the backsplash with 6″x12″ (subway style) hand-cut mirror tiles
Installed art spotlights, under-cabinet lighting, interior-cabinet lighting, and electrical outlets
Hung a beautiful oversized, overhead, brass light fixture
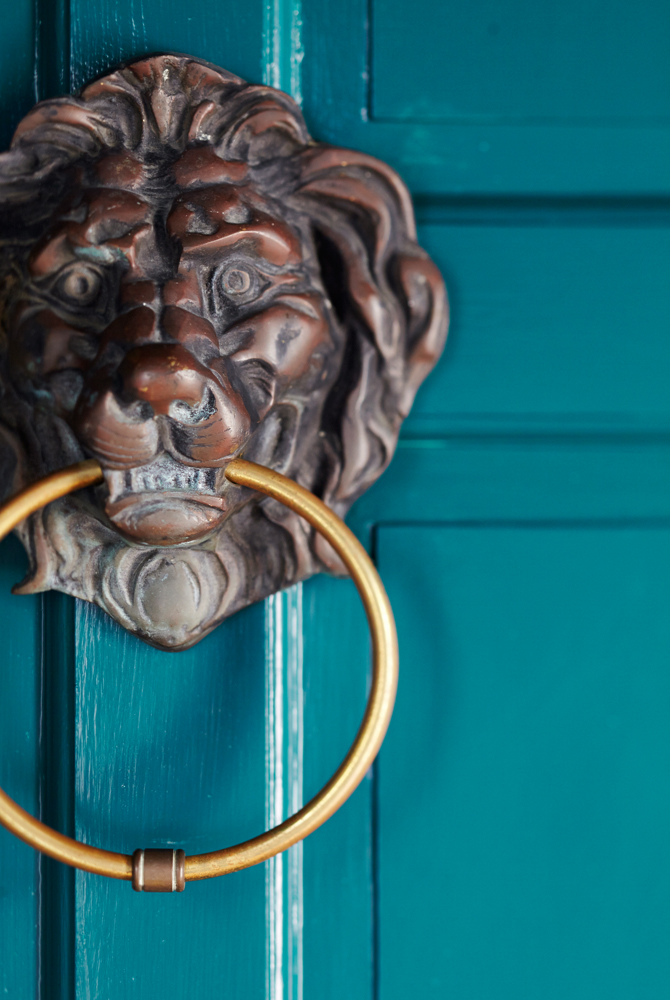
Hung lion-head door knockers for a bit of (Bowie’s) Labyrinth whimsy
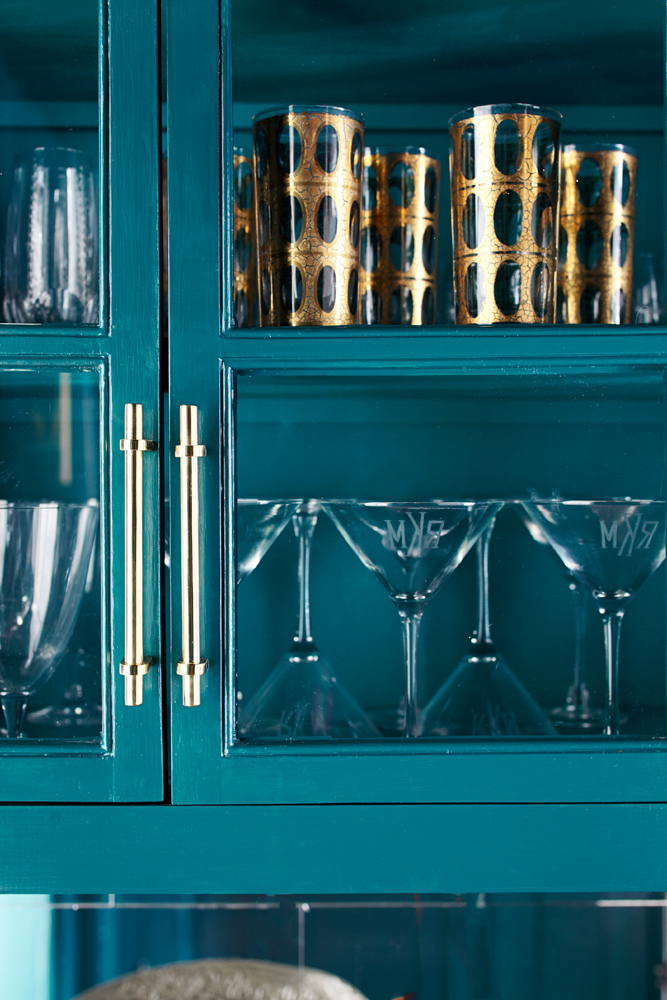
Installed sleek brass hardware

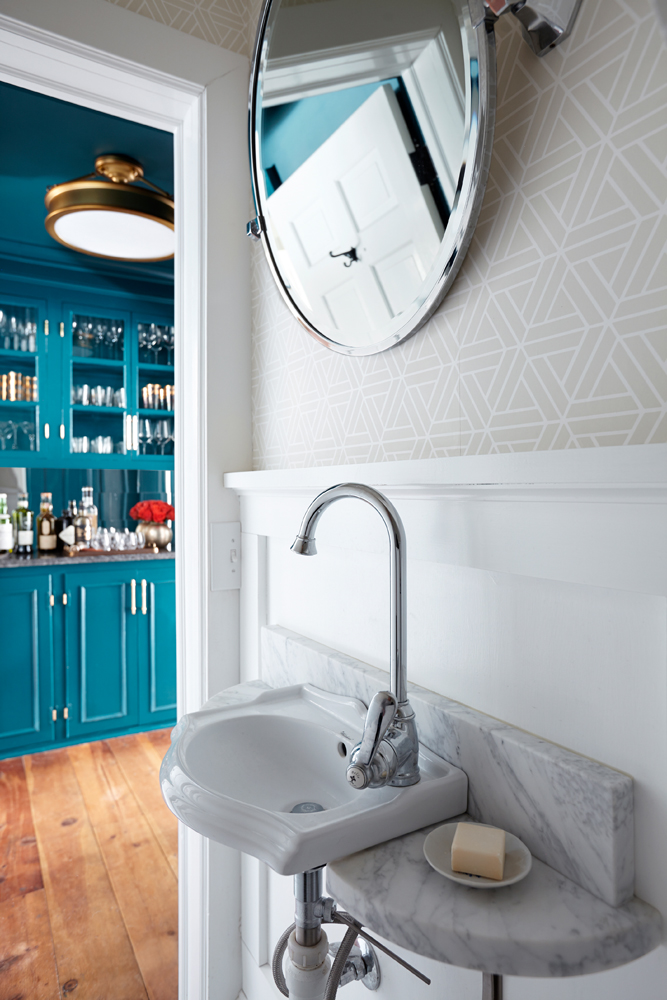
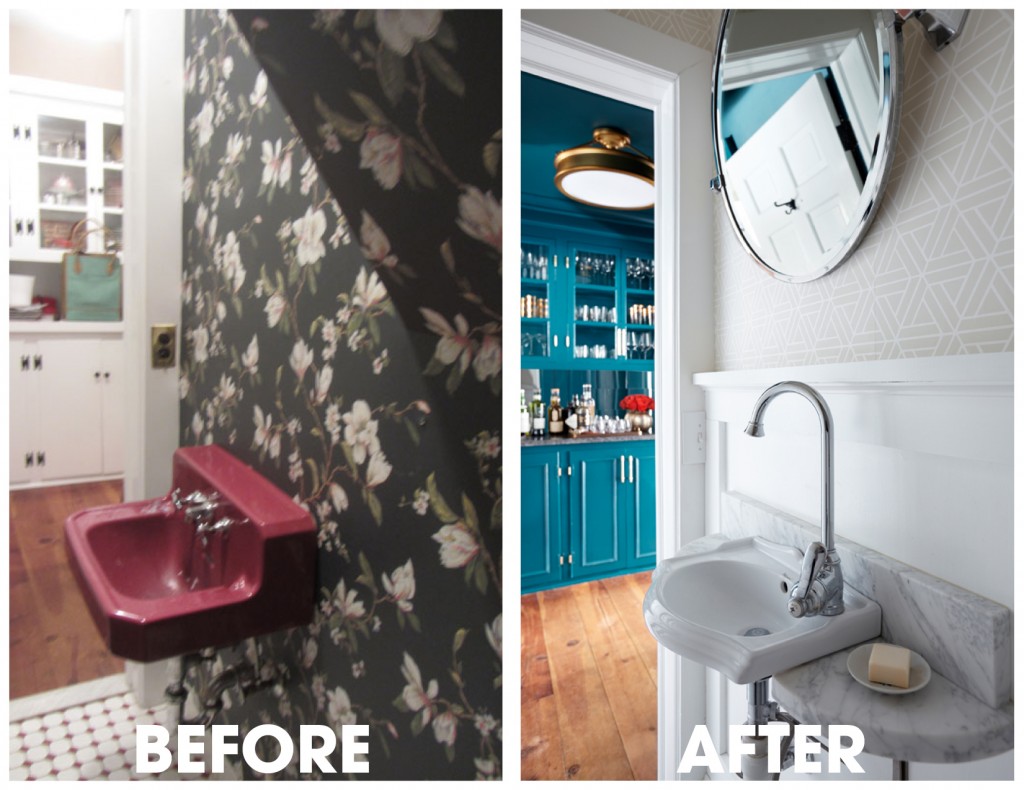
Steps for transforming the POWDER ROOM:
Removed toilet, sink and tile floor
Removed wallpaper and light fixture
Installed paneling on walls and repaired, primed and painted walls and trim
wallpapered above paneling
installed Julisk light
installed new miniature sink with custom-designed marble backsplash and counter
Steps for transforming the BACK STAIRWELL:
Stripped the carpet & wallpaper
Caulked and repaired walls, trim and floors
Primed and painted walls, ceiling and stairs
Cut and stapled floor runners to create continuous look
Framed and hung important historical family photos

BEFORES & AFTERS:

BUTLER’S PANTRY CLICKABLE RESOURCES:
Brass light fixture
Custom teal paint color: click to see image of scannable barcode for home depot BEHR color
Lion head door knockers are antique, but here are some similar ones 

POWDER ROOM CLICKABLE RESOURCES:
Juliska light fixture
Miniature porcelain sink
Marble sink surround and backsplash custom designed by Meredith, cut by Atlas Stone
Marble sink surround and backsplash installed with love by Sebastian Martorana
Rose vase by his talented wife, Amanda Martorana

BACK STAIRS RESOURCES:
Chevron stair runners


We Need the Bunk!

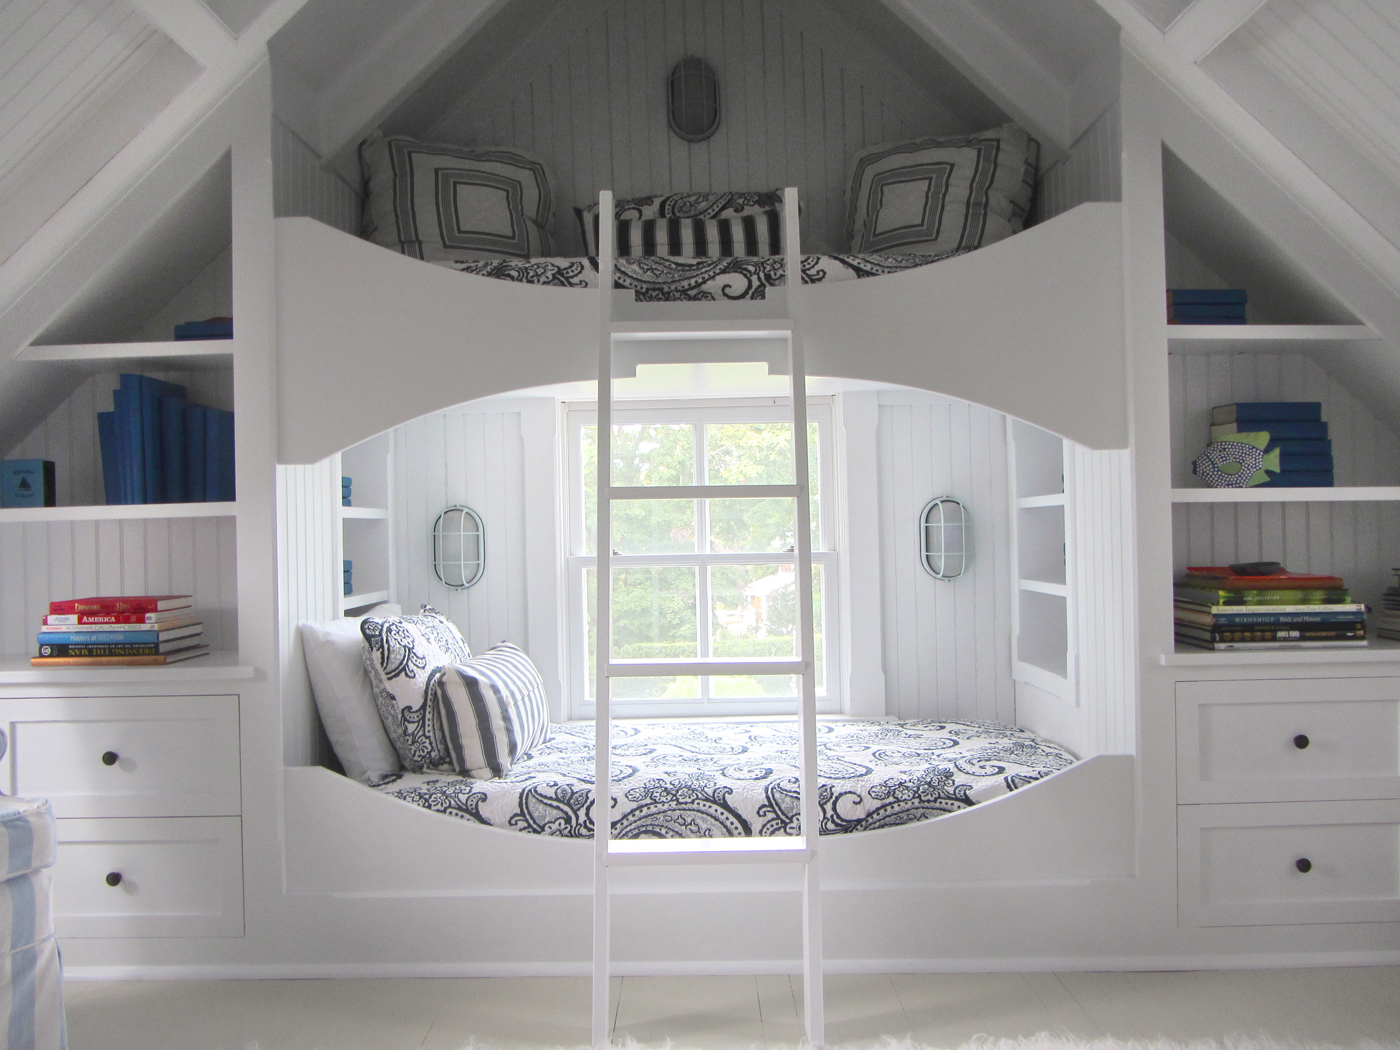
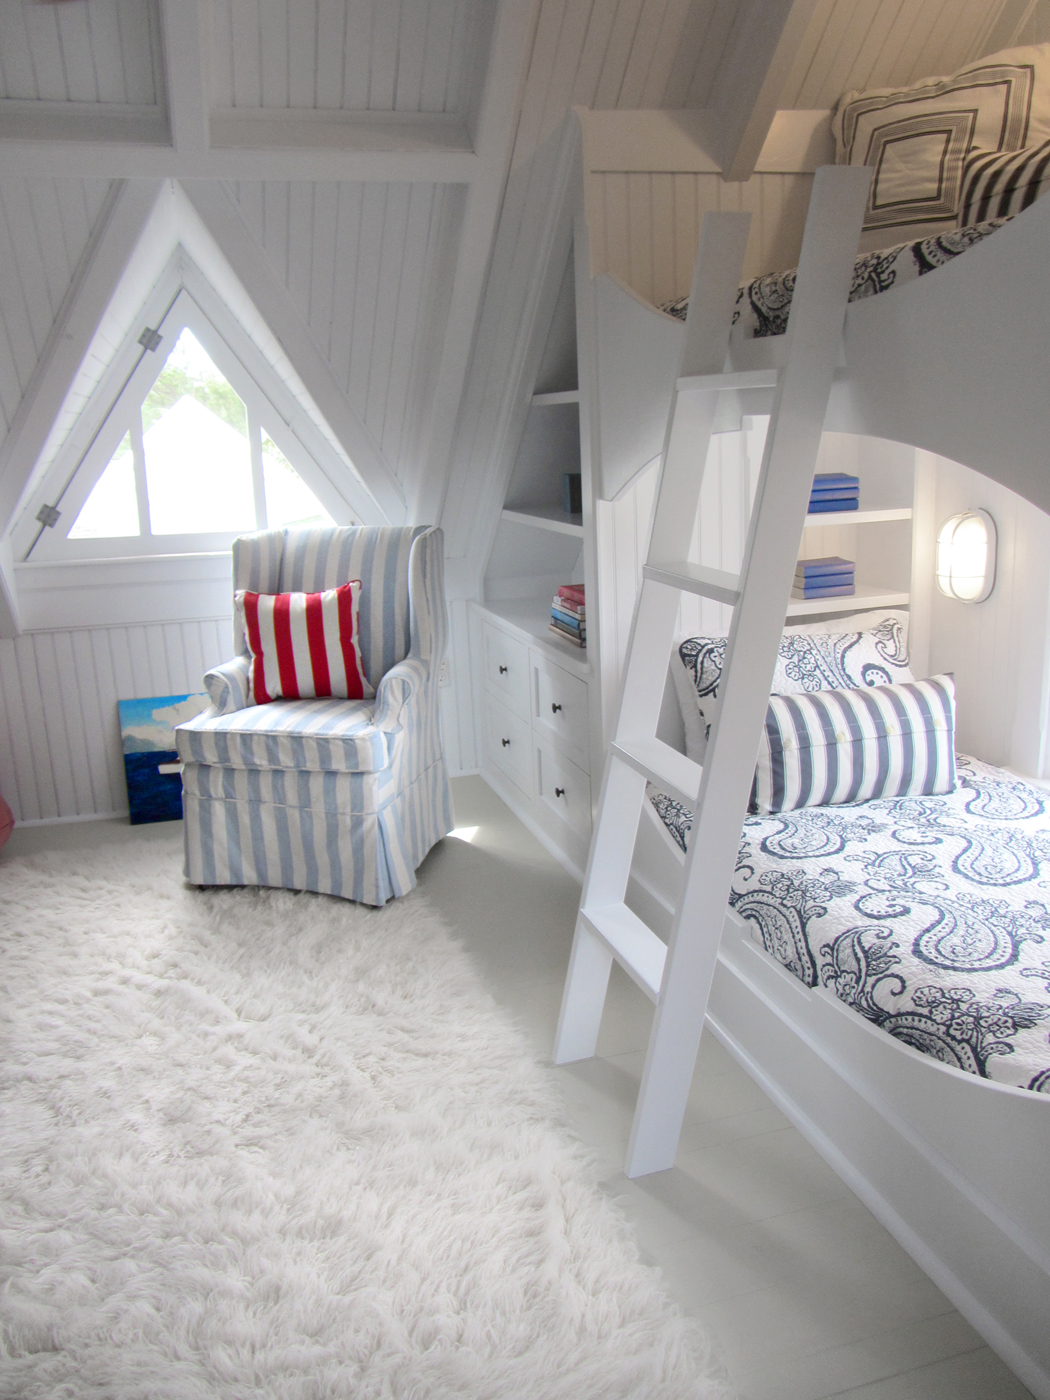
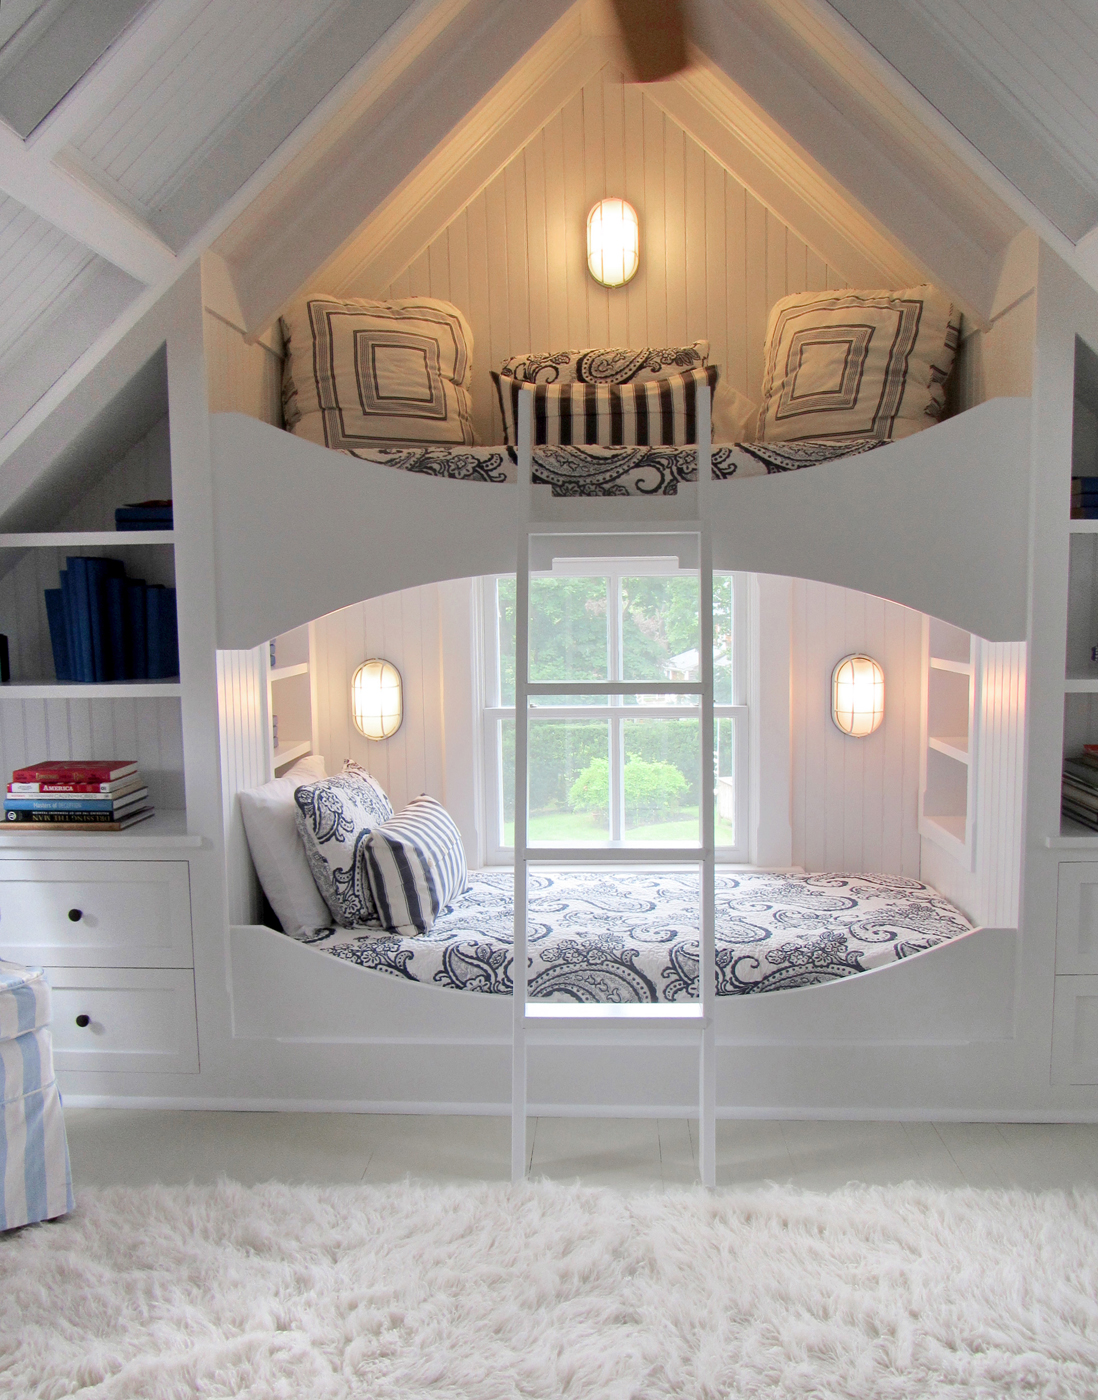
Gotta have the bunk! Perhaps George Clinton would find this room a little preppy for his taste, but I think he’d agree it’s bunkedelic. I designed this kids’ room for a Hamptons beach home a few years back and—because it’s fun, summery and patriotic—I thought Independence Day was a good time to share it with you.

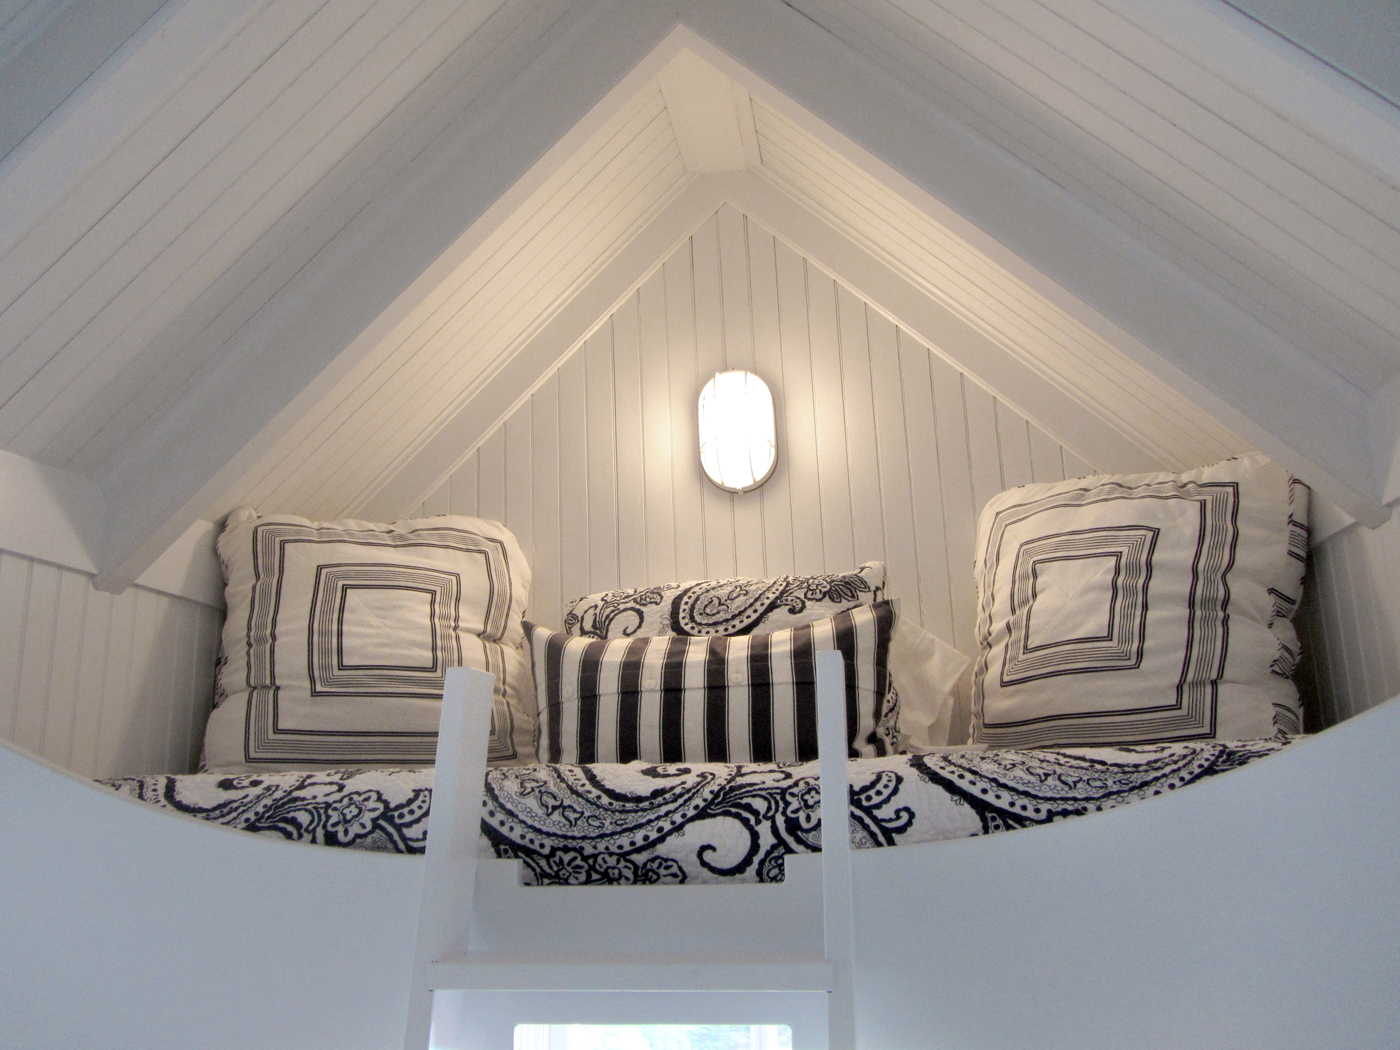
Bunk beds are a great solution for a small space and often create opportunities for interesting and efficient storage solutions.

Have a cozy and happy 4th with your friends and family! xo MMK

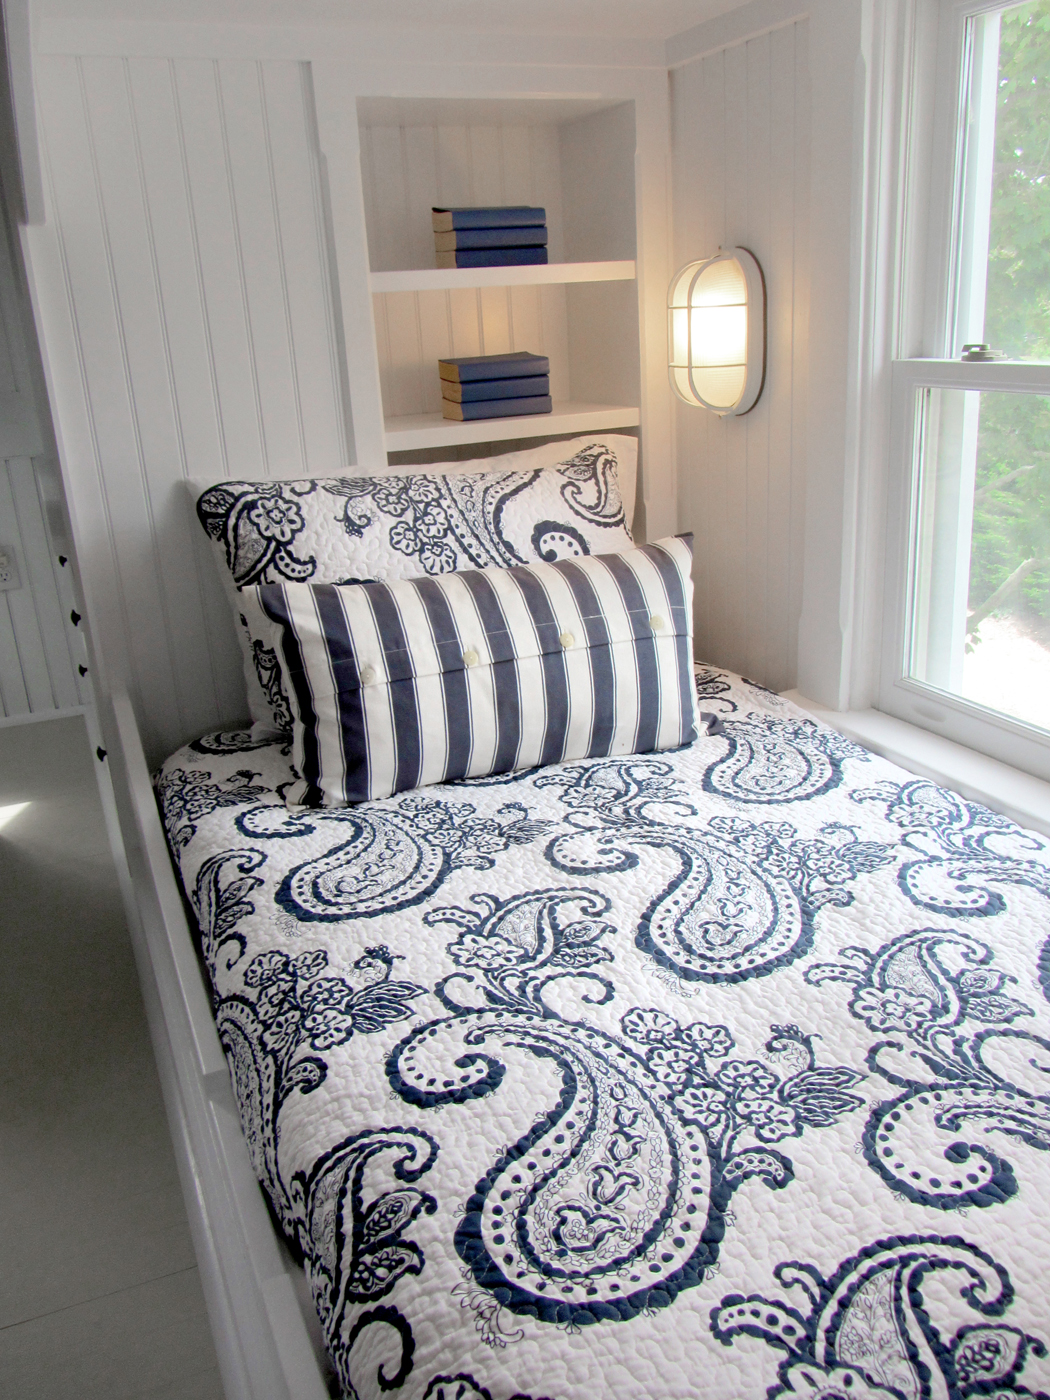
The nautical cage lights are similar to these at Cape Cod Lanterns and are good and kid-proof.

The canvas floor totes are a great solution for toy storage and things that need to come and go (like beach gear or laundry). I bought these at Home Goods but Pottery Barn has some similar in style.

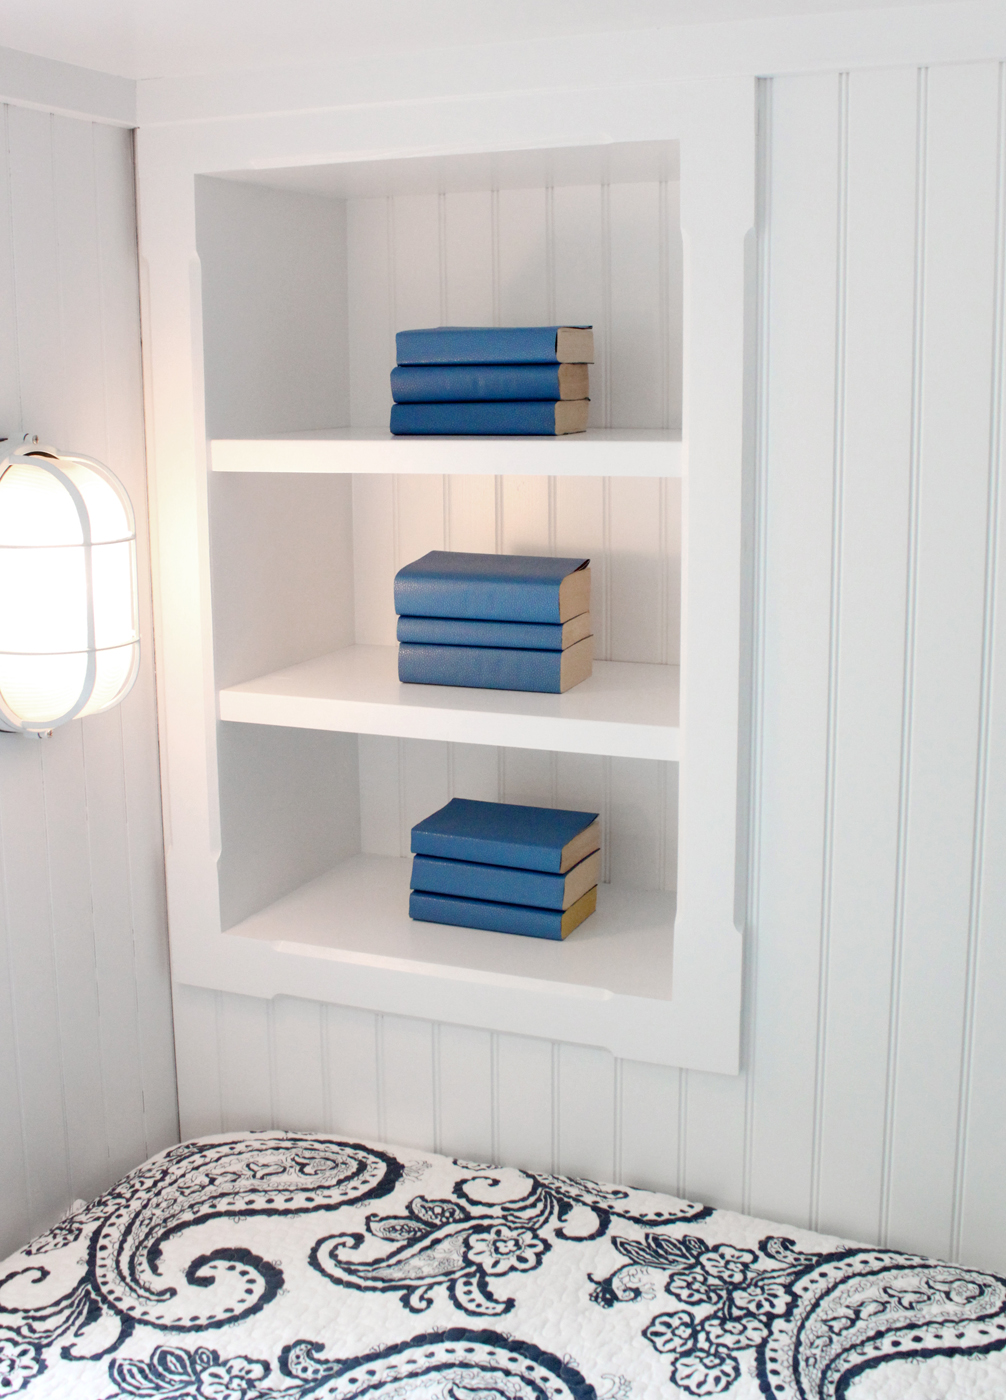
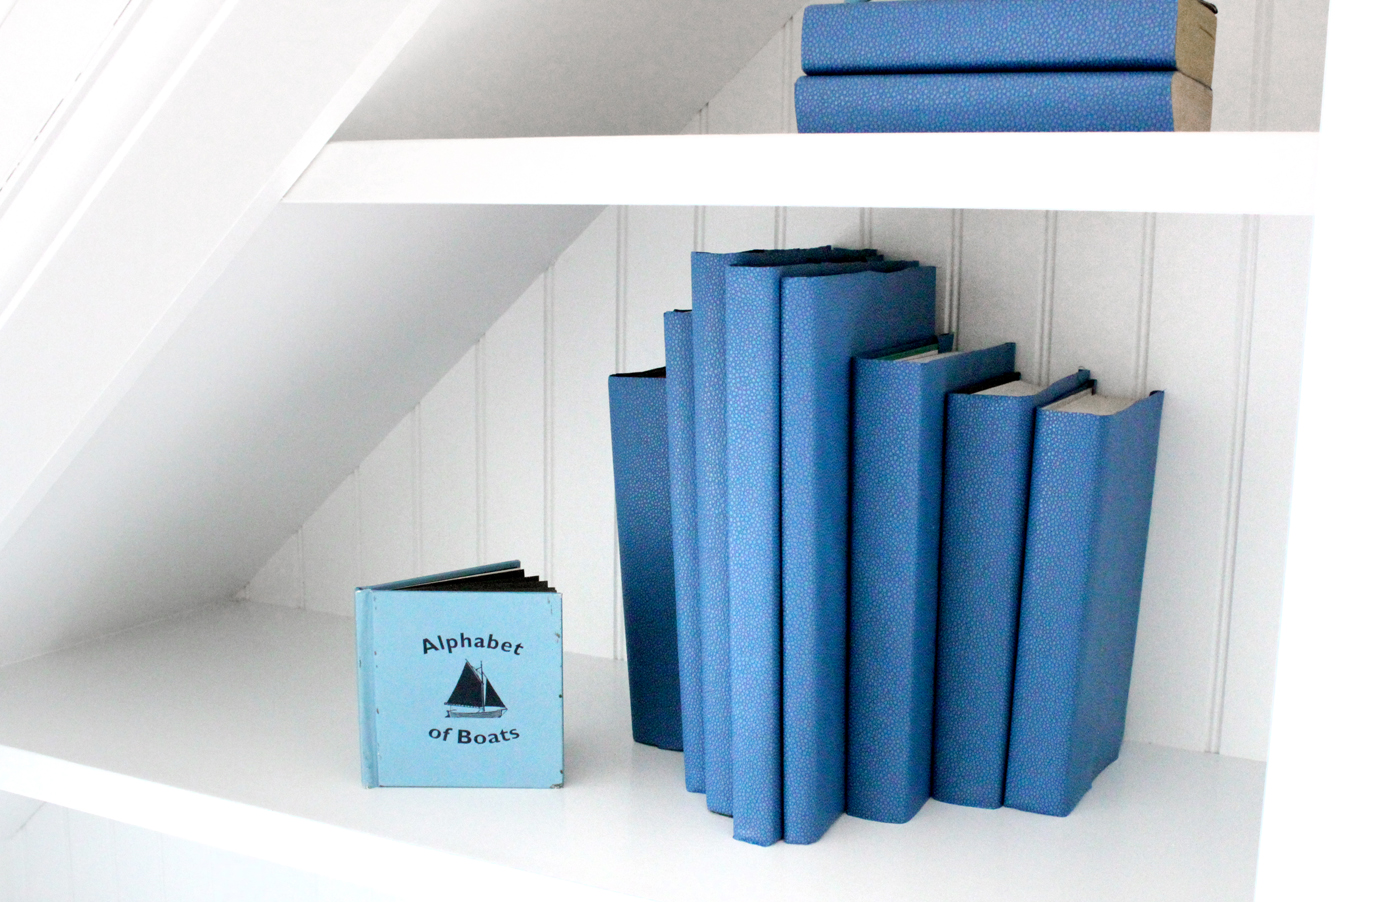
Because the room needed to be finished for a house tour and was not being lived in yet, I styled the shelves with a mix of my own books and others that I bought at Salvation Army and covered in blue faux-shagreen paper just to give it a little consistency and color.

The rug is flokati and is similar to this one from homedecorators.com.

The bedding is all from Marshall’s and Home Goods. Because of my tight time frame I picked a classic and simple color scheme (navy & white with small hints of red) and stuck with it. You can get away with mixing patterns as long as the hues are the same.
Get a similar, but more tailored, look with the following bedding by Ralph Lauren and a few of these pillows and these pillows too.


Re-soul a Slipper

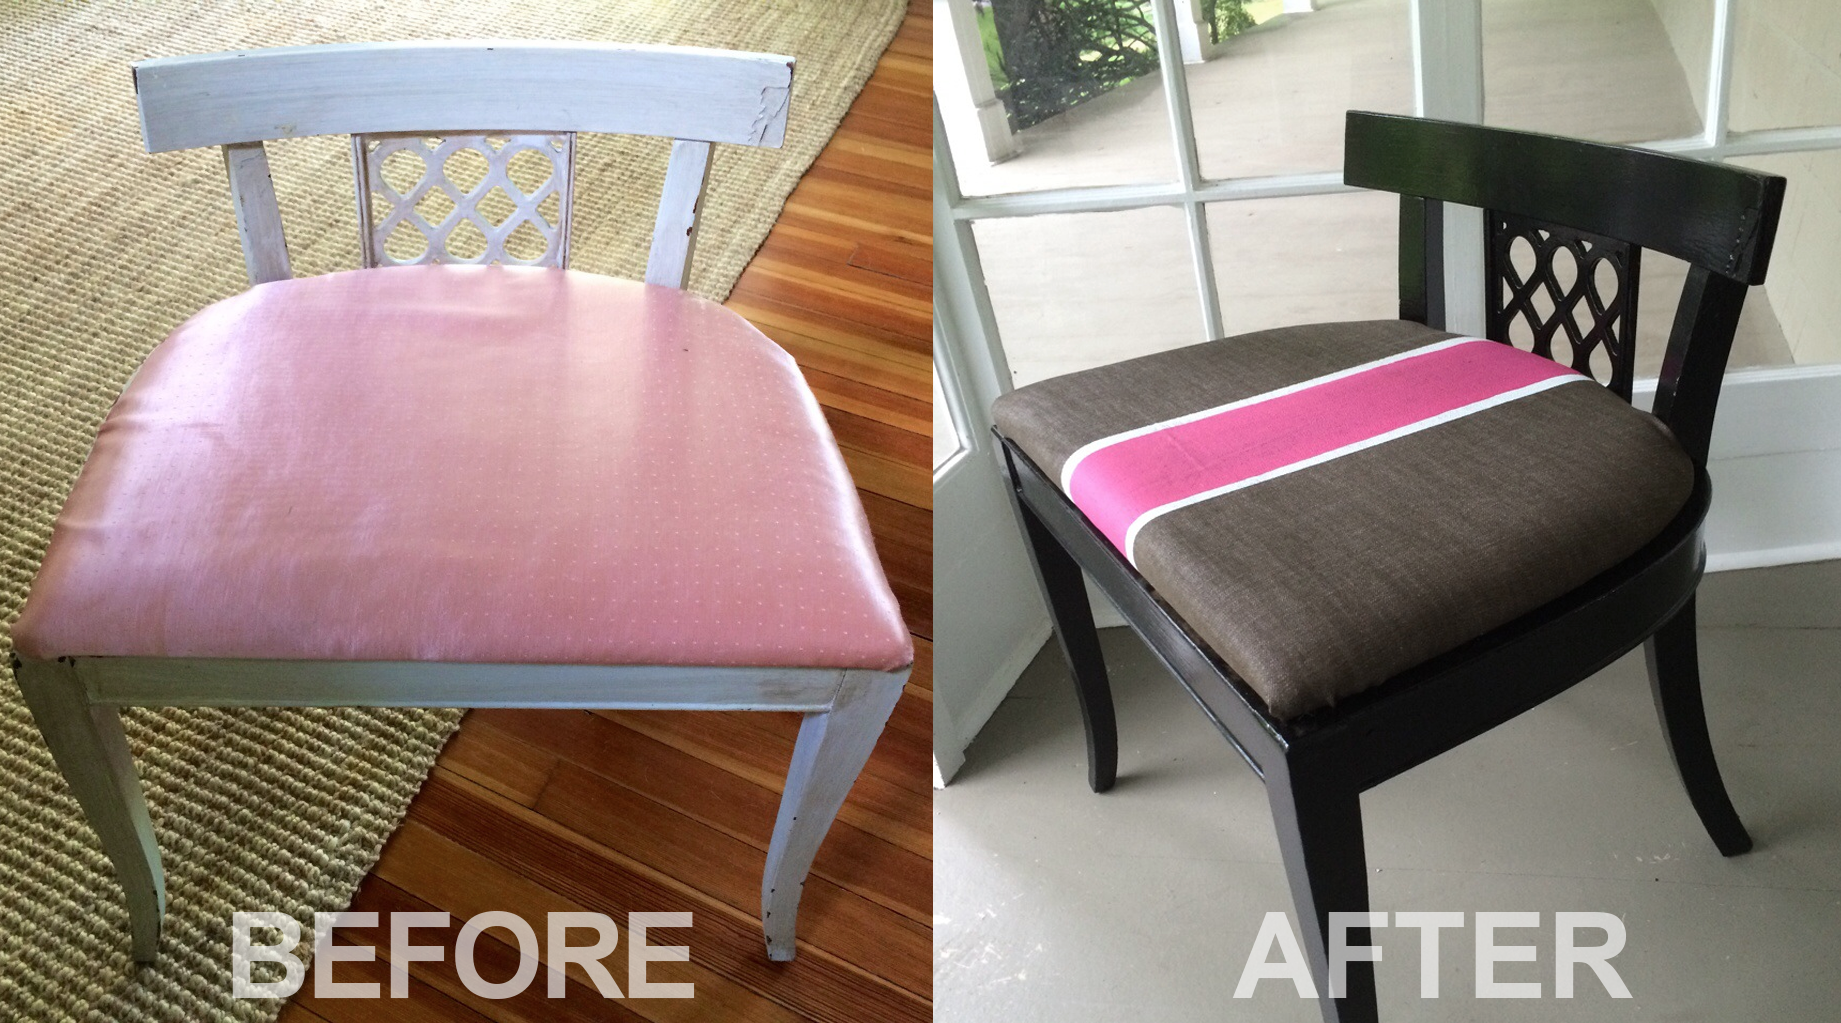
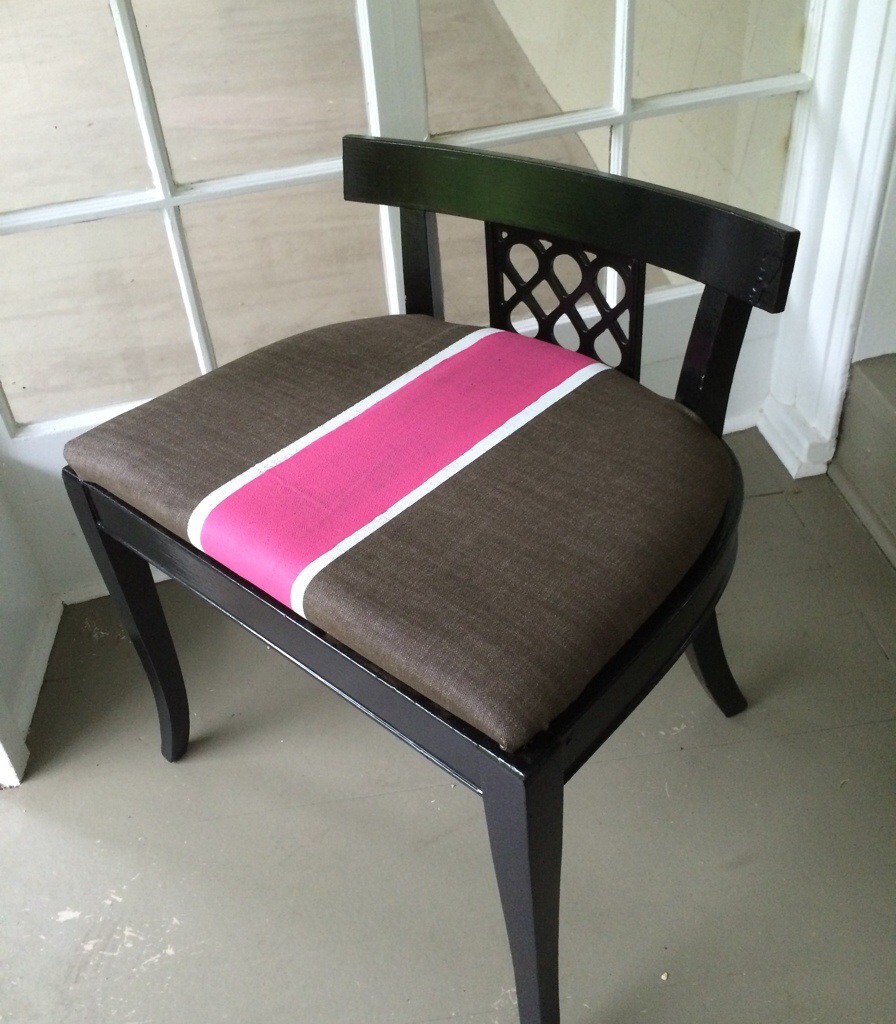
Give new life to  garage sale find this weekend. Whether it be a new purchase from your Memorial Day weekend hunting or one of the pieces you’ve been hanging onto, just rip the bandaid off and do it. Here’s a quick slipper chair remodel I did in a few hours yesterday. All it entailed was a fresh coat of glossy spray paint, a piece of fabric and 2 samples of latex wall paint from my local hardware store. Directions below. Good luck and happy hunting this weekend!

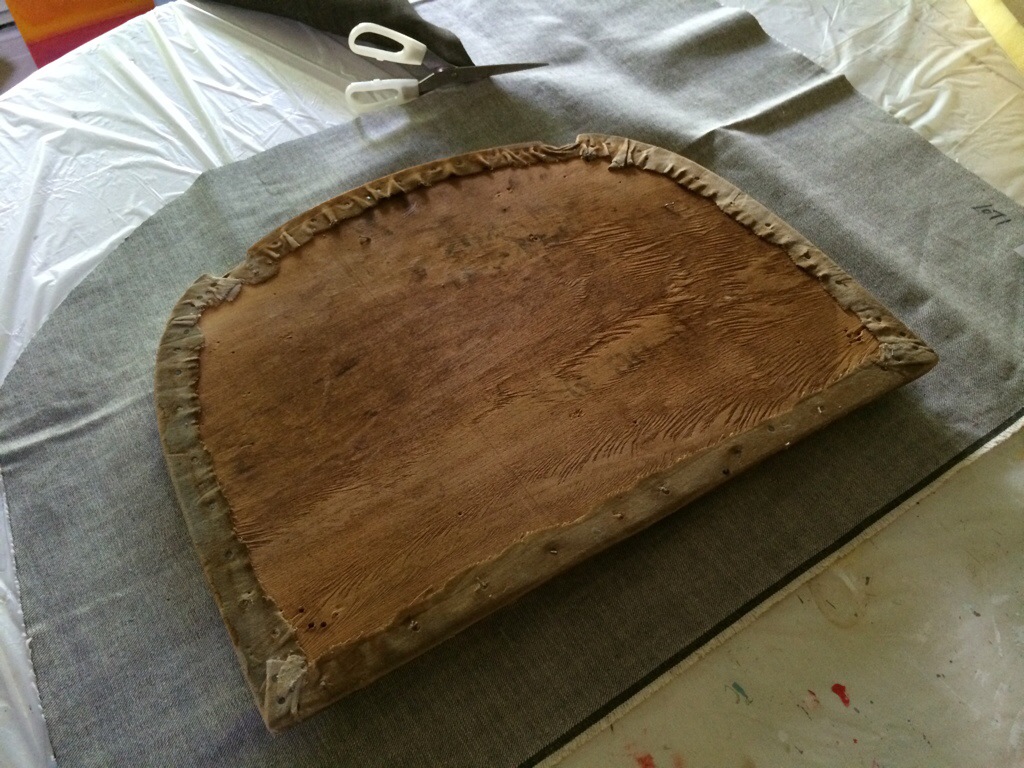
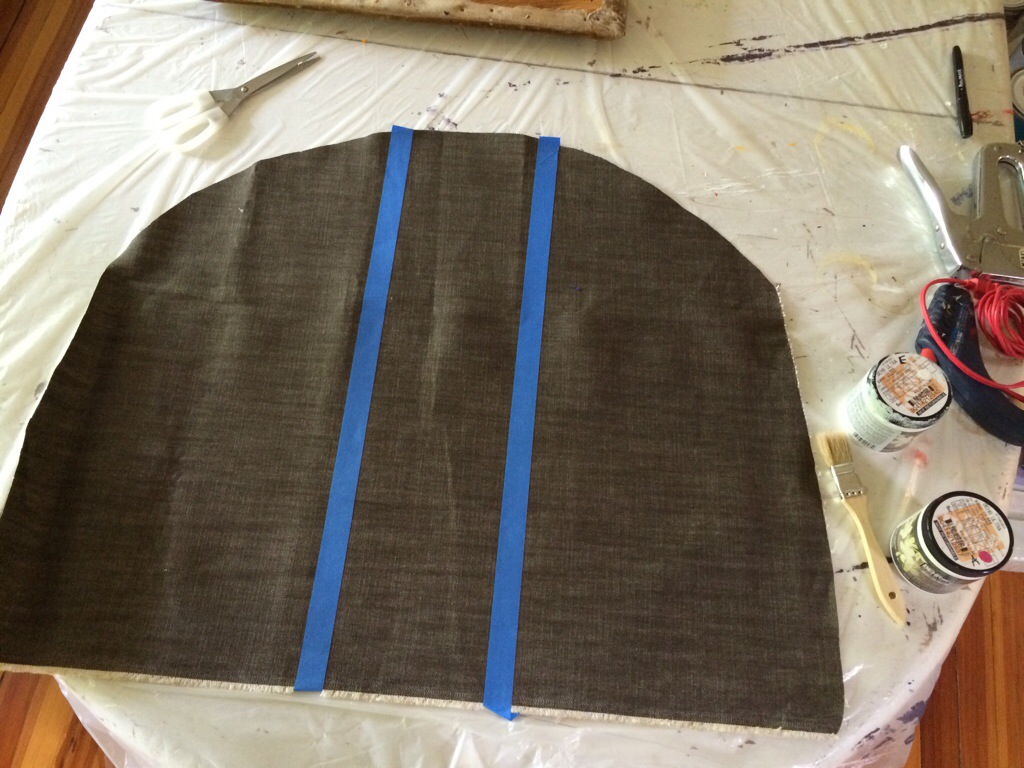
Cut a piece of fabric large enough to wrap around and be stapled. Always give yourself a little extra.

I taped off o wide stripe down the center of the fabric. Measure from each side to make sure your pretty centered.

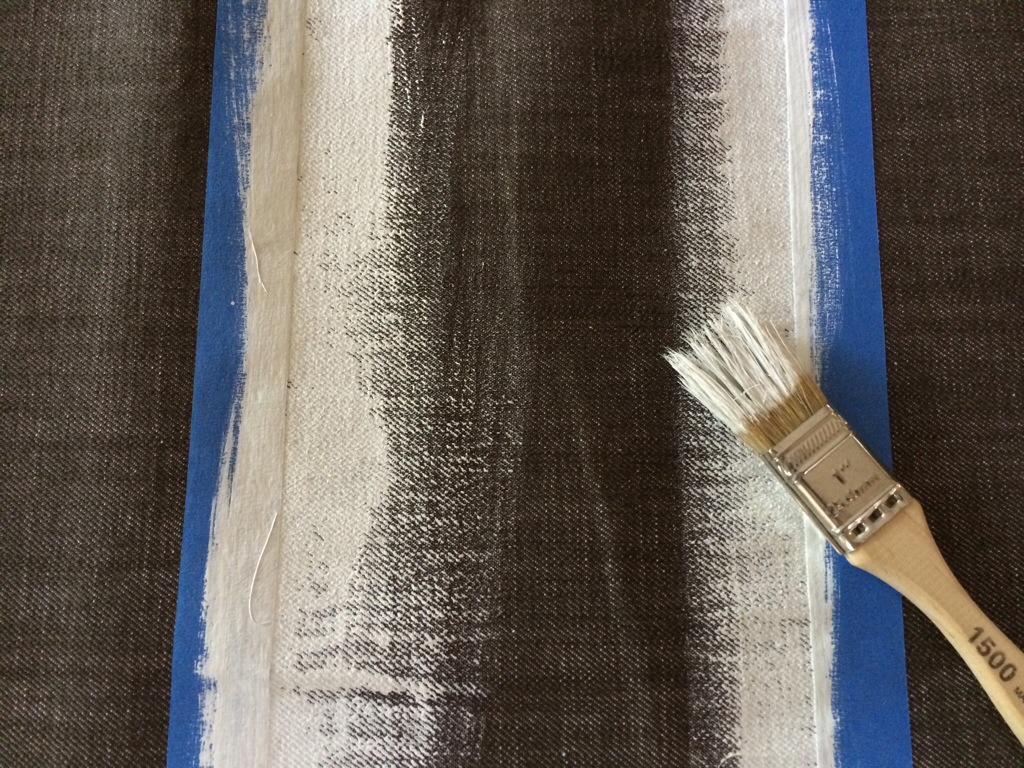
I brushed on white latex paint for a white edge

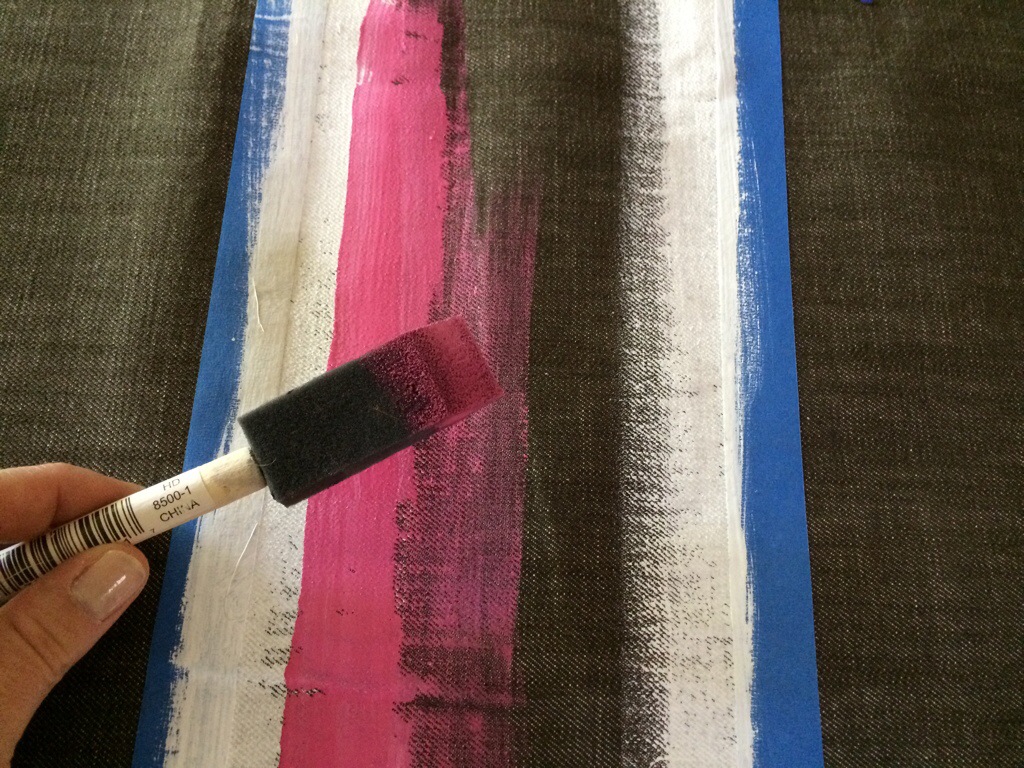
Then pink. If you want the lines to be perfect, let the white dry, then tape a new line for the pink. I wanted mine to be a little organic so i freehanded it

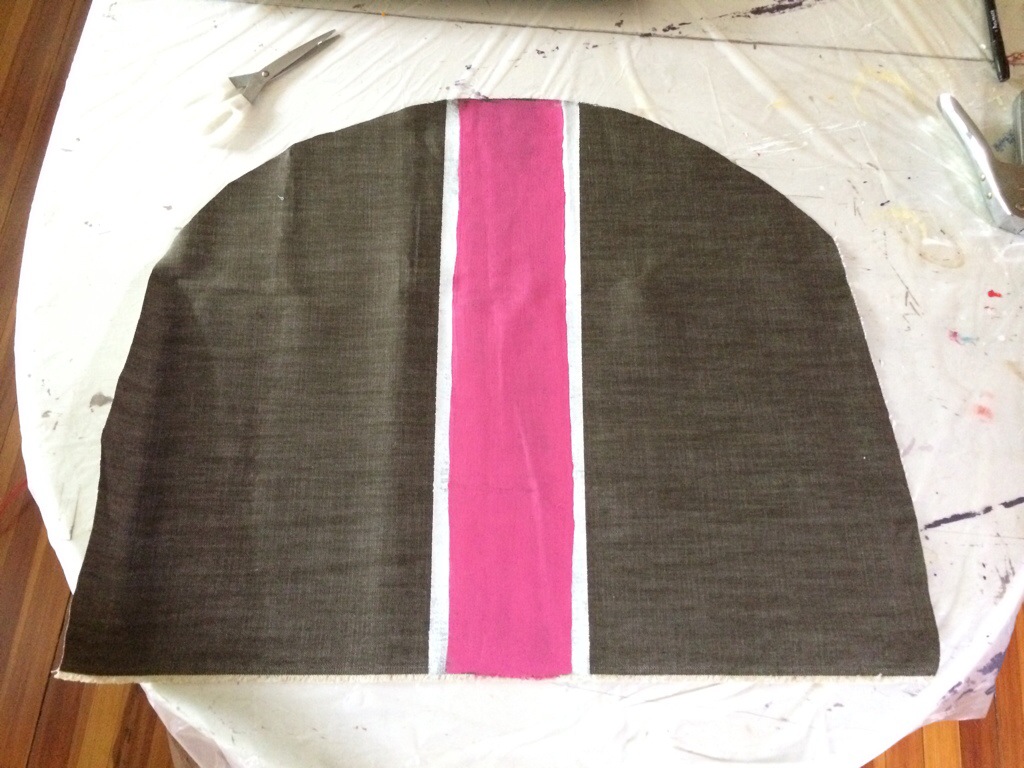
remove the tape and let it dry thoroughly

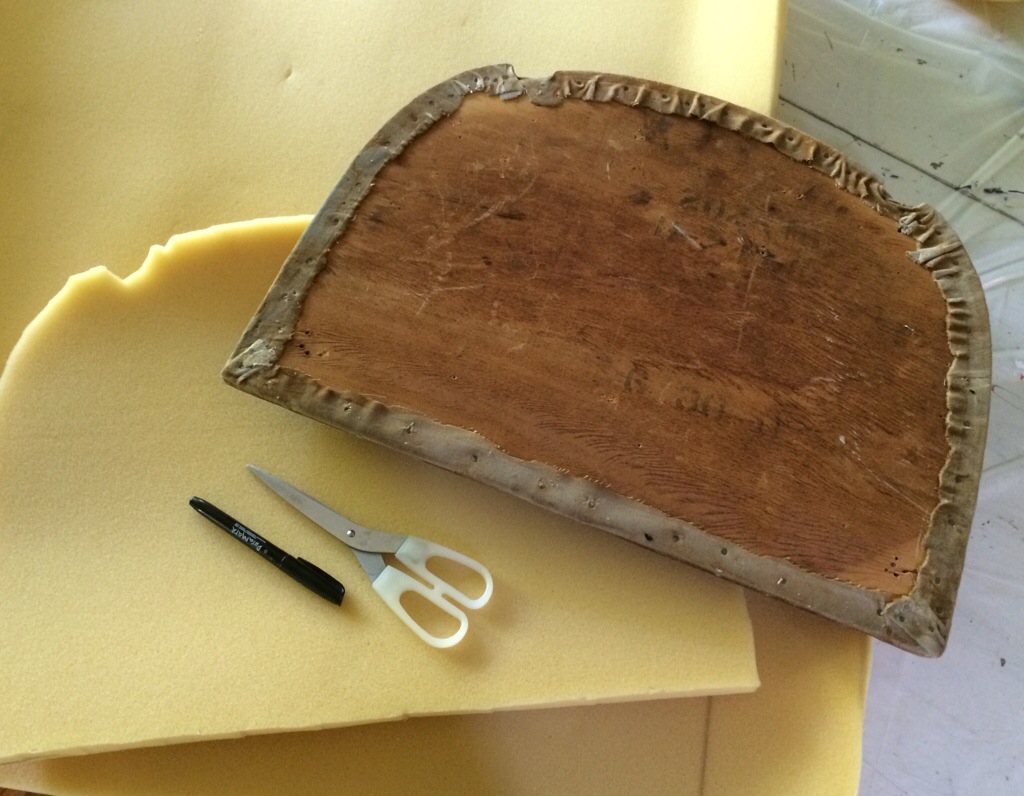
if you need to replace the foam, do so by tracing the seat onto the foam and then cut it out with scissors.

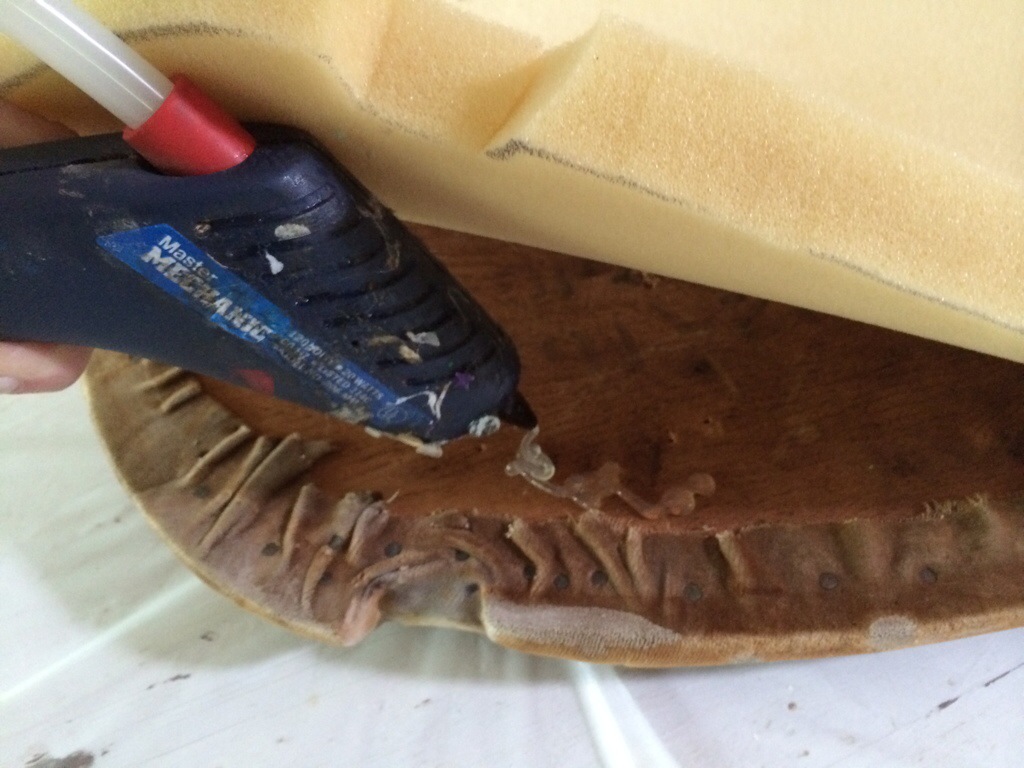
Once lined up precisely, glue your foam in place so that it doesn’t shift while you’re upholstering or in the future

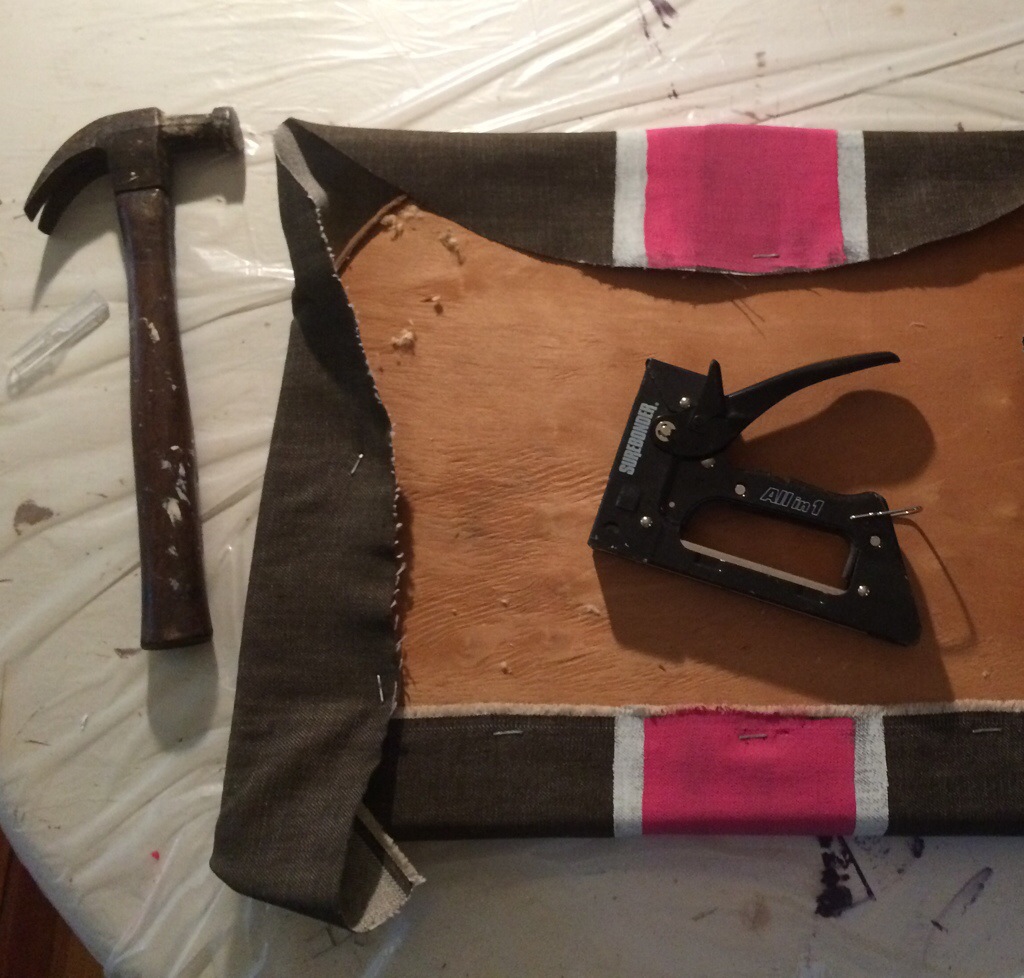
I staple-gunned the fabric taught to the wooden seat, pulling the foam to a rounded edge along the sides of the cushion. Again, measure to make sure your stripe is centered and straight before you staple.

Et Voila! A new soul for your Slipper chair!


RECIPE TO REFRESH

REPOSTED FROM the style blog of the chic, NYC-BASED, SURF-FRIENDLY FASHION BRAND, LOOMSTATE, WHERE I WAS A GUEST BLOGGER LAST WEEK.

You’re probably feeling a little guilty from overindulging throughout the holiday season…nibbling the cheese cubes at the holiday party, exploring the innerds of every chocolate in the box (invest some time and you might actually find the caramel one) and bathing your liver in a stream of hot toddies. Luckily, it’s 2014 and a chance to refresh your mind and body!  Meredith McBride Kipp, Creative Director at New York Spaces magazine and editor of her own design & style blog aMereLife.com offers us a simple recipe for a refreshing green juice AND bread made from the leftover pulp…

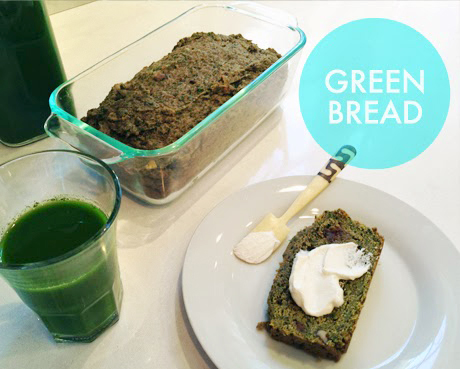
Meredith: I’m no heady health fanatic, but I’ve really gotten into making fresh juice once or twice a week. I usually drink it as a meal supplement through breakfast and lunch a few days per week. It makes me feel great and keeps me firing on all cylinders. I don’t need my usual caffeine fixes when I’m “juicing” either, so it saves me from having to buy expensive breakfasts, lunches and coffees in manhattan during the busy work week. I stock the green juice in dishwasher-safe rubber-seal glass bottles that I found on the cheap so that they are always ready-to-go and shake-friendly. Standard pitchers will require that you stir before you pour (the juice settles: don’t be turned off), so sealed/lidded containers are best. Here’s my loose recipe for a large batch of Green Juice. Enjoy!
GREEN JUICE | makes a few gallons (good for 2 people for 3-5 days)
       3 heads romaine
       2 bunches parsley
       3 large cucumbers
       4-5 green apples
       3 bunches of kale
       1.5 bunches celery
       ginger (the size of a golf ball): juice this last because it will clog up
       your juicer
       juice from 5 large lemons
If you are in need of a full 3-day cleanse (similar to the well-known and extremely expensive Blueprint Cleanse), make a batch of my green juice, along with the Spicy Lemonade and Cashew Milk recipes from this site.
GREEN BREAD | makes 1 loaf
       1 1/2 cups juice pulp (aim for the apple, cucumber and kale)
       1/2 cup oil or 1/2 cup butter, melted
       1/2 cup brown sugar
       2 eggs, beaten
       1 teaspoon vanilla
       1 1/2 cups flour (could do whole wheat)
       1/2 teaspoon baking soda
       1/2 teaspoon baking powder
       1/2 teaspoon salt
       1 1/2 teaspoons cinnamon
       1/2 teaspoon allspice
       1/2 cup nuts, chopped (optional)
       1/2 cup raisins, dates or figs (optional)
Directions:
       1. Beat together oil and honey, then add eggs, vanilla and pulp.
       2. Sift dry ingredients and add to pulp mixture.
       3. Add nuts and fruit last.
       4. Bake in a greased 9″ loaf pan at 350F for 45 to 60 minutes.


Thanksgiving with Style

Thanksgiving is only two weeks away! For all you hosts out there, don’t wait for the panic to set in. Take care of your tabletop(s) now so that you can put your heart into the food preparation later… and actually enjoy it.

Whether you have a game plan or not, I’d recommend popping into The Little Flower Shoppe in Ridgewood, NJ for their Stress-free Holiday Decorating Party tomorrow night (Thursday, Nov 14, 2013, 6-8pm). RSVP: 201 652 7600 or info@raimondihg.com. Fabulous flower extraordinaire, Anne Miller (who has worked with the likes of Preston Bailey and David Tutera) will be giving floral advice and dishing inspirational tabletop ideas. Ridgewood Fare will be serving up delicious bites and giving pointers on cuisine. And in the proper spirit of Thanksgiving, a portion of the evenings sales proceeds will be going to Children’s Aid and Family Services.

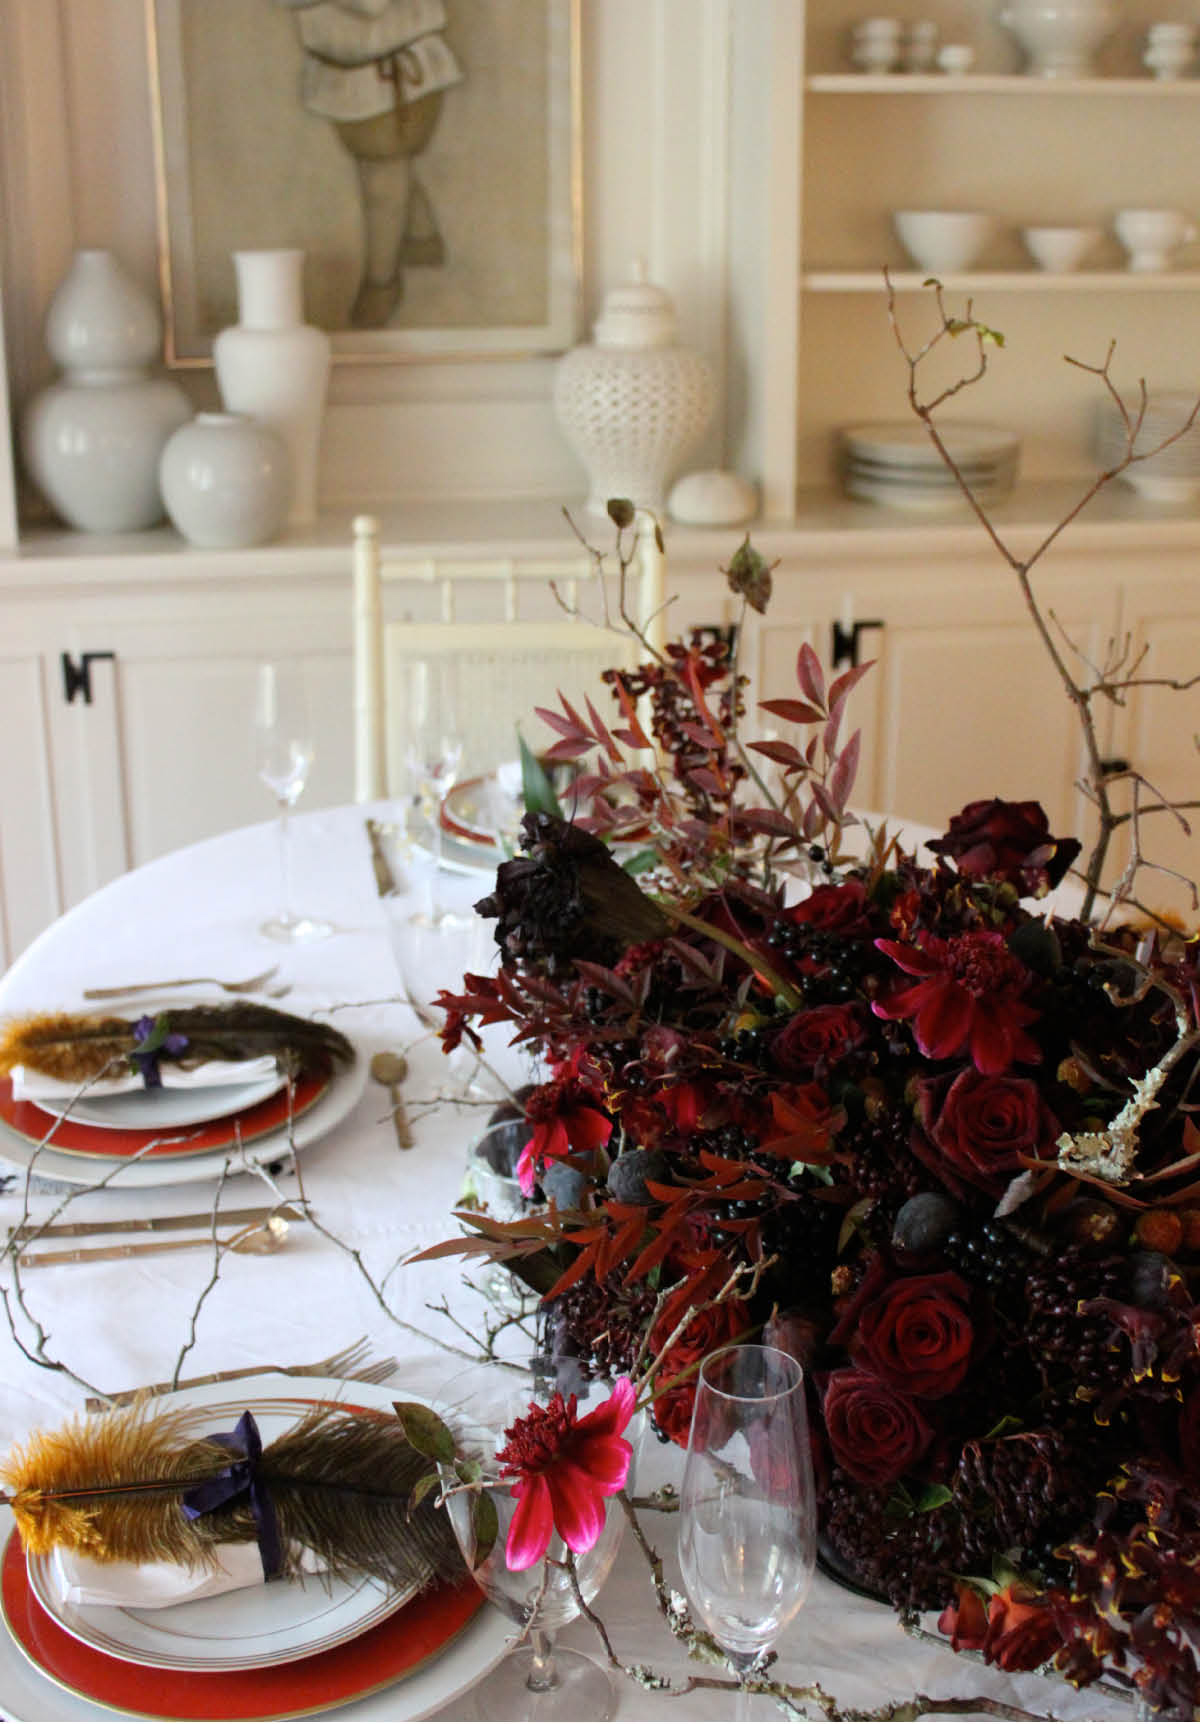
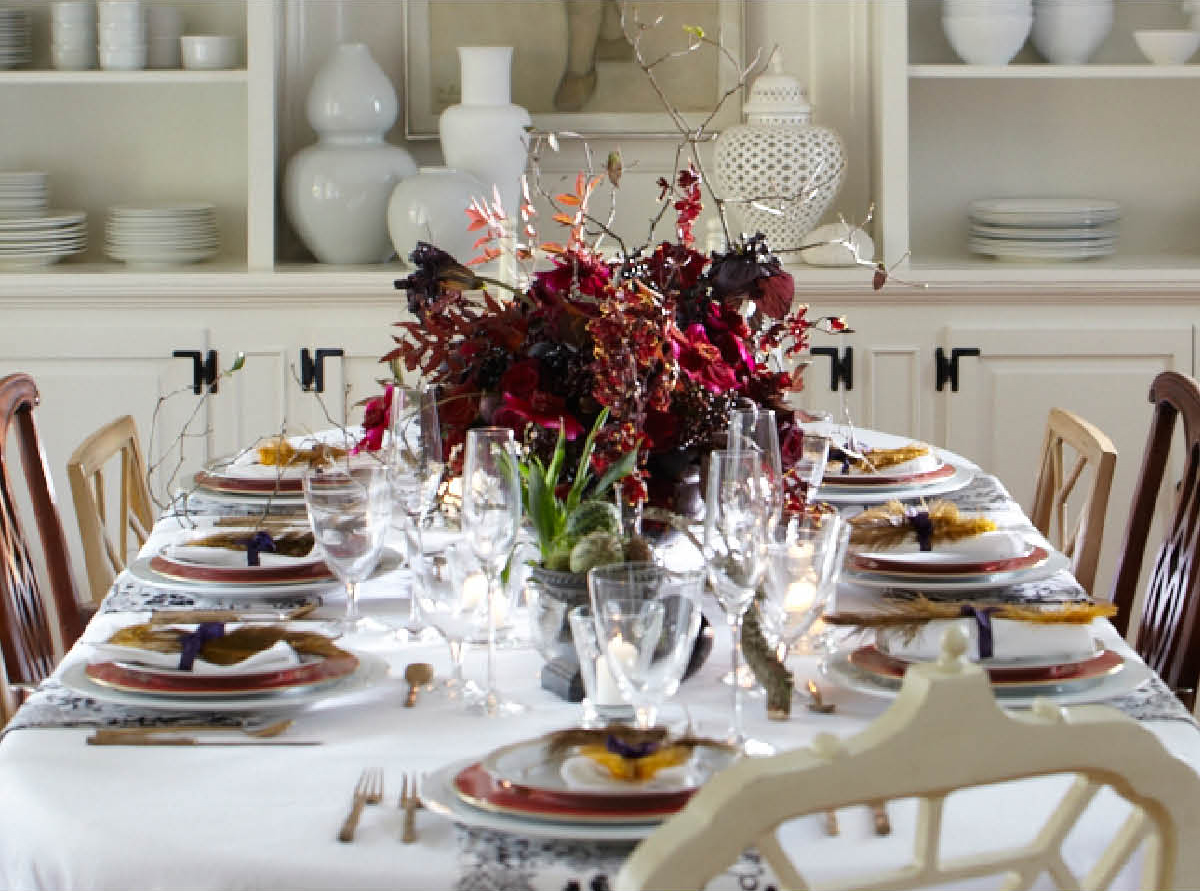
Here is the Thanksgiving table I styled with florals and frills from said Anne Miller. I asked for “dark, rich and deadly” and she delivered:

Photography by Laura Moss.
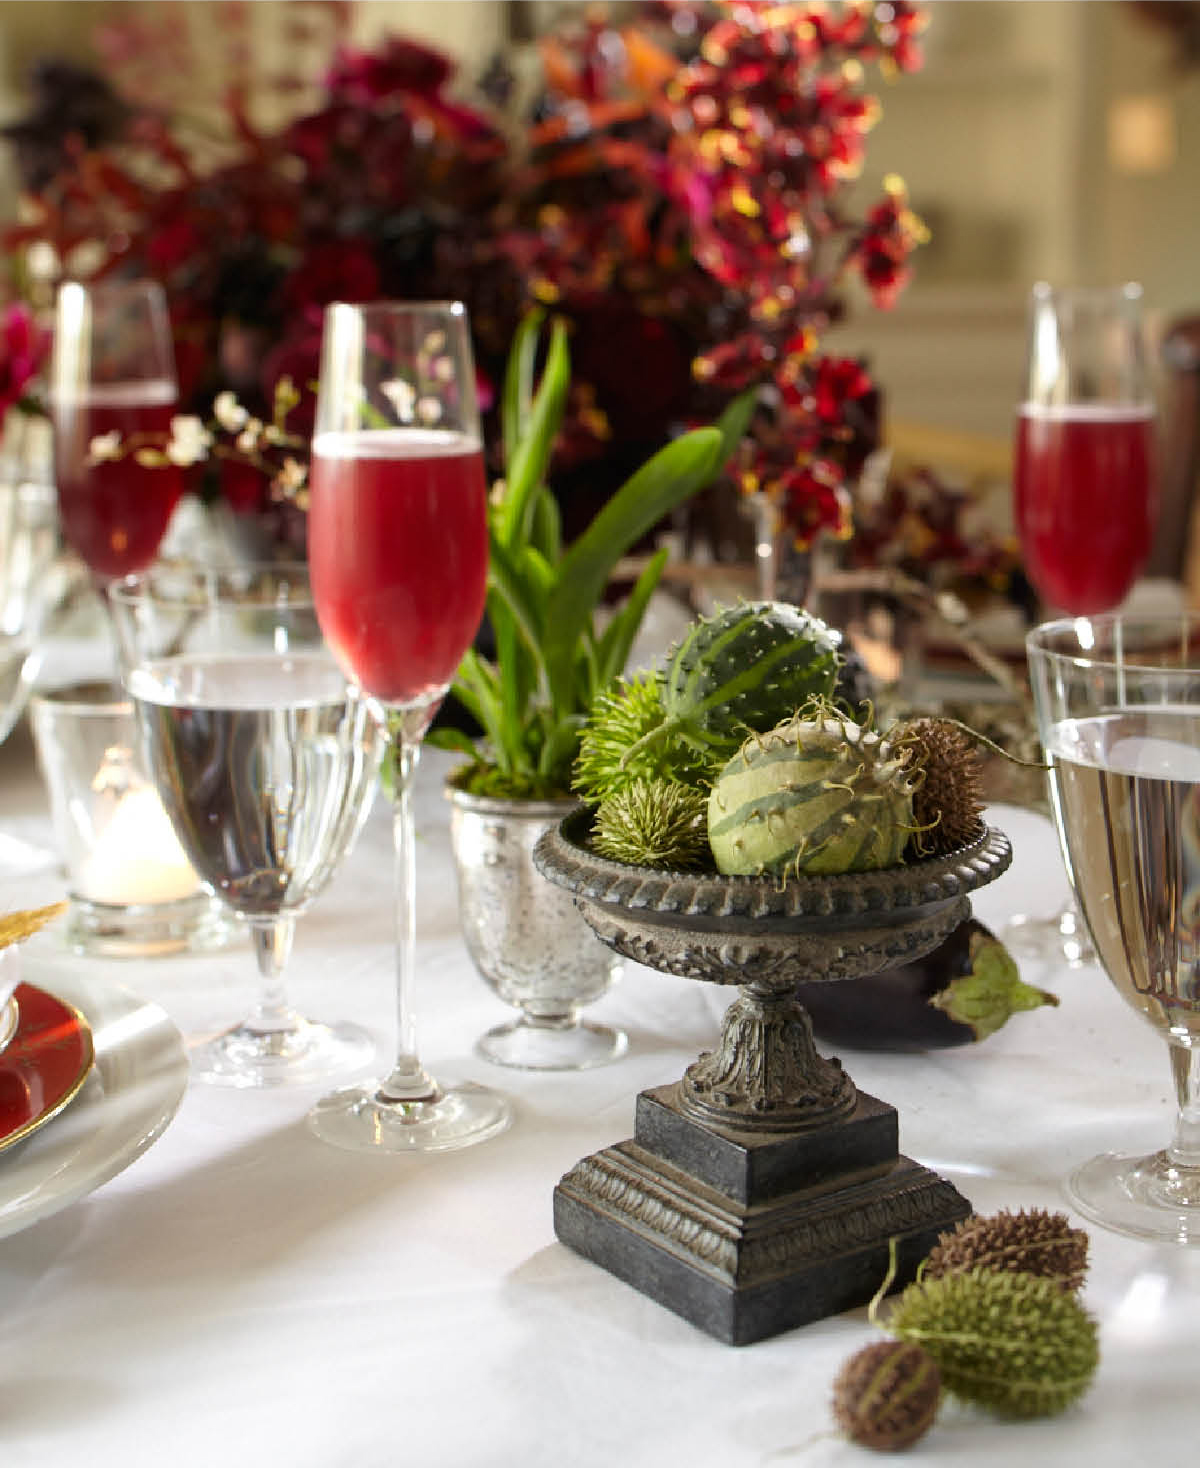
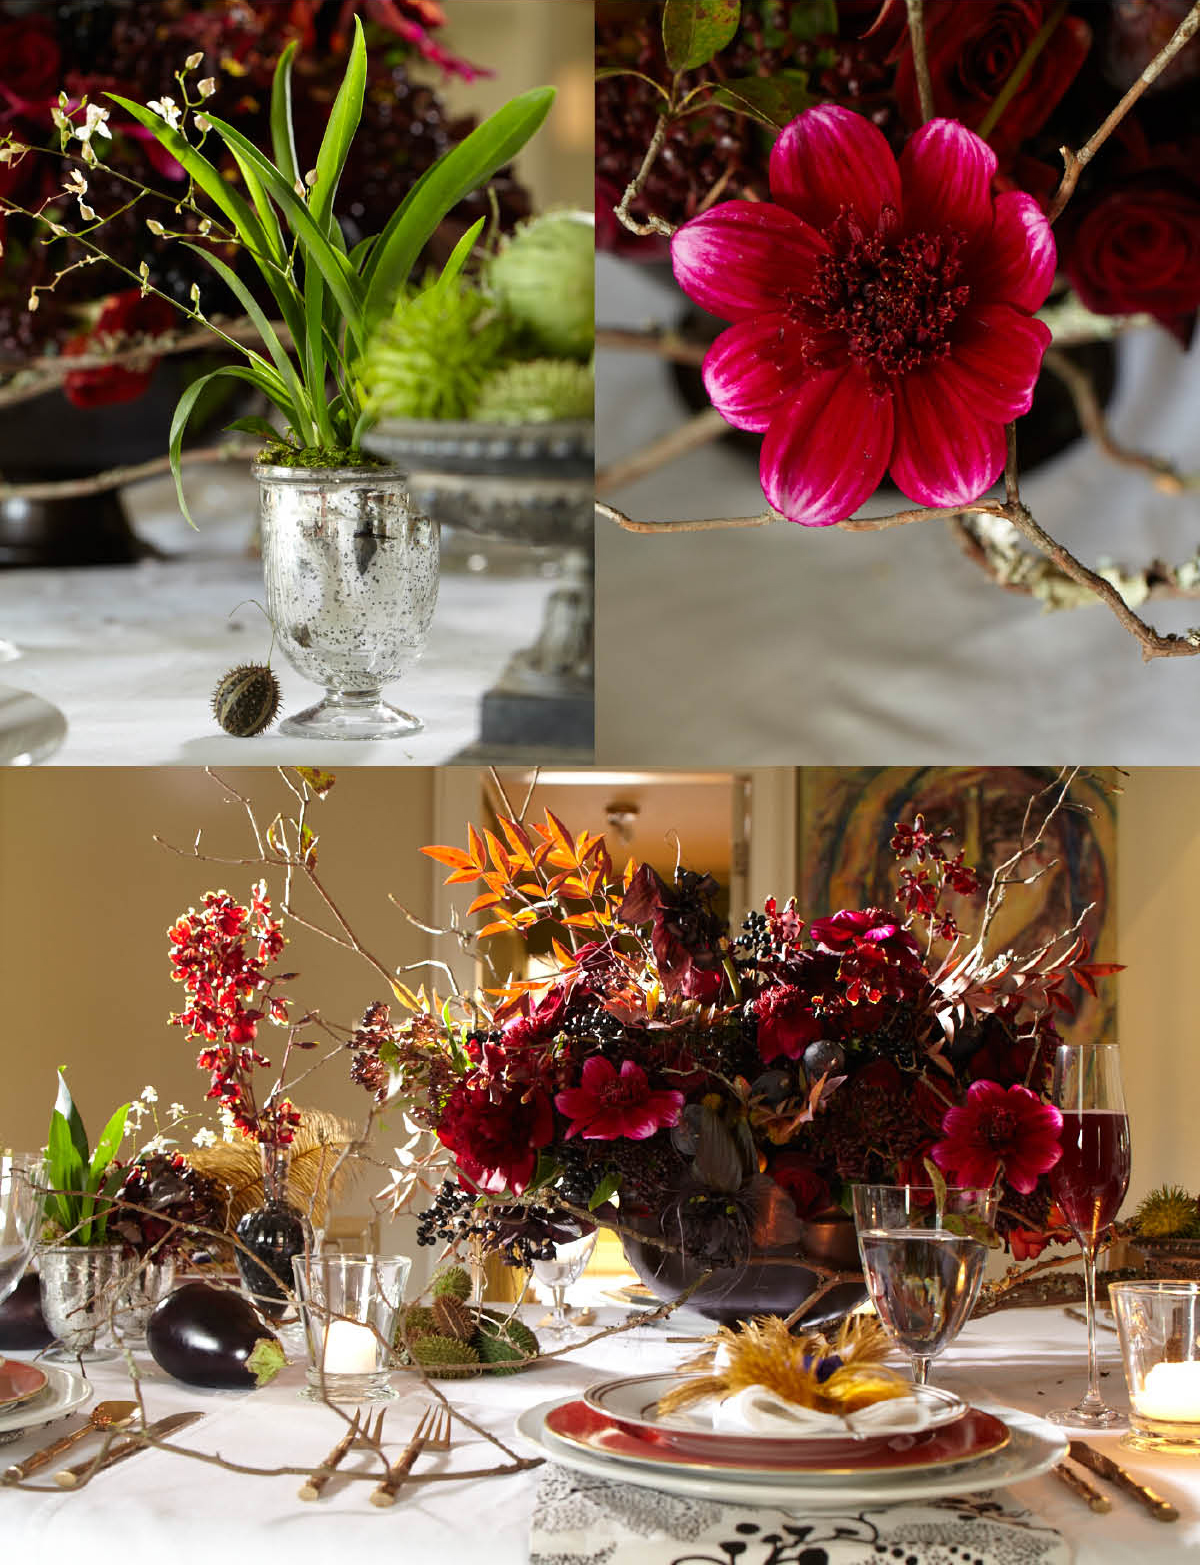
Anne sourced all the flowers (and miniature orchids) and fruit (miniature eggplants, figs, gourds, grapes, various berries, and these incredible little green spiky seedpods) directly from the flower district in New York. Bring her any vessel that’s right for your table, mantle, doorway, etc and she will fill it with the the most beautiful work you’ve ever seen.

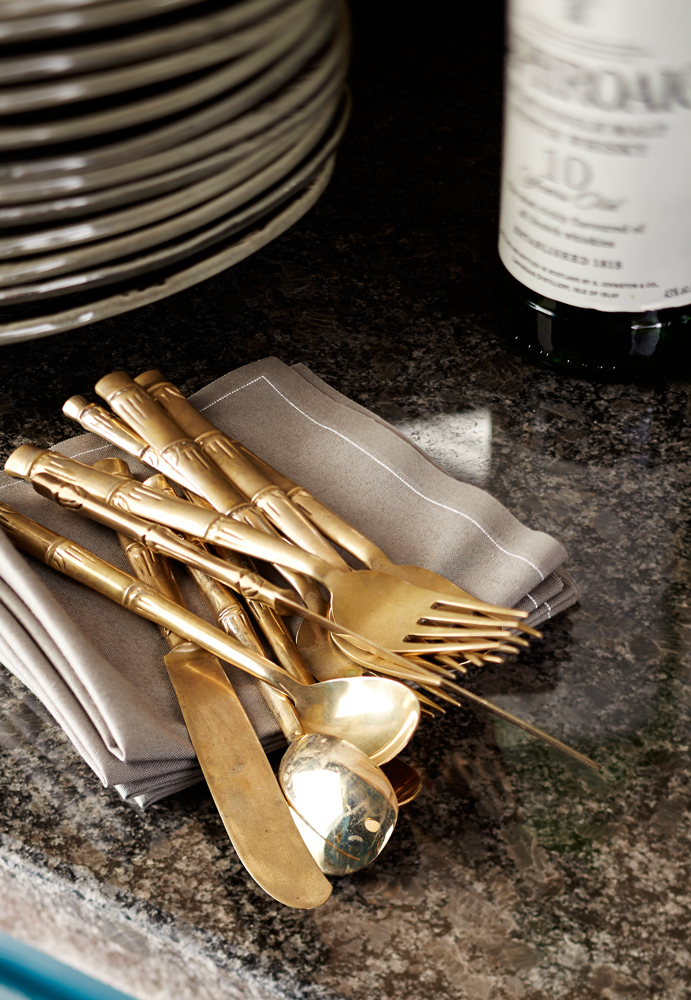
The salad plates and dinner plates are from a totally fabulous buying trip to 200+ year-old porcelain factory, Royal Limoges—the oldest existing porcelain factory in all of Limoges, France—but you can pull this look off with whatever whites you have at home. Throw a pop color in there for fun: I found these celadon green dinner plates at Crate & Barrel that at first I thought were a knock off, but I they appear to actually be made by Jars, a very well respected stoneware factory in France (I also have a set of this exact dinnerware in a dark green: it’s totally awesome and totally rustic and totally perfect for a hearty Thanksgiving meal). The flatware is a vintage brass set I picked up at an estate sale years ago, but I found a ton of Ricci Argentieri’s “Bamboo d’Oro” on (my favorite website) replacements.com. Frankly I’d recommend the electroplated gold over the brass any day because mine is nearly impossible to keep polished. There are tons of sets on online auction houses too… happy hunting and happy thanksgiving! xx Mere

Hypertufa Potting Party

Photography by Laura Moss, styling by Meredith McBride Kipp

Now that the hectic summer is behind us, it’s a great time to catch up with friends over an outdoor art project. Eccentric artist/collectors Jorge & Katie Lengyel invited a few pals (along with photographer Laura Moss and me) to their custom-built swiss chalet on Lake Mohawk for an afternoon of crafting.

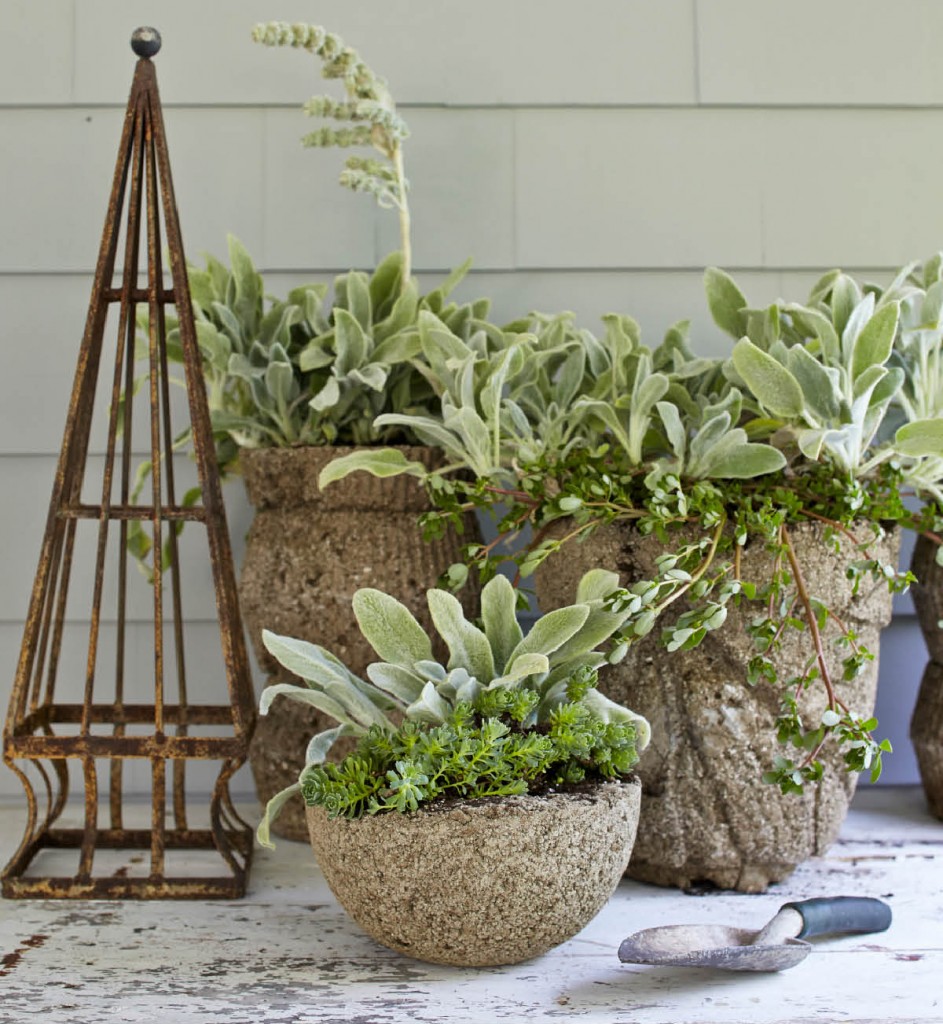
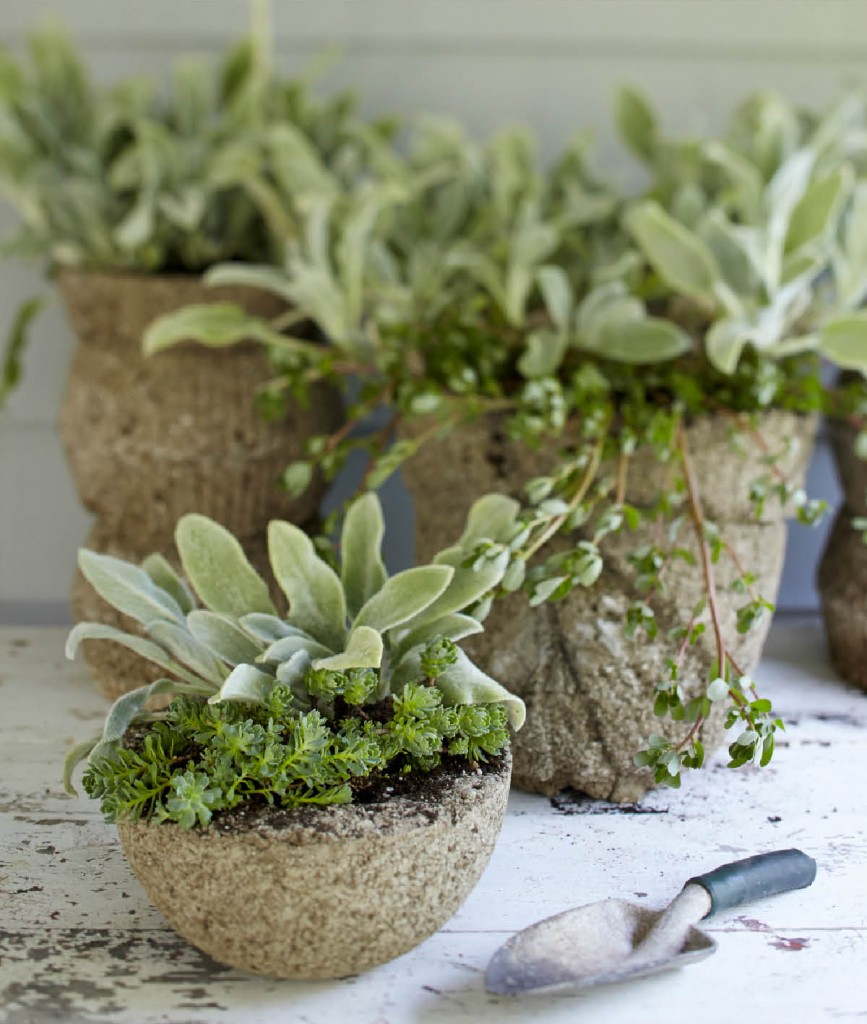
On the agenda: Hypertufa garden containers. Hypertufa is a material that looks a lot like cement (tufa is a volcanic rock found in nature) but quite a bit lighter in weight. It’s easy to do and you can use just about anything for a mold.

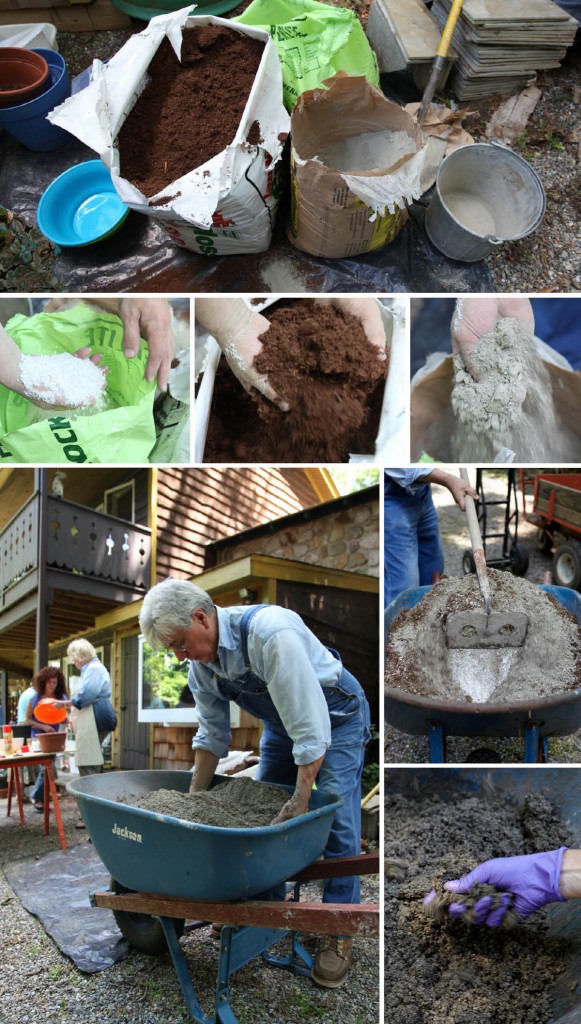
What you’ll need (you can find at Home Depot, a grocery store, or at home):
•    Rubber gloves
•    Dust mask (very important when working w/cement)
•    Perlite
•    Peat moss
•    Portland cement
•    Plastic tub (or wheelbarrow)
•    Water (nearby hose ideally)
•    Spray cooking oil
•    Mold  (box, nursery pot, large bowl, etc)
•    Plastic garbage bags
•    Large leaves or branches for surface texture (optional)
•    Wire brush

Martha Stewart’s (with my edits and additions) How-to Instructions:
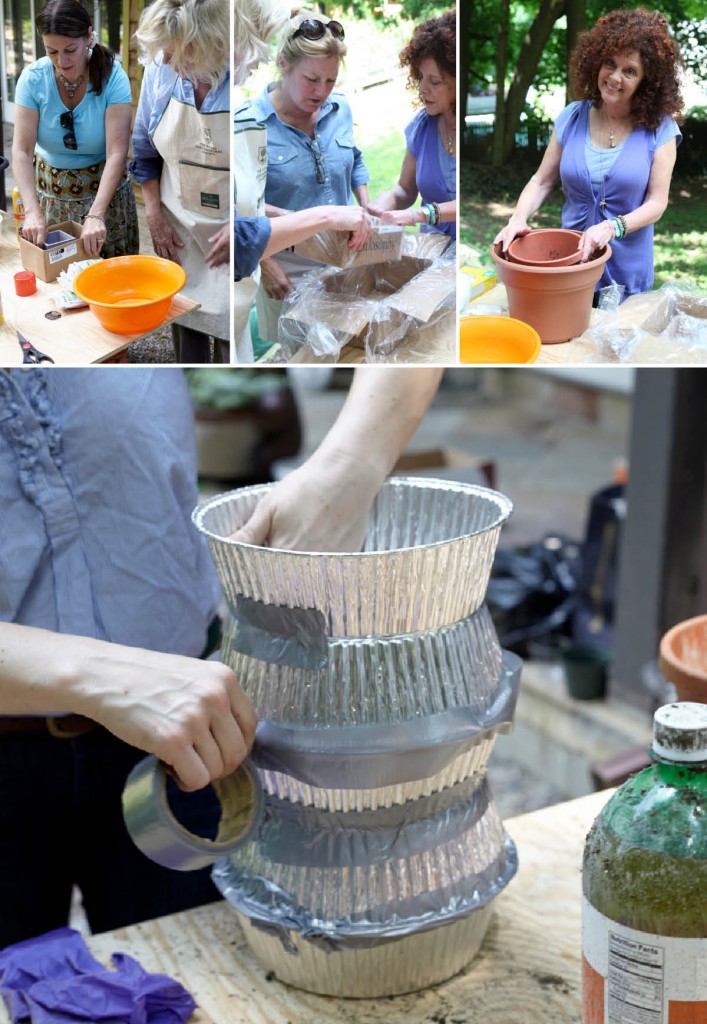
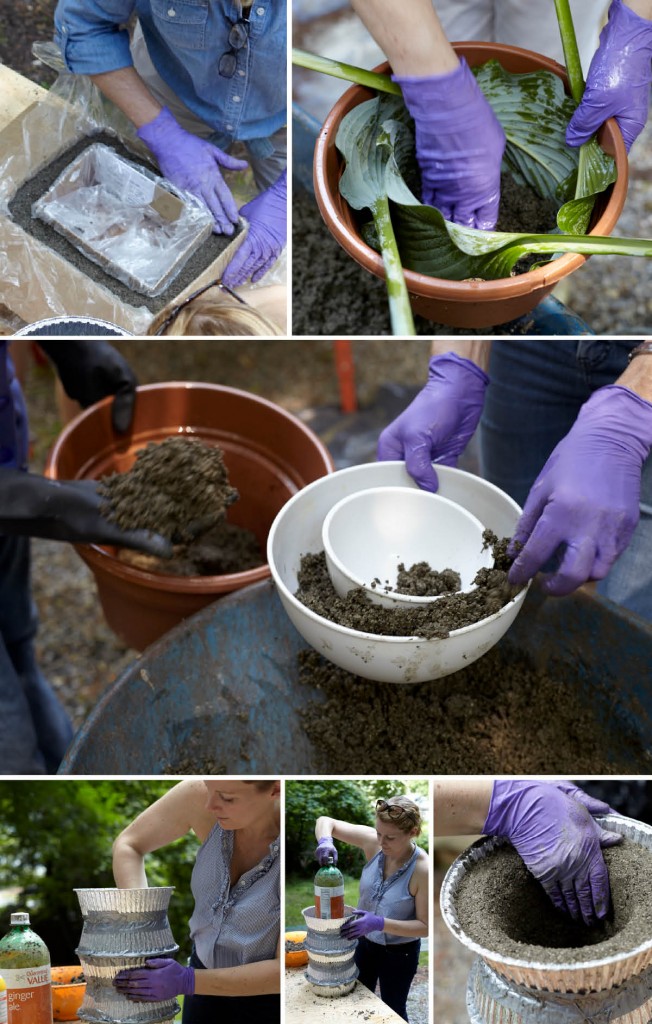
1. Set up your mold(s) so they are ready to go and (if porous) line them with a plastic garbage bag. If they are smooth, non-porous surfaces, merely spray inside of mold with cooking oil. I was going for a Kelly Wearstler/mid-century shape, so I built my molds out of aluminum pie tins (with the centers cut out) and duct tape.

2. Wearing rubber gloves and a dust mask, mix 3 parts perlite, 3 parts peat moss, and 2 parts Portland cement in a plastic tub or wheelbarrow. Add water to tub, a bit at a time, until the mixture has the consistency of moist cottage cheese.

3. Push a handful of wet hypertufa mixture firmly against the bottom of the mold (if you are lining the mold with leaves or branches for texture make sure that goes in before the hypertufa). Repeat until you have made a bottom base that is approximately 1 inch thick. Push handfuls of wet hypertufa mixture firmly against the sides of container approximately 3/4 inches in thickness. Continue until rim of mold is reached. Press bottom and sides firmly to remove air pockets. I used a large soda bottle to help support and shape the inside of the vessel because of its height.

4. Create drainage hole by pushing finger or small dowell through the bottom of mold so that it penetrates the hypertufa mixture.
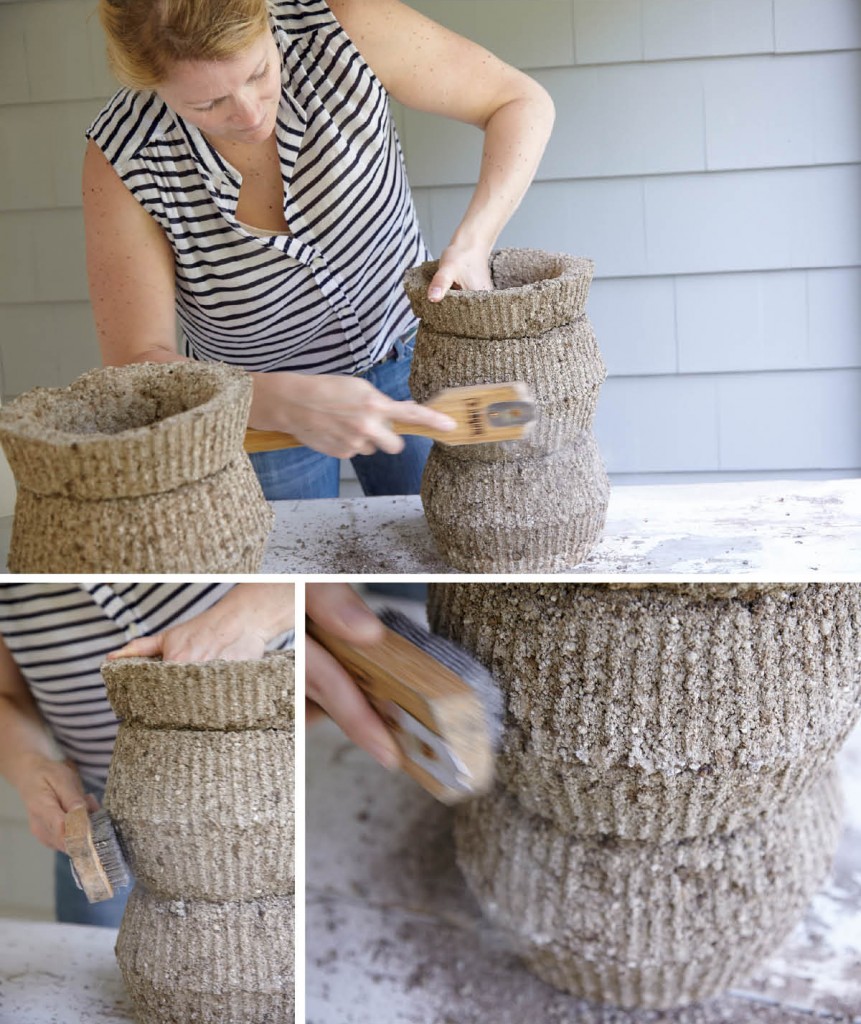
5. Cover with plastic bag, let dry for about 48 hours.
6. Take off plastic bag and remove pot from mold (pot with be slightly wet). Using a wire brush, rough up the surface of the hypertufa for a more rustic appearance. Let sit for 2 to 3 weeks to cure completely. Now you’ll be all set for your early spring plantings!

Creative Commons License
amerelife.com by Meredith McBride Kipp is licensed under a Creative Commons Attribution-NonCommercial-NoDerivs 3.0 Unported License.

© Meredith McBride Kipp and amerelife.com. Unauthorized use and/or duplication of this material without express and written permission from this blog’s author and/or owner is strictly prohibited. Excerpts and links may be used, provided that full and clear credit is given to Meredith McBride Kipp and amerelife.com with appropriate and specific direction to the original content.

Bring the Ikat to the Beach

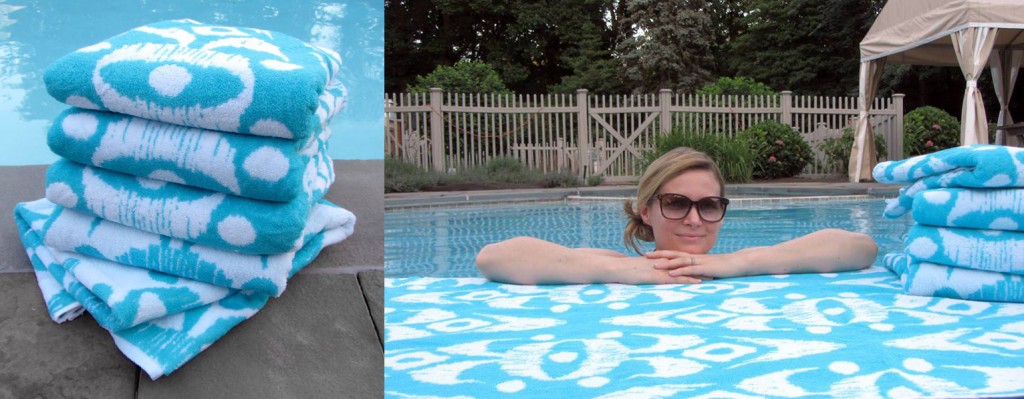
I’m so honored to announce that the glamorous online retailer, One Kings Lane, is featuring my ikat pattern for their Artist Edition Beach Towel Series this week! I custom designed the classically-inspired ikat pattern for them, and I think it looks just randy in aqua! They look great folded, rolled, over a towel bar, peeking out of a beach bag, wrapped around your hips, wrapped around your kid, and so on!

Click here to purchase on One Kings Lane.
The sale ends tomorrow, Friday July 12, at 11am and will not be available after that.

Let me know what you think! xx Mere